> ## Documentation Index
> Fetch the complete documentation index at: https://docs.userplane.io/llms.txt
> Use this file to discover all available pages before exploring further.
# Support Agent Onboarding
> Start collecting screen recordings from customers and reviewing sessions inside your help desk
You're the one talking to customers. This guide gets you from zero to sending your first recording request — without leaving your help desk.
## What you'll be able to do
* Send recording links to customers directly from Intercom, Zendesk, Slack, or the Chrome extension
* Review screen recordings with console logs and network data alongside the video
* Use shortcuts and macros to request recordings in seconds
## Step 1: Join your workspace
Your workspace admin will send you an invite link via email. Click it to create your account and join the workspace. If you haven't received an invite, ask your admin to send one from [Workspace Settings > Team](https://dash.userplane.io/_/settings?tab=team).
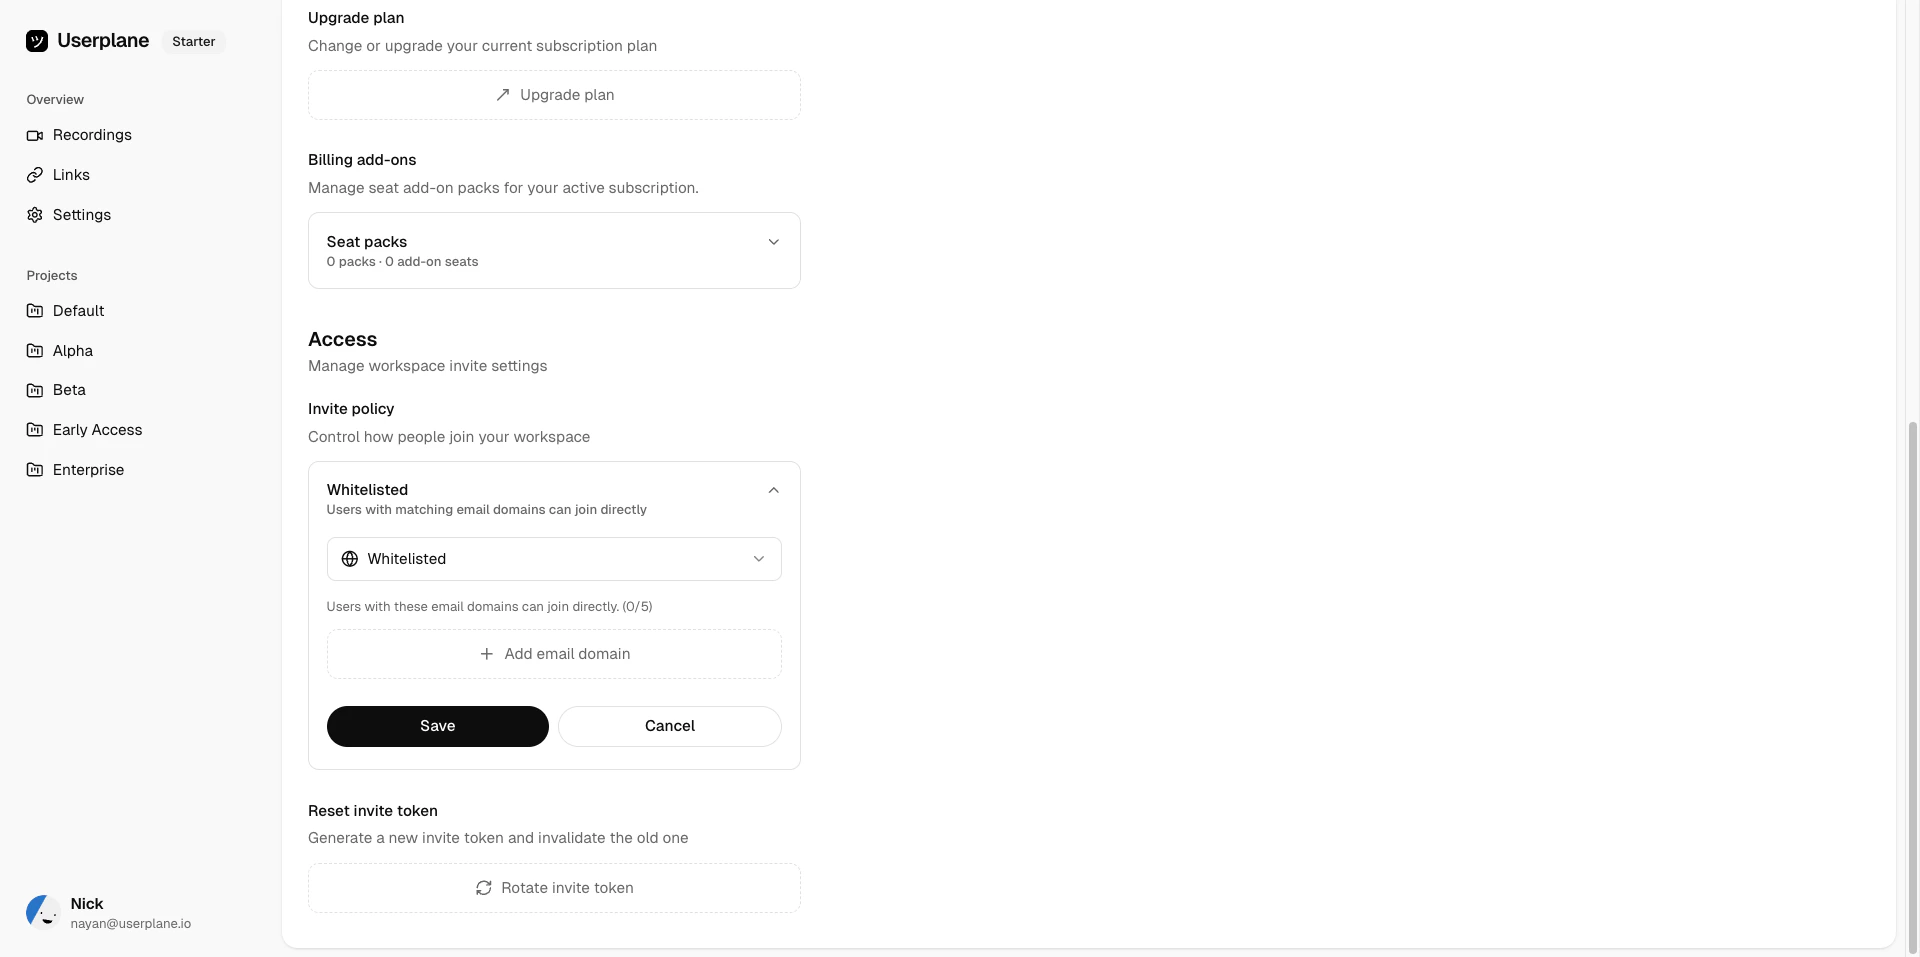
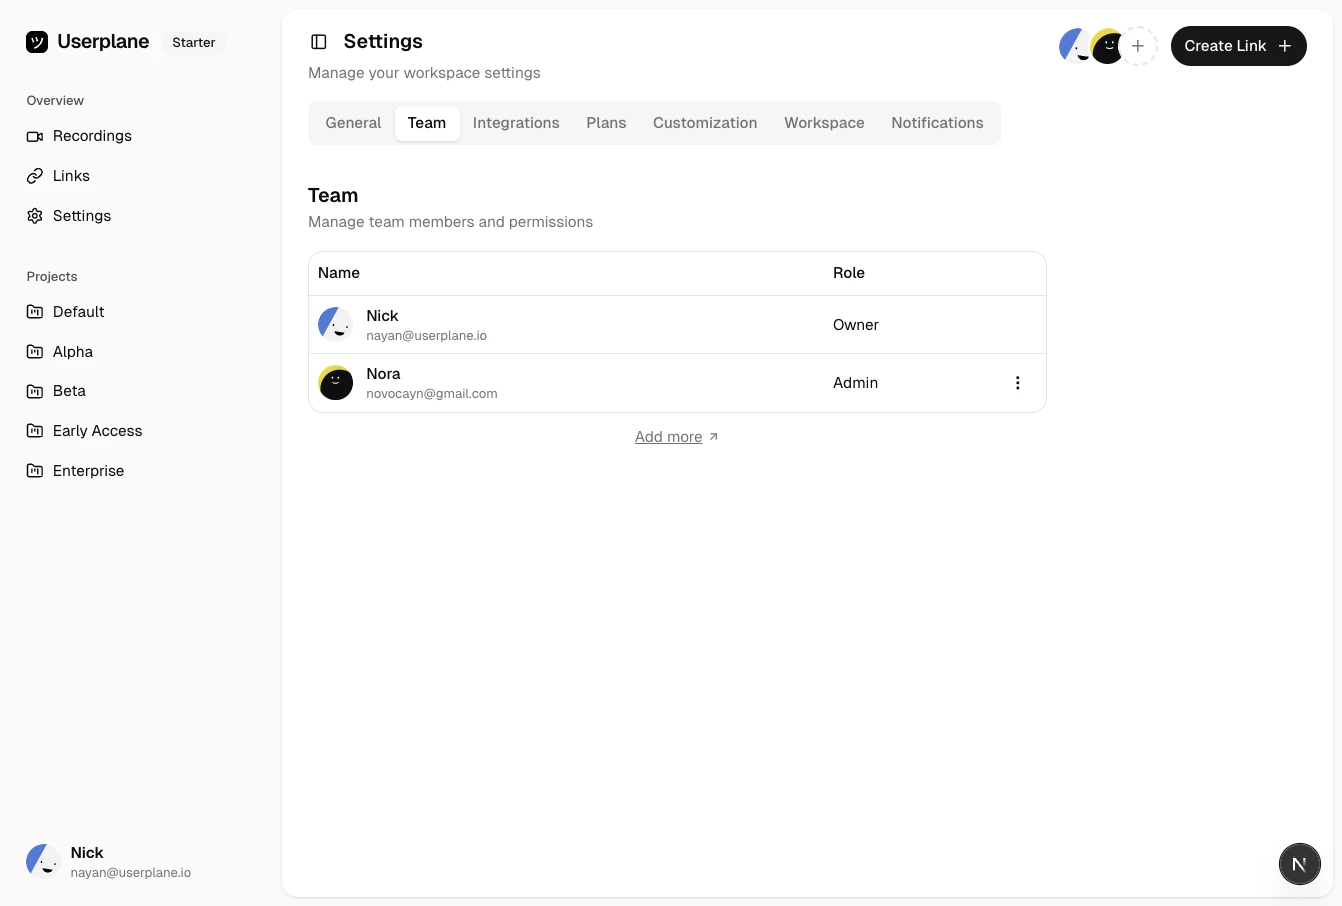 If your company has domain whitelisting enabled, you may be able to join directly with your work
email — no invite needed.
If your company has domain whitelisting enabled, you may be able to join directly with your work
email — no invite needed.
 ## Step 2: Find Userplane in your help desk
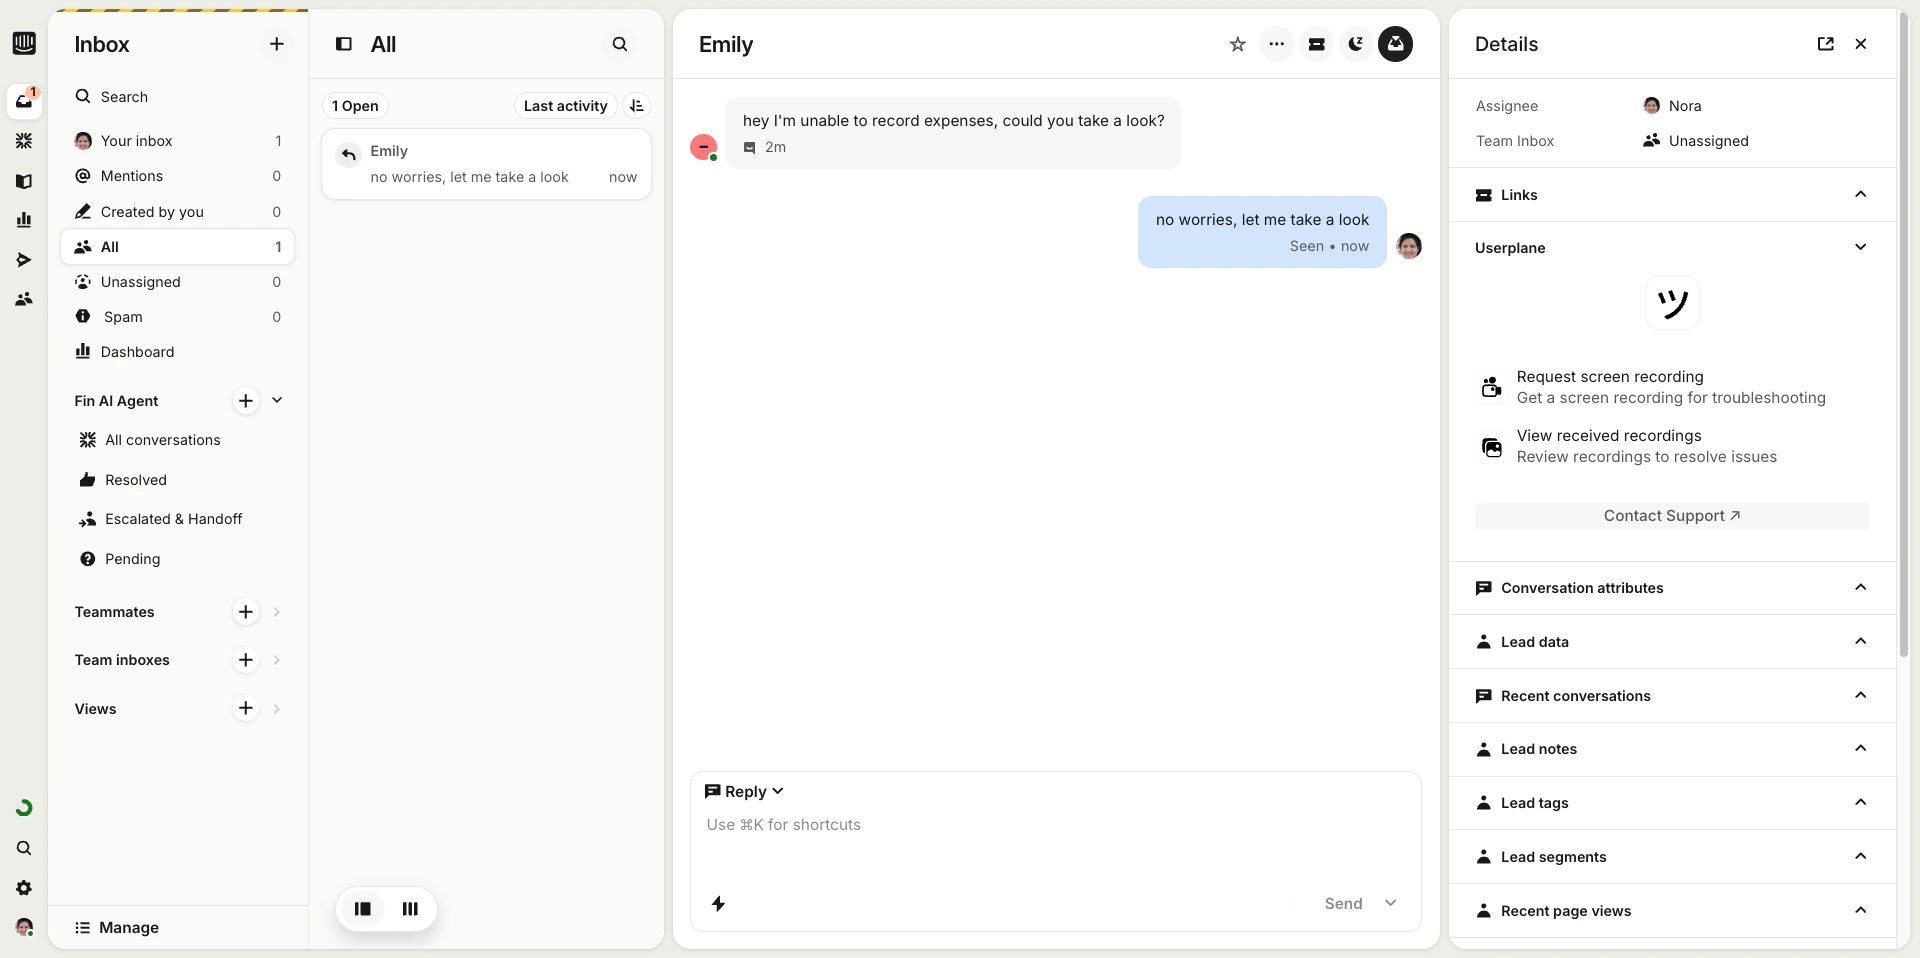
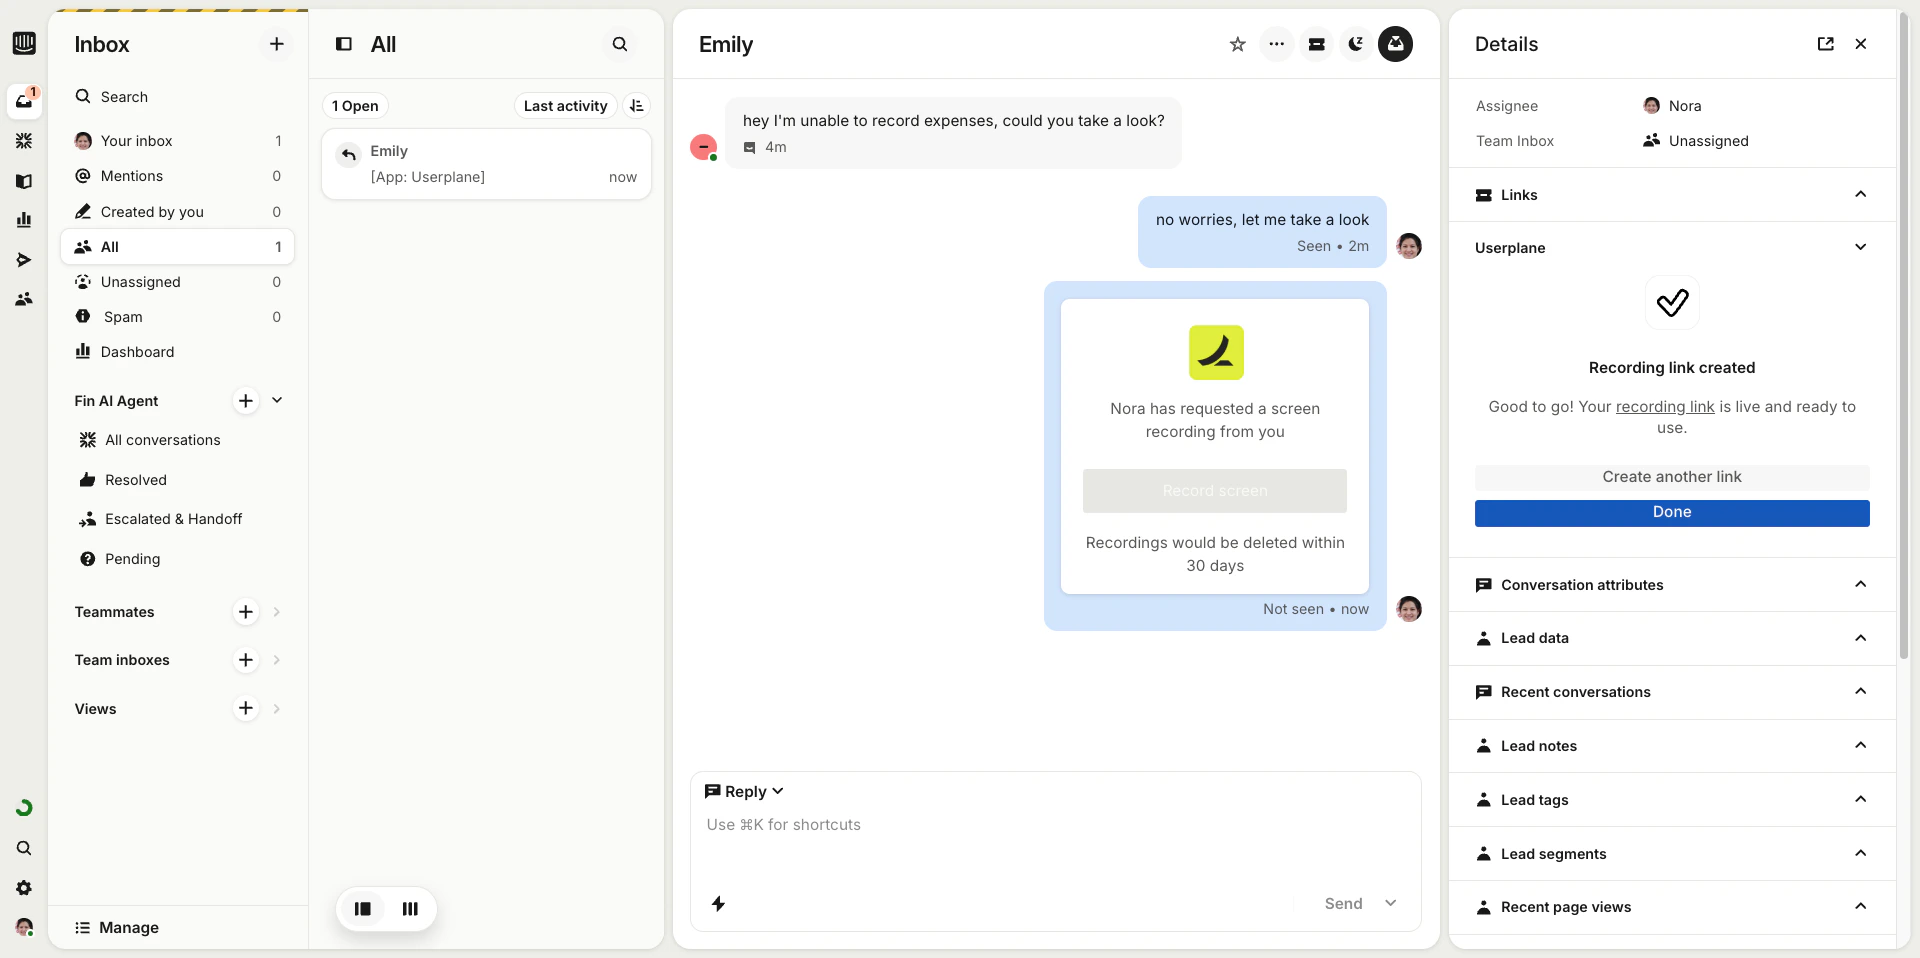
Userplane lives in your Intercom inbox as a sidebar app. To pin it:
Go to your Intercom inbox and open a customer conversation.
Click **Edit app** in the right sidebar to see available apps.
Find Userplane in the list and pin it so it's always visible in the sidebar.
## Step 2: Find Userplane in your help desk
Userplane lives in your Intercom inbox as a sidebar app. To pin it:
Go to your Intercom inbox and open a customer conversation.
Click **Edit app** in the right sidebar to see available apps.
Find Userplane in the list and pin it so it's always visible in the sidebar.
 Userplane appears automatically in every Zendesk ticket — as a **sidebar app**, a **button in the reply editor**, and in the **top bar**. No pinning required.
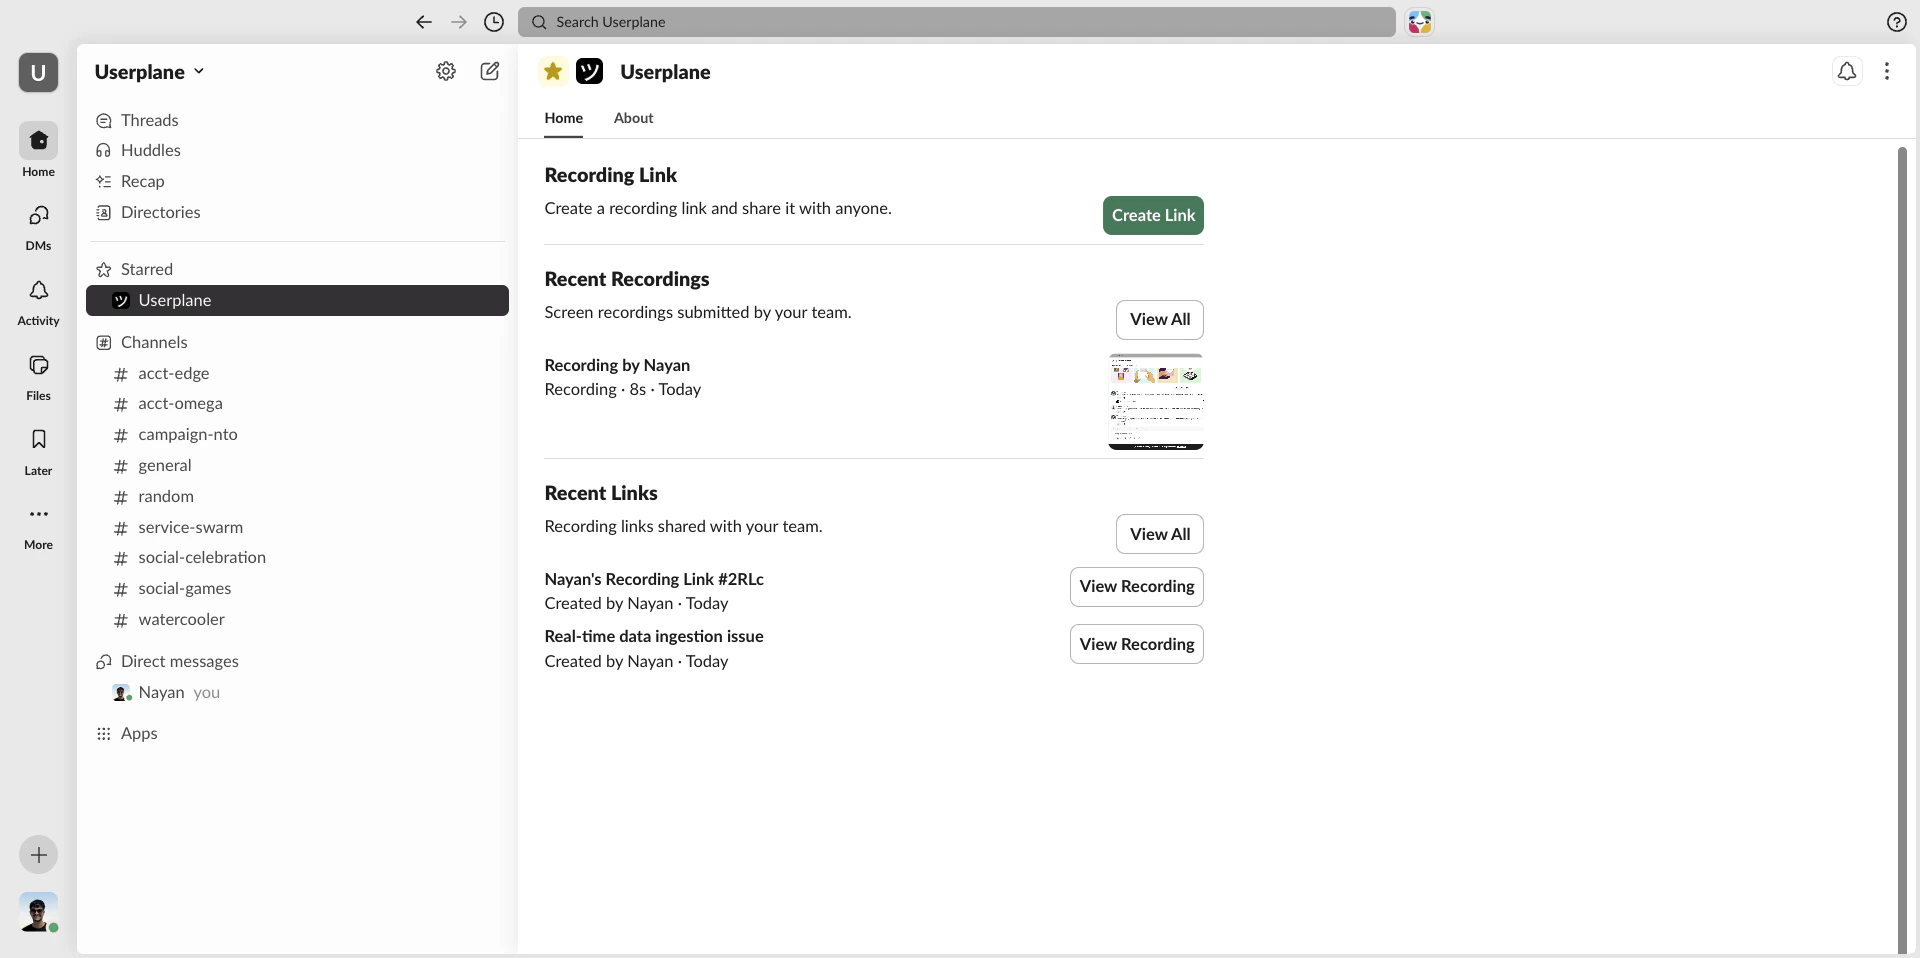
Userplane lives in Slack as a slash command, a message shortcut, and an App Home tab.
In your Slack sidebar, go to **Apps** and open **Userplane**. The Home tab shows your recent recordings and links.
Userplane appears automatically in every Zendesk ticket — as a **sidebar app**, a **button in the reply editor**, and in the **top bar**. No pinning required.
Userplane lives in Slack as a slash command, a message shortcut, and an App Home tab.
In your Slack sidebar, go to **Apps** and open **Userplane**. The Home tab shows your recent recordings and links.
 In any channel, type `/userplane` and press **Enter** to open the link creator.
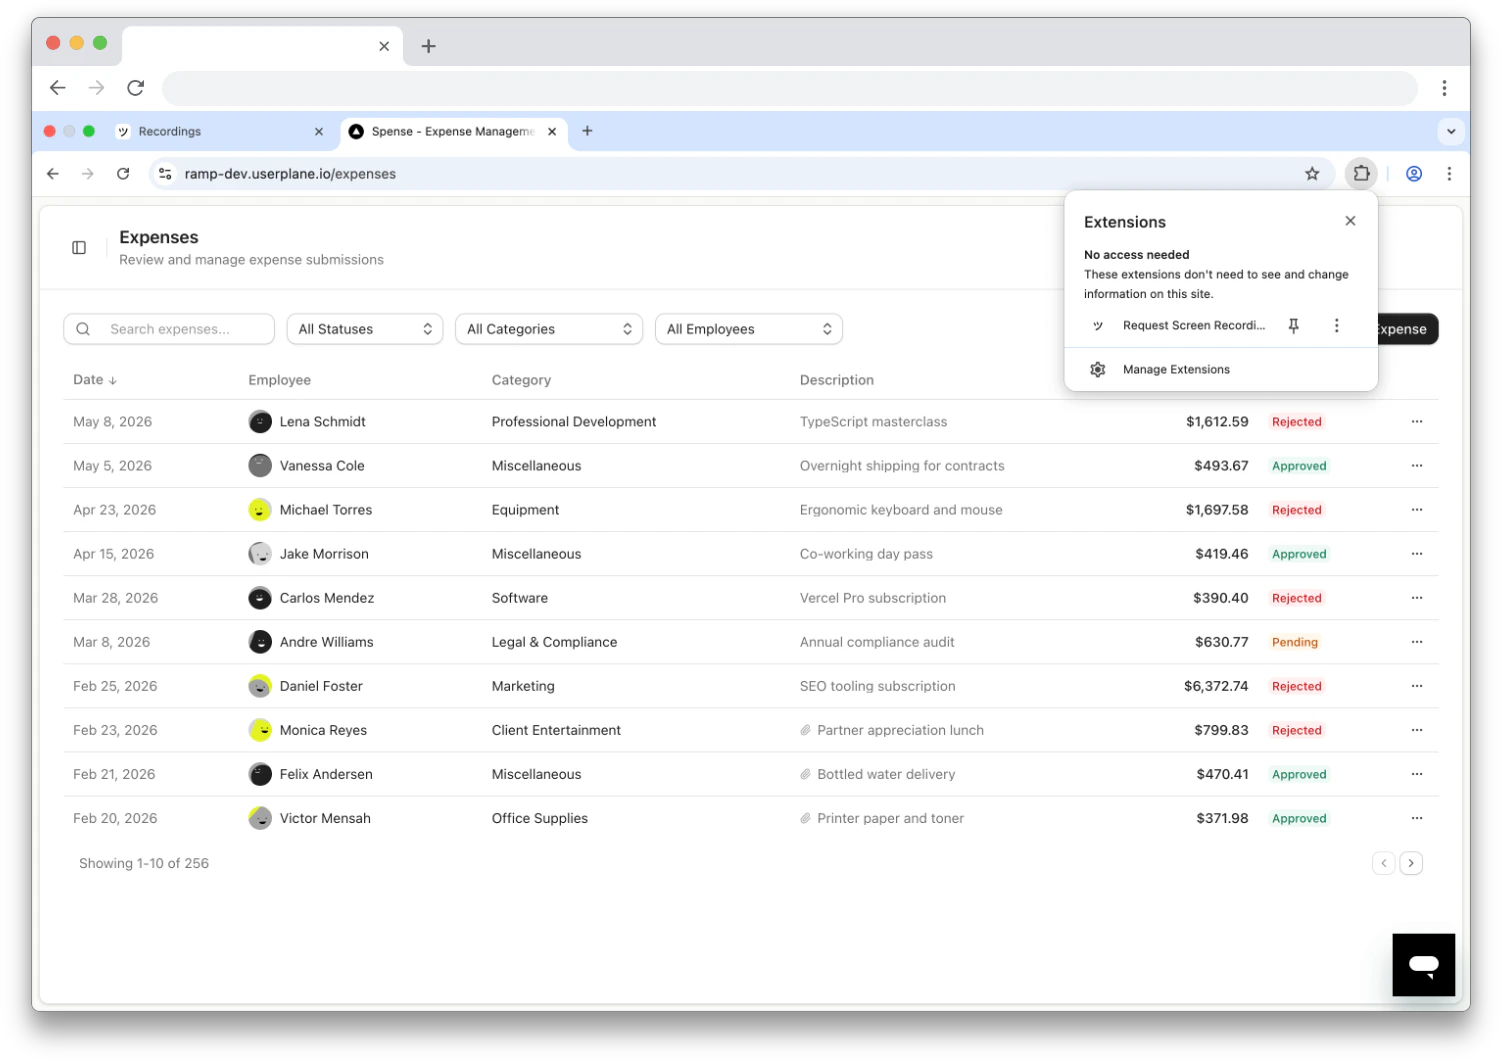
Userplane opens as a Chrome side panel alongside whatever tab you're working in.
Click the **Userplane** extension icon in your Chrome toolbar — or press **Cmd+Shift+Y** (Mac) / **Ctrl+Shift+Y** (Windows/Linux).
The first time, click **Sign in to continue** and authenticate via the Userplane dashboard. After that, the side panel opens automatically.
In any channel, type `/userplane` and press **Enter** to open the link creator.
Userplane opens as a Chrome side panel alongside whatever tab you're working in.
Click the **Userplane** extension icon in your Chrome toolbar — or press **Cmd+Shift+Y** (Mac) / **Ctrl+Shift+Y** (Windows/Linux).
The first time, click **Sign in to continue** and authenticate via the Userplane dashboard. After that, the side panel opens automatically.
 Pin the extension to your toolbar so the icon is always visible. Click the puzzle piece icon in
Chrome and pin **Userplane**.
Pin the extension to your toolbar so the icon is always visible. Click the puzzle piece icon in
Chrome and pin **Userplane**.
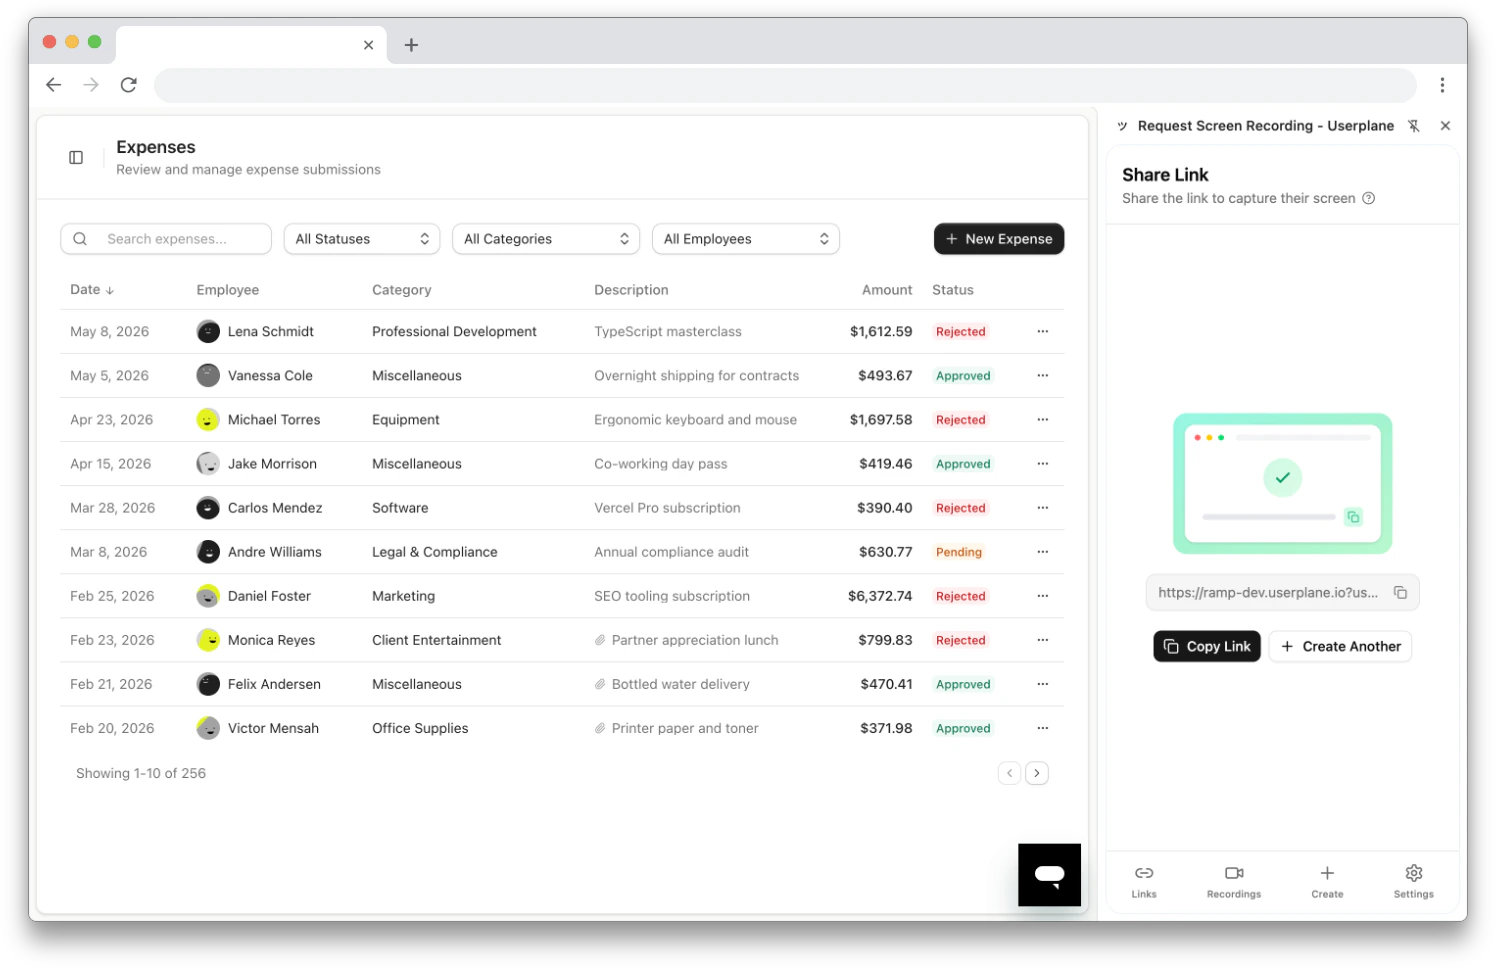
 ## Step 3: Request a recording from a customer
Go to the Intercom conversation where the customer is reporting an issue.
In the Userplane sidebar app, click **Create Link**. Choose a project, add a reference (like a
ticket number), and click **Create**.
## Step 3: Request a recording from a customer
Go to the Intercom conversation where the customer is reporting an issue.
In the Userplane sidebar app, click **Create Link**. Choose a project, add a reference (like a
ticket number), and click **Create**.
 Copy the link and paste it into the conversation — or use an Intercom shortcut to insert it in
one click.
Copy the link and paste it into the conversation — or use an Intercom shortcut to insert it in
one click.
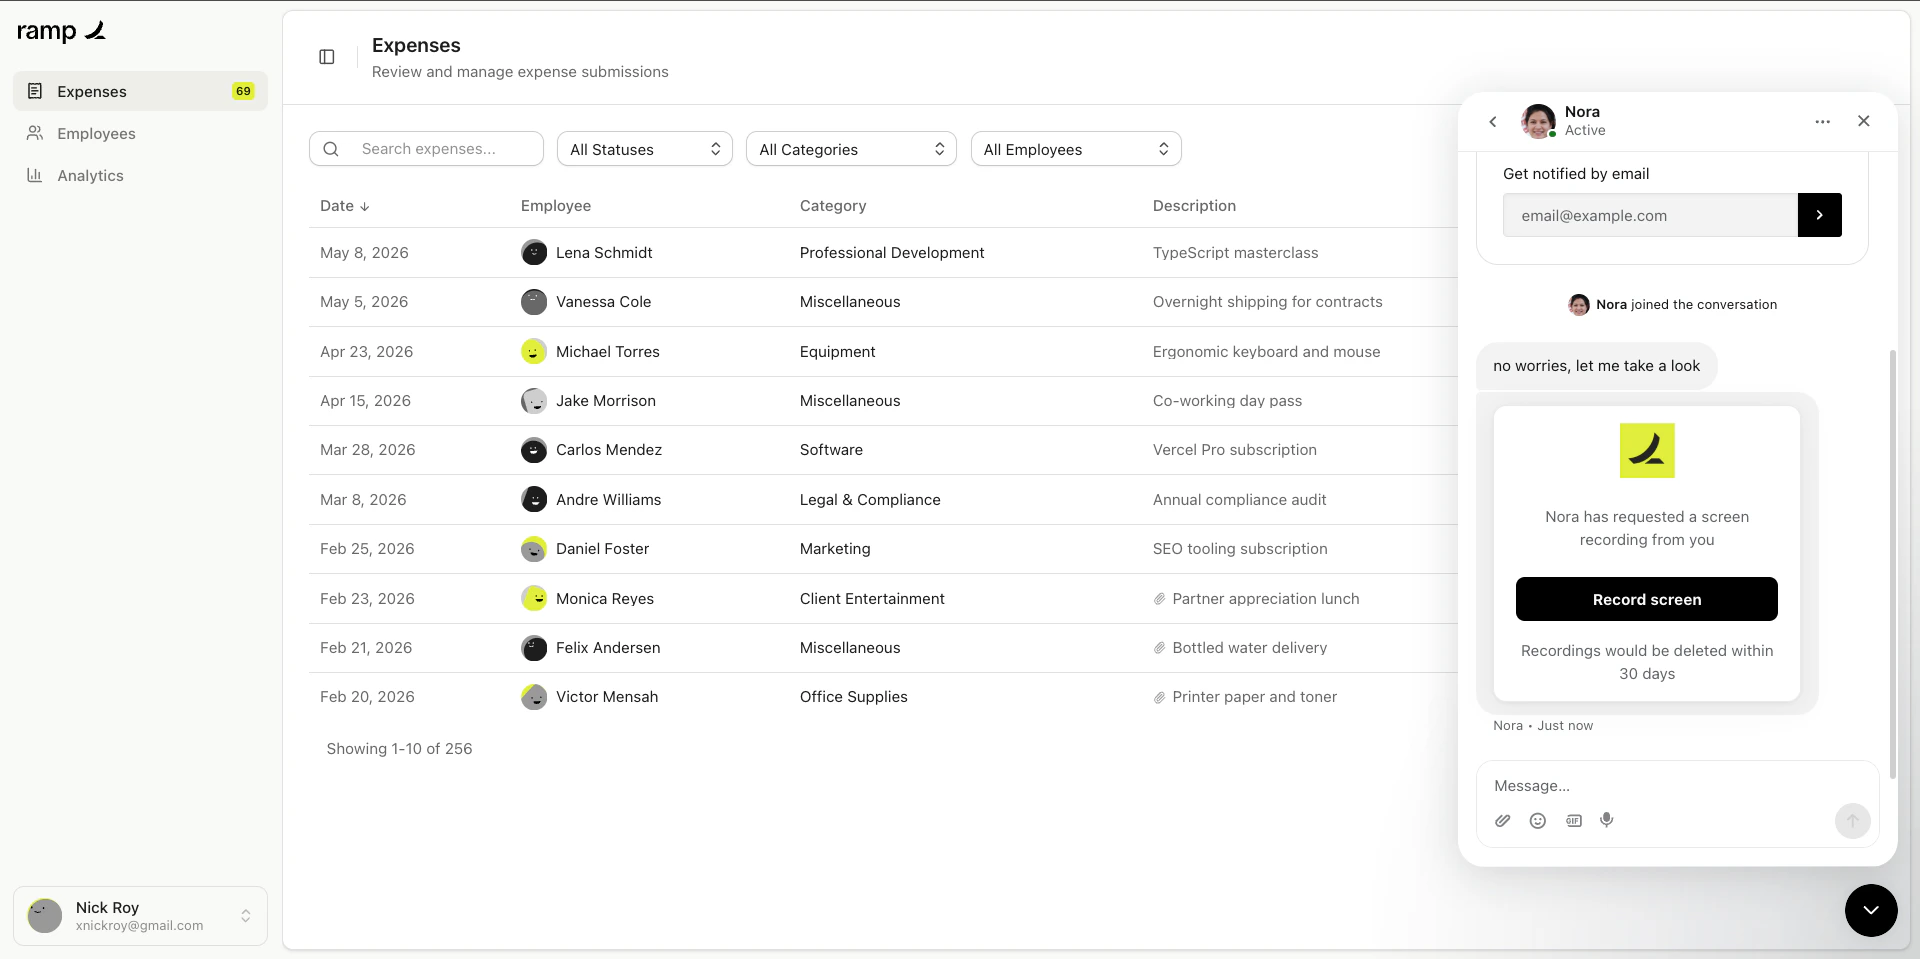
 The customer clicks the link, records their screen, and submits. No installs required on their
end.
The customer clicks the link, records their screen, and submits. No installs required on their
end.
 Use **Intercom Shortcuts** (`Cmd+K` / `Ctrl+K`) to insert a recording link into the conversation
without opening the sidebar. See [Intercom Shortcuts](/integrations/intercom-shortcuts) for setup.
Go to the Zendesk ticket where the customer is reporting an issue.
Click **Userplane** in the ticket sidebar and click **Request Recording**. Select a project and
domain, then click **Create Link**.
Use **Intercom Shortcuts** (`Cmd+K` / `Ctrl+K`) to insert a recording link into the conversation
without opening the sidebar. See [Intercom Shortcuts](/integrations/intercom-shortcuts) for setup.
Go to the Zendesk ticket where the customer is reporting an issue.
Click **Userplane** in the ticket sidebar and click **Request Recording**. Select a project and
domain, then click **Create Link**.
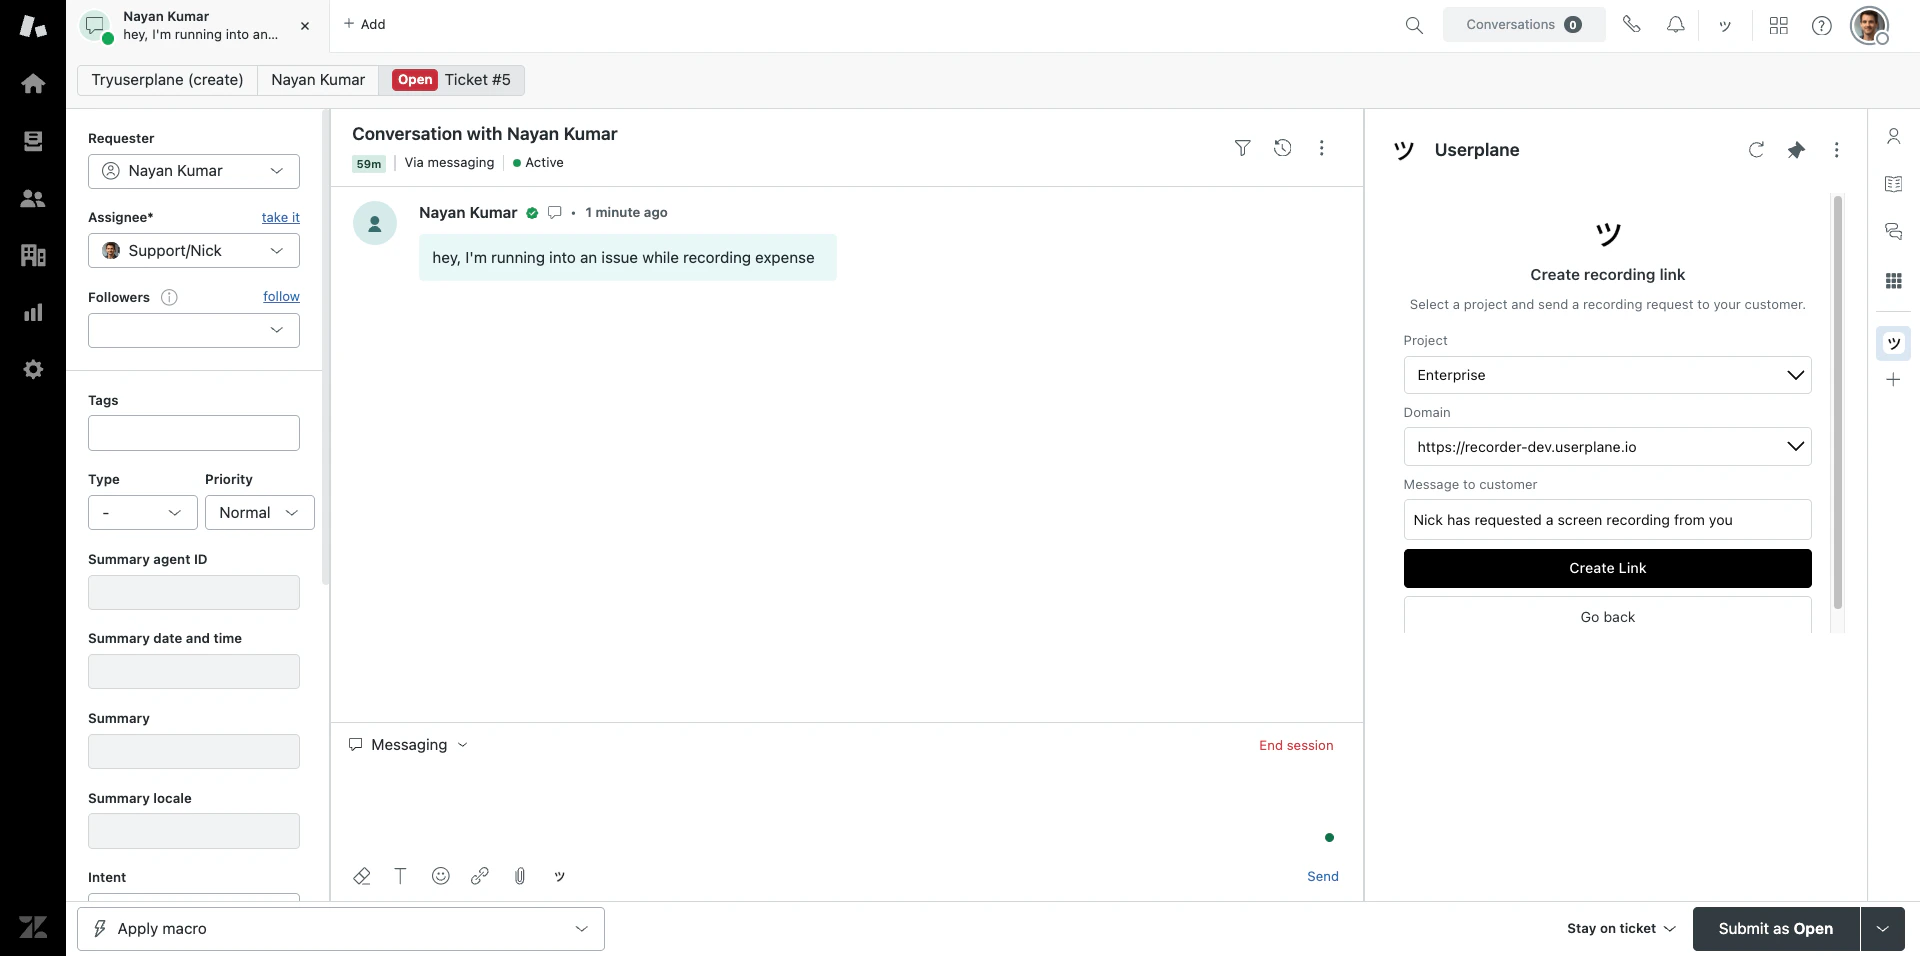 The recording link is ready to share with the customer. You can also use the **ticket editor button** to insert a link directly into your reply draft.
The customer clicks the link, records their screen, and submits. No installs required on their
end.
The recording link is ready to share with the customer. You can also use the **ticket editor button** to insert a link directly into your reply draft.
The customer clicks the link, records their screen, and submits. No installs required on their
end.
 Use the **ticket editor button** in the reply toolbar to insert a recording link directly into
your reply — without opening the sidebar. See [Zendesk Ticket Editor](/integrations/zendesk-ticket-editor).
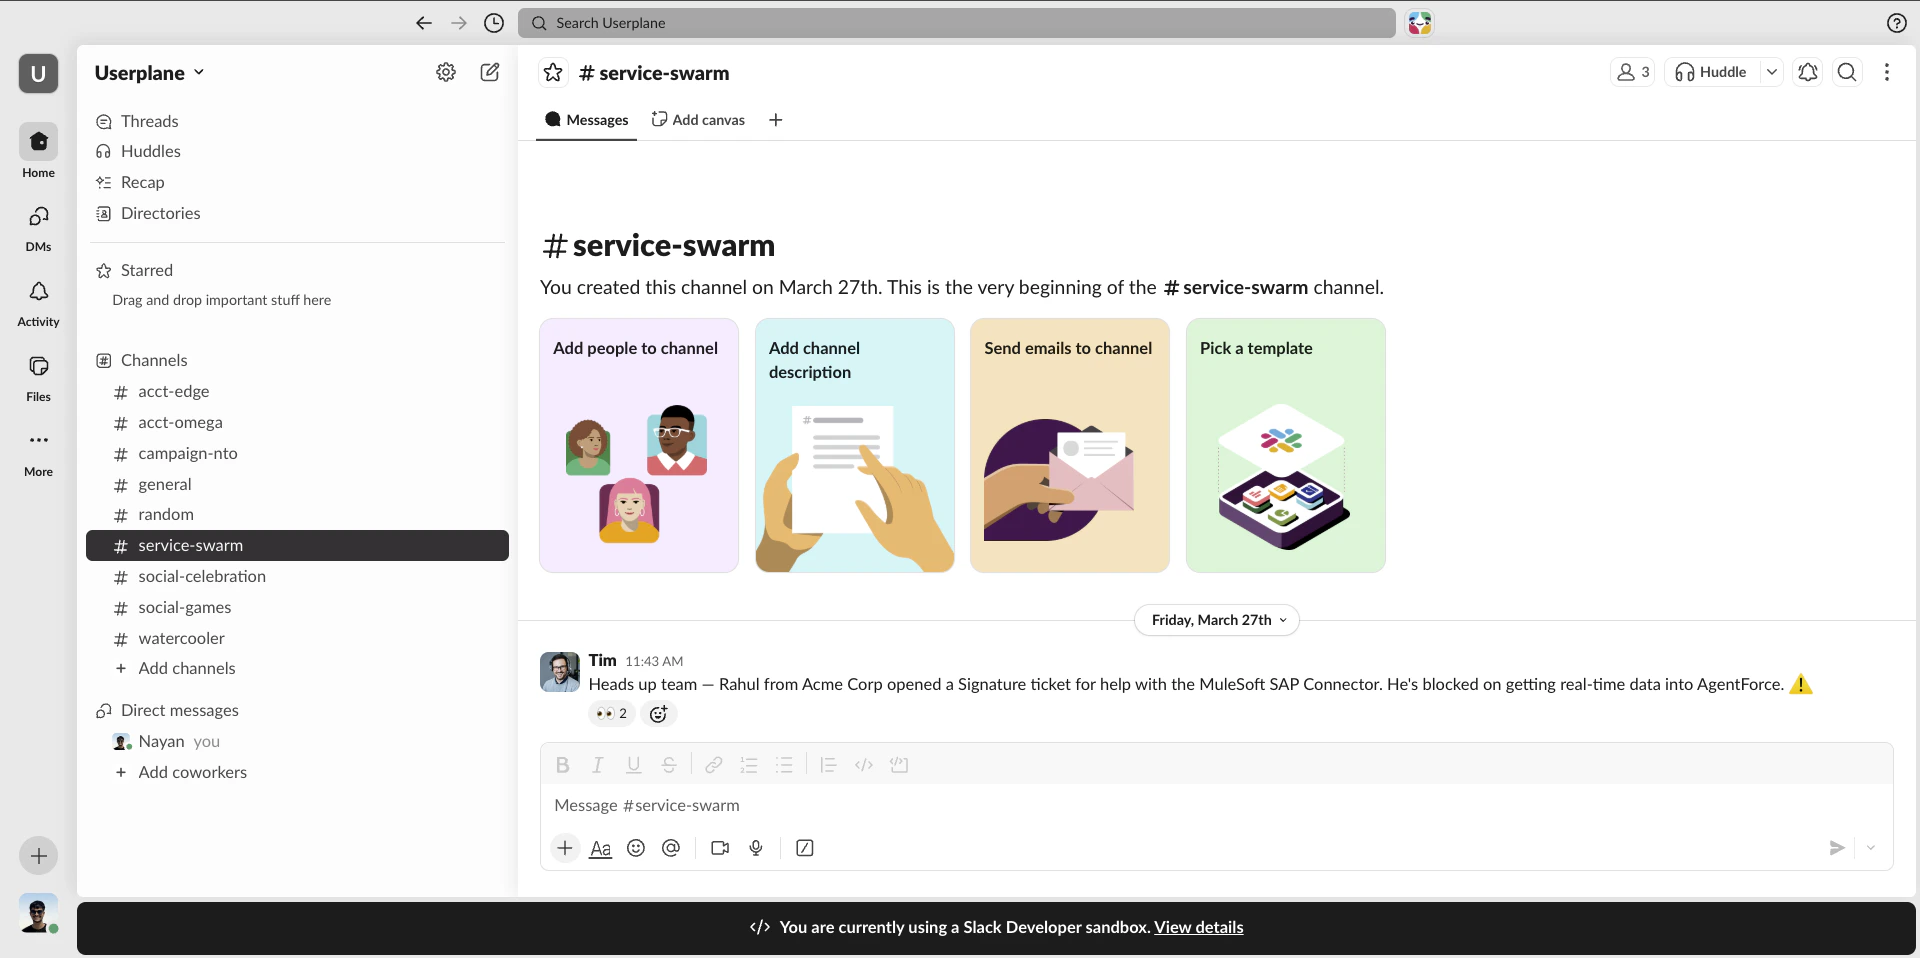
Find the Slack channel or DM where the customer (or an internal teammate relaying the issue) has described the problem.
Use the **ticket editor button** in the reply toolbar to insert a recording link directly into
your reply — without opening the sidebar. See [Zendesk Ticket Editor](/integrations/zendesk-ticket-editor).
Find the Slack channel or DM where the customer (or an internal teammate relaying the issue) has described the problem.
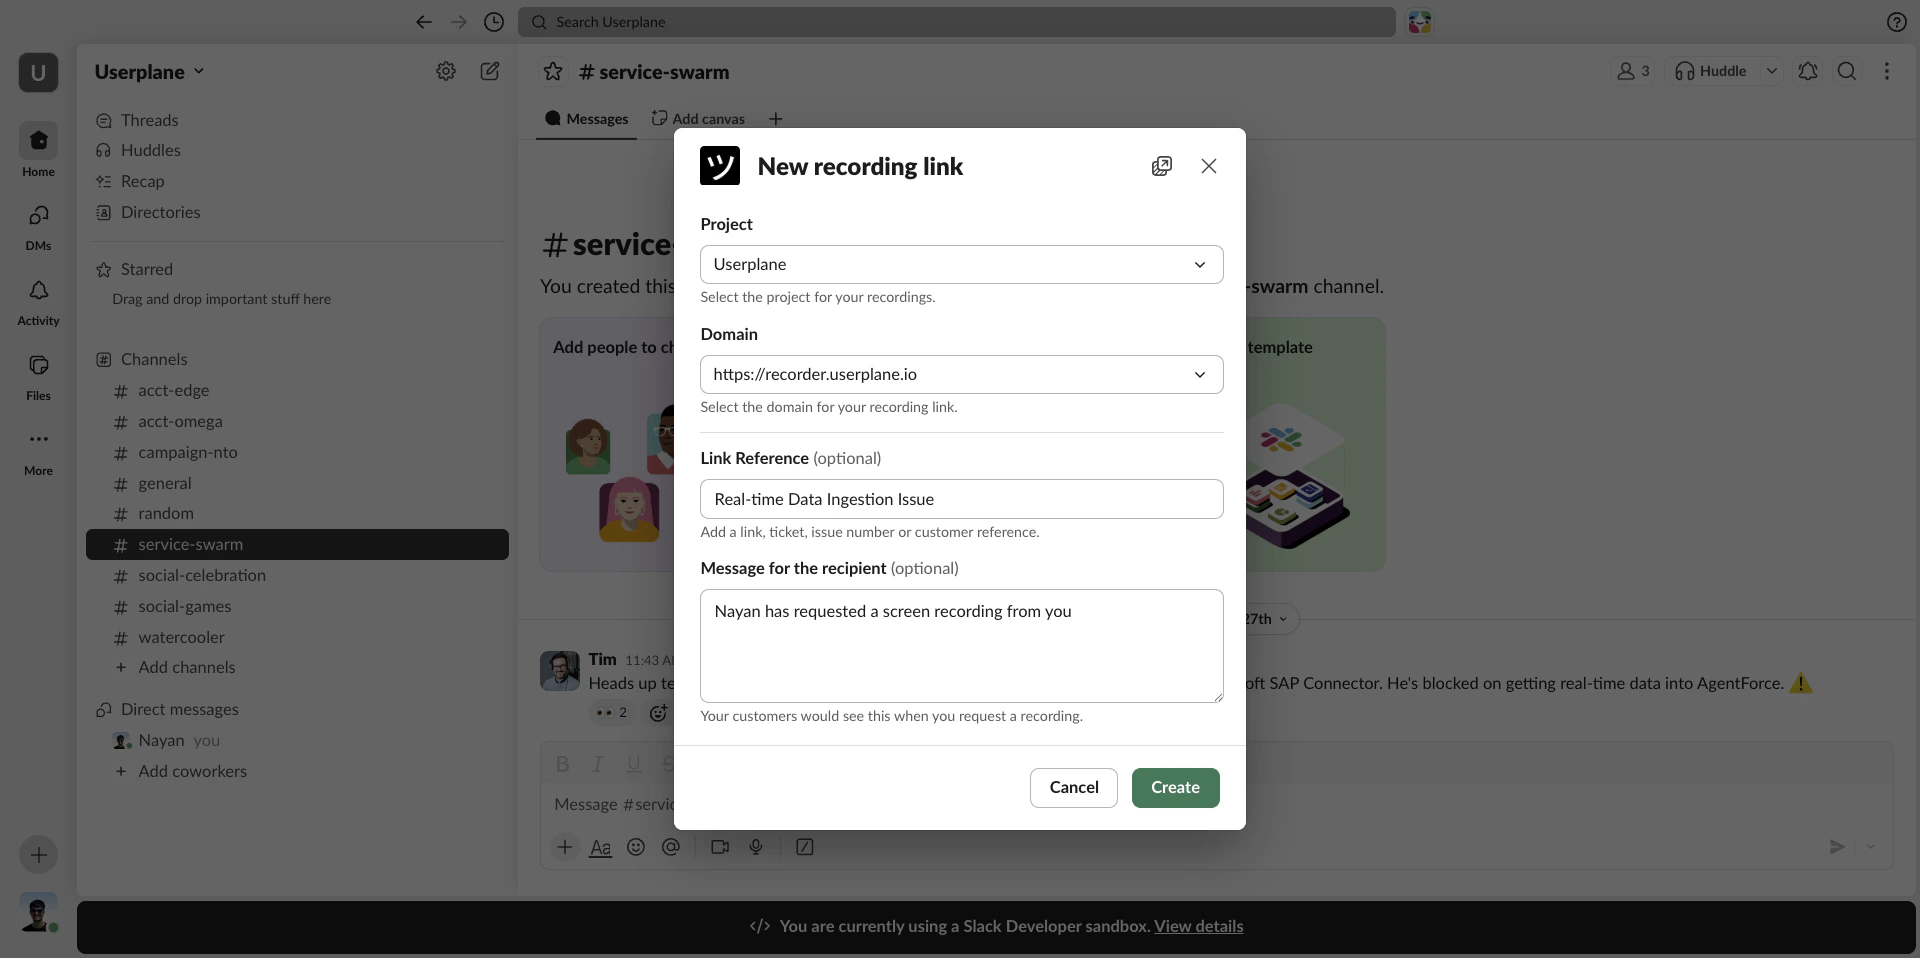
 Type `/userplane` in the channel and press **Enter**. A modal opens — select a **Project** and **Domain**, optionally add a reference, and click **Create**.
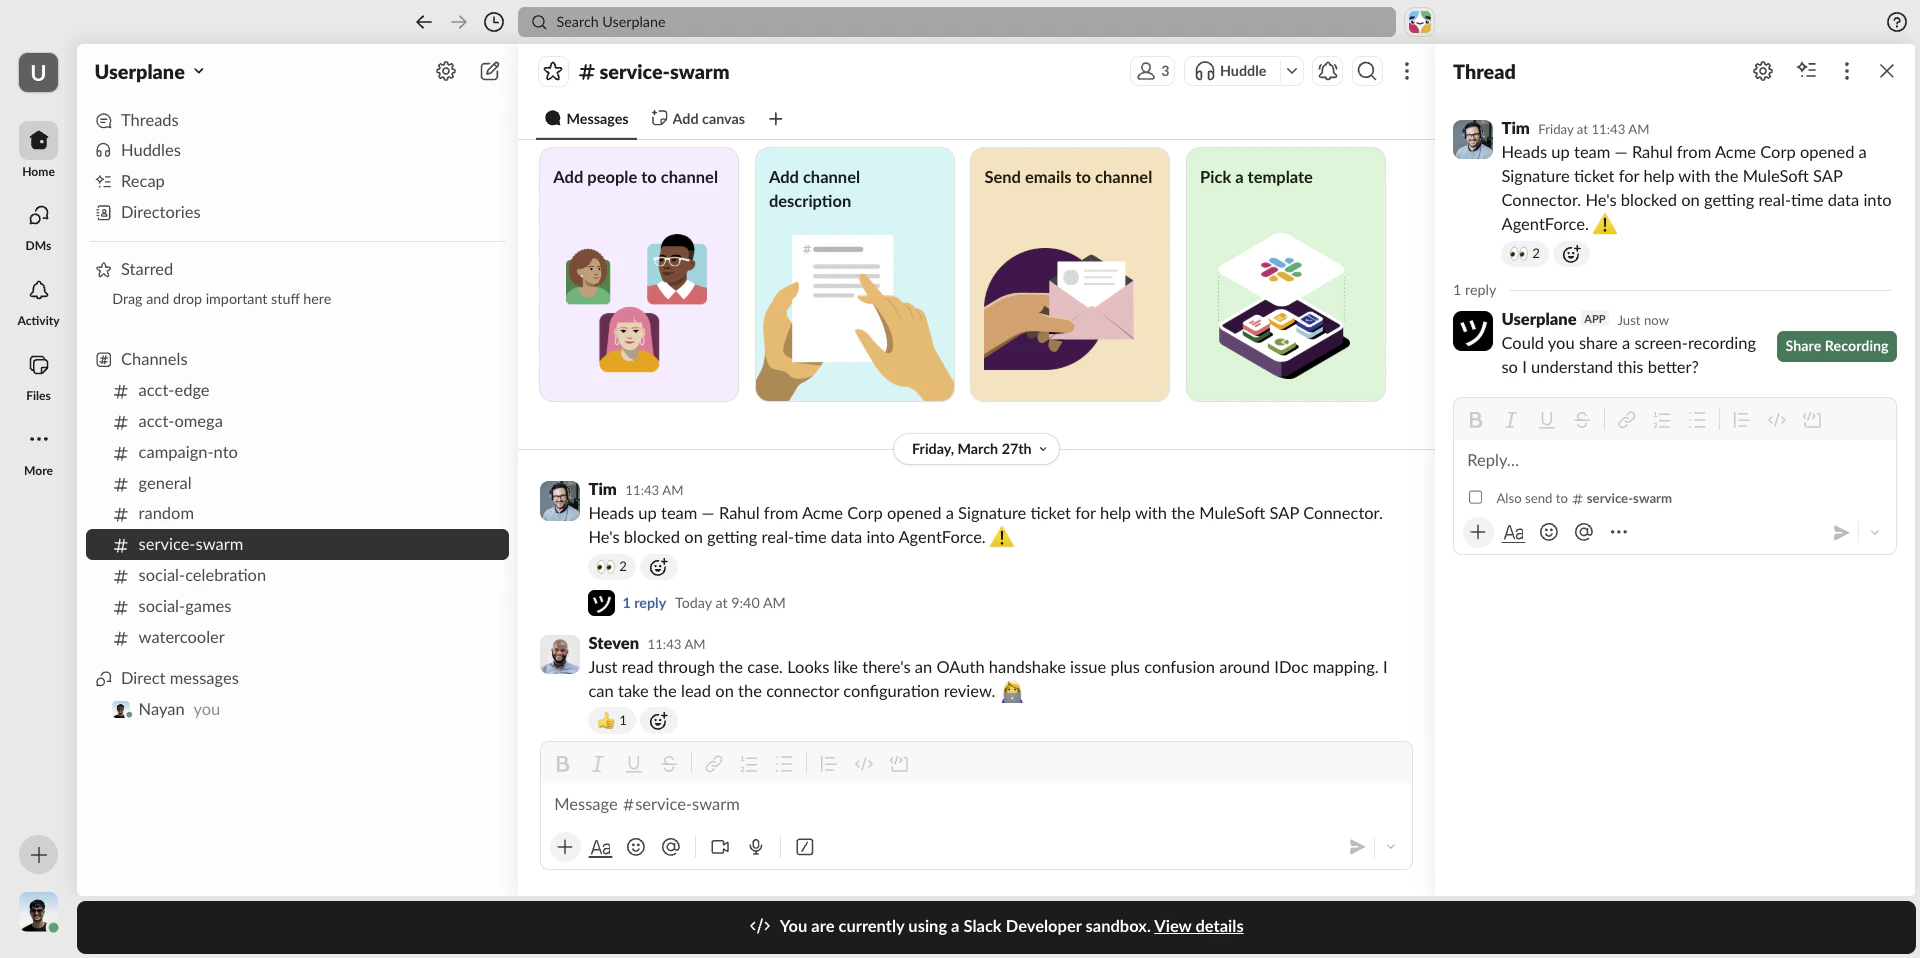
 The recording link is posted as a channel message. Share it with the customer directly or copy it to send via another channel.
 The customer clicks the link, records their screen, and submits. No installs required on their end.
Use the **message shortcut** instead if you want the recording link posted as a reply to a specific message. Right-click any message and select **Create recording link**. See [Slack Message Shortcuts](/integrations/slack-shortcuts).
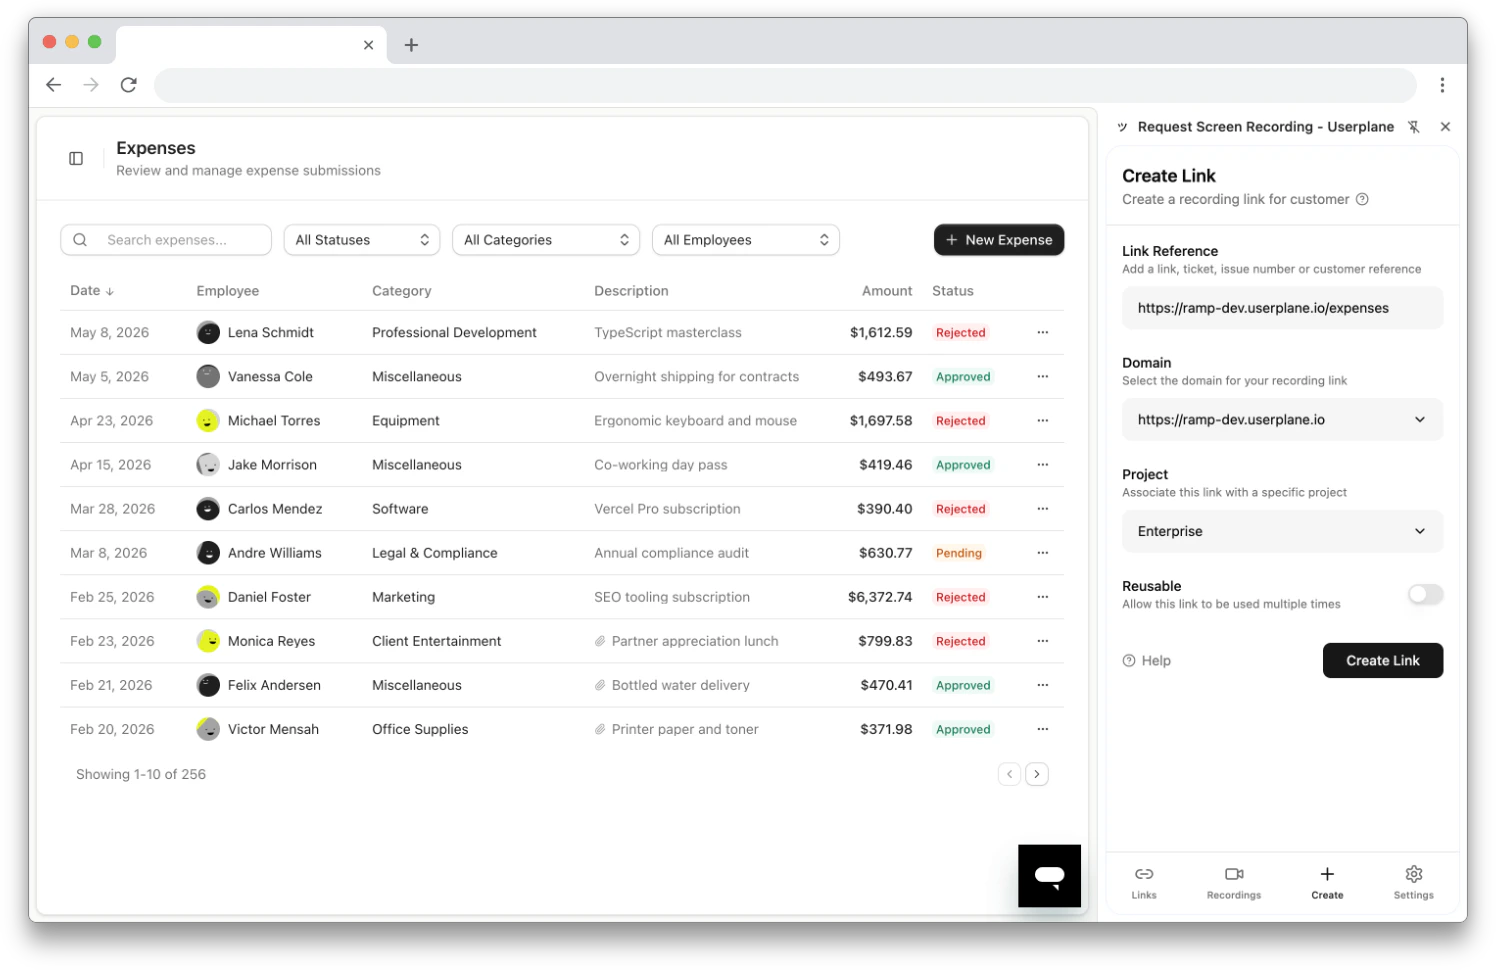
Go to the ticket or conversation in your help desk where the customer is reporting an issue.
Click the **Userplane** icon in the toolbar or press **Cmd+Shift+Y** (Mac) / **Ctrl+Shift+Y** (Windows/Linux).
The **Link Reference** field auto-populates with the current tab URL (your ticket page). Select a **domain** and **project**, then click **Create Link**.
The customer clicks the link, records their screen, and submits. No installs required on their end.
Use the **message shortcut** instead if you want the recording link posted as a reply to a specific message. Right-click any message and select **Create recording link**. See [Slack Message Shortcuts](/integrations/slack-shortcuts).
Go to the ticket or conversation in your help desk where the customer is reporting an issue.
Click the **Userplane** icon in the toolbar or press **Cmd+Shift+Y** (Mac) / **Ctrl+Shift+Y** (Windows/Linux).
The **Link Reference** field auto-populates with the current tab URL (your ticket page). Select a **domain** and **project**, then click **Create Link**.
 Copy the link and paste it into your help desk reply.
 The customer clicks the link, records their screen, and submits. No installs required on their end.
Use the **omnibox** (type `userplane` in the address bar, press Tab, then type a reference) or
**right-click context menu** for even faster access. See [Chrome Extension
Shortcuts](/integrations/chrome-extension-shortcuts).
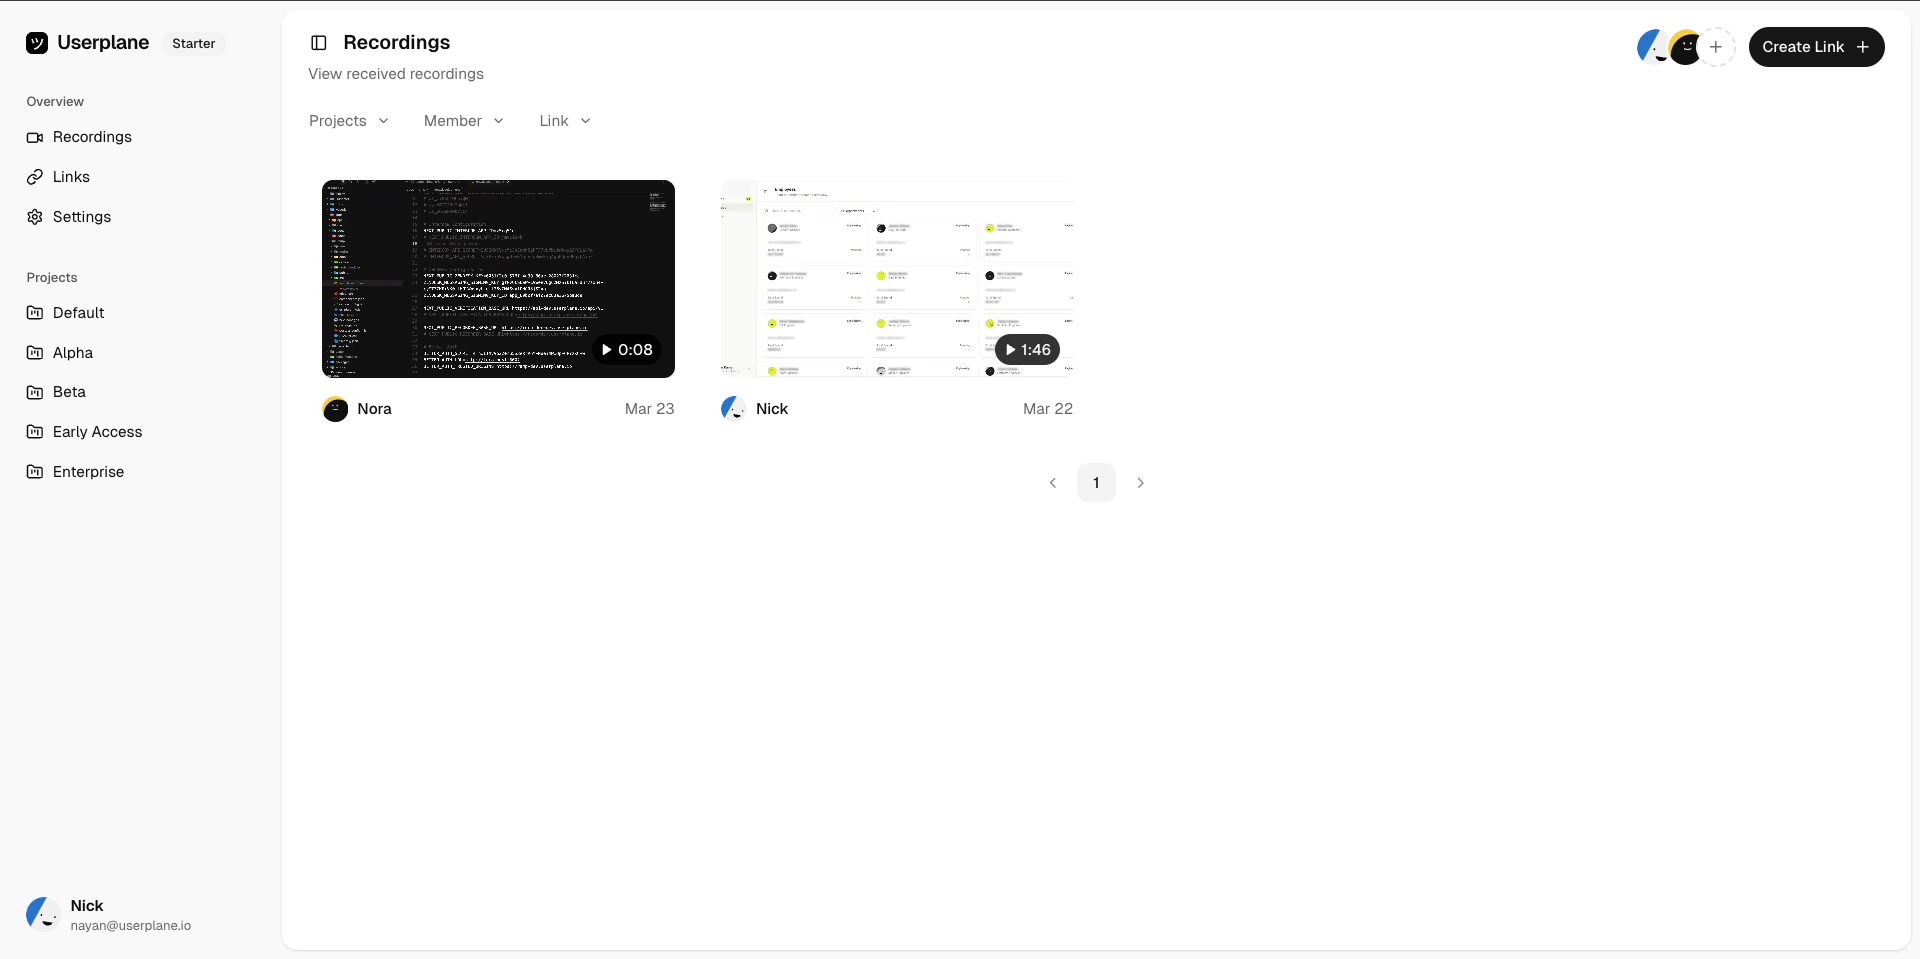
## Step 4: Review the recording
Once the customer submits, the recording appears in the Userplane dashboard.
Go to [Recordings](https://dash.userplane.io/_/recordings) in the dashboard and find the recording.
The customer clicks the link, records their screen, and submits. No installs required on their end.
Use the **omnibox** (type `userplane` in the address bar, press Tab, then type a reference) or
**right-click context menu** for even faster access. See [Chrome Extension
Shortcuts](/integrations/chrome-extension-shortcuts).
## Step 4: Review the recording
Once the customer submits, the recording appears in the Userplane dashboard.
Go to [Recordings](https://dash.userplane.io/_/recordings) in the dashboard and find the recording.
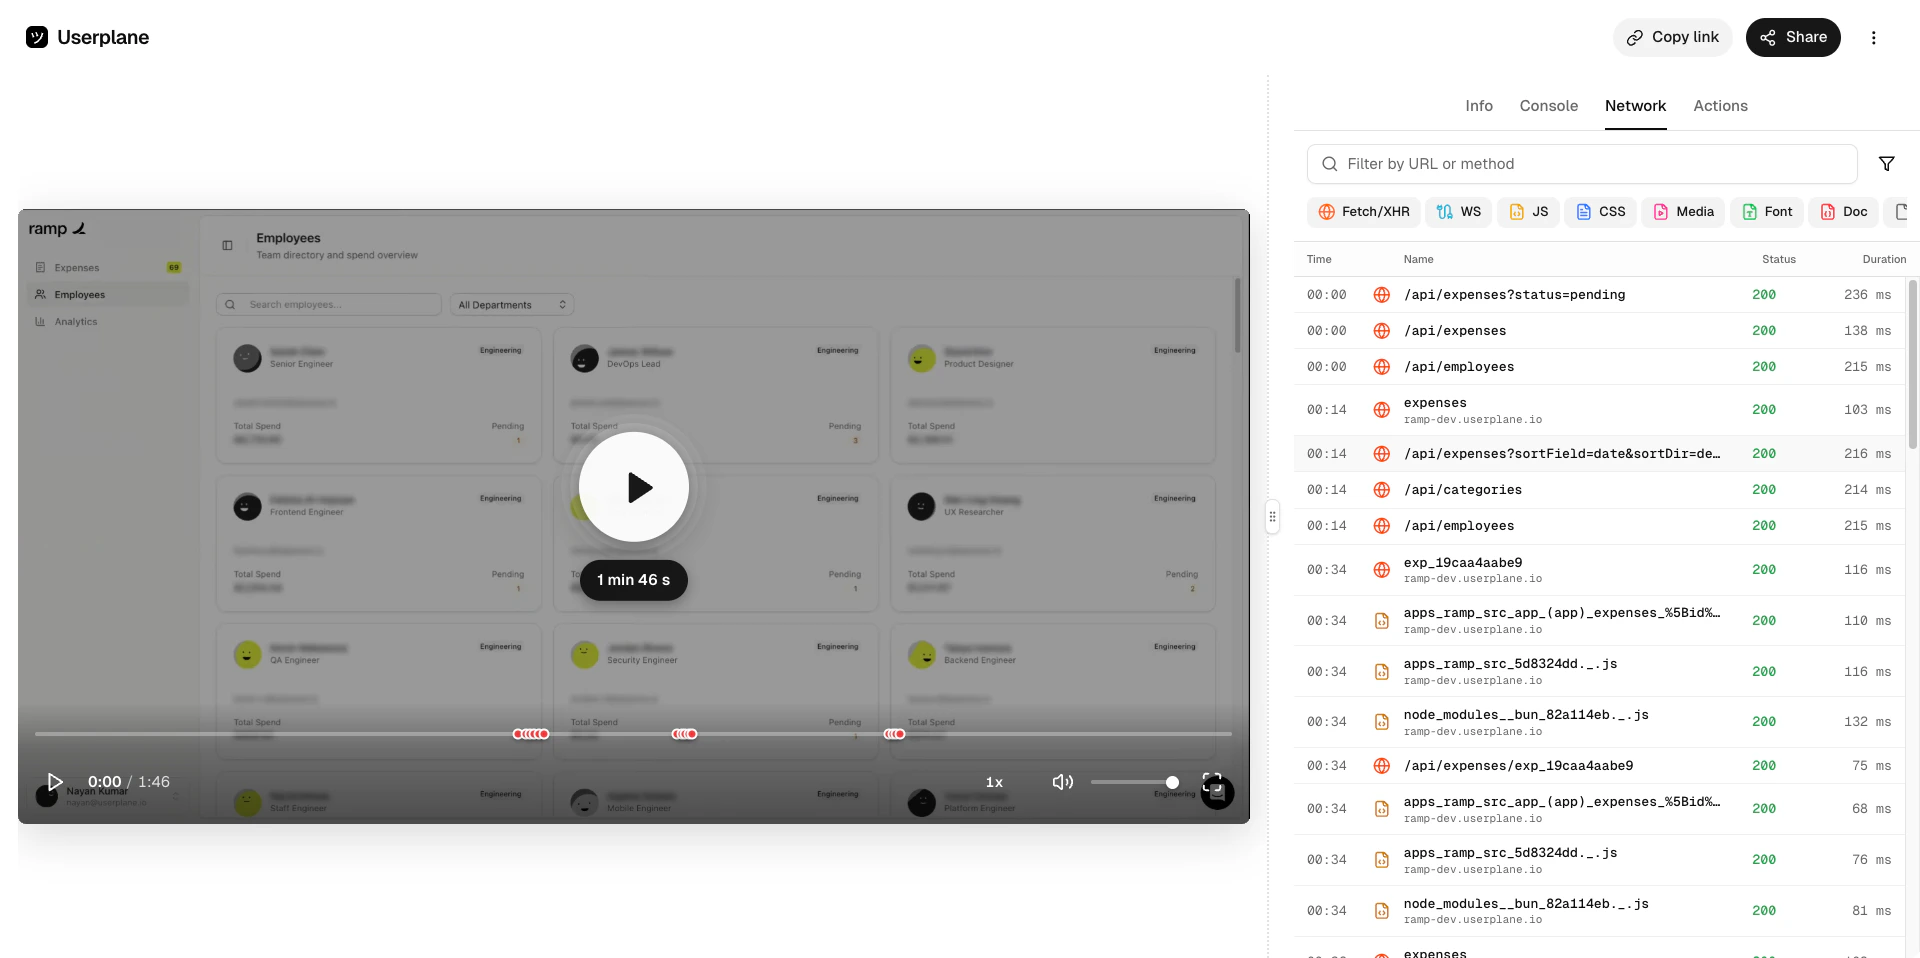
 The video plays back exactly what the customer saw. Use the timeline scrubber to jump to specific moments.
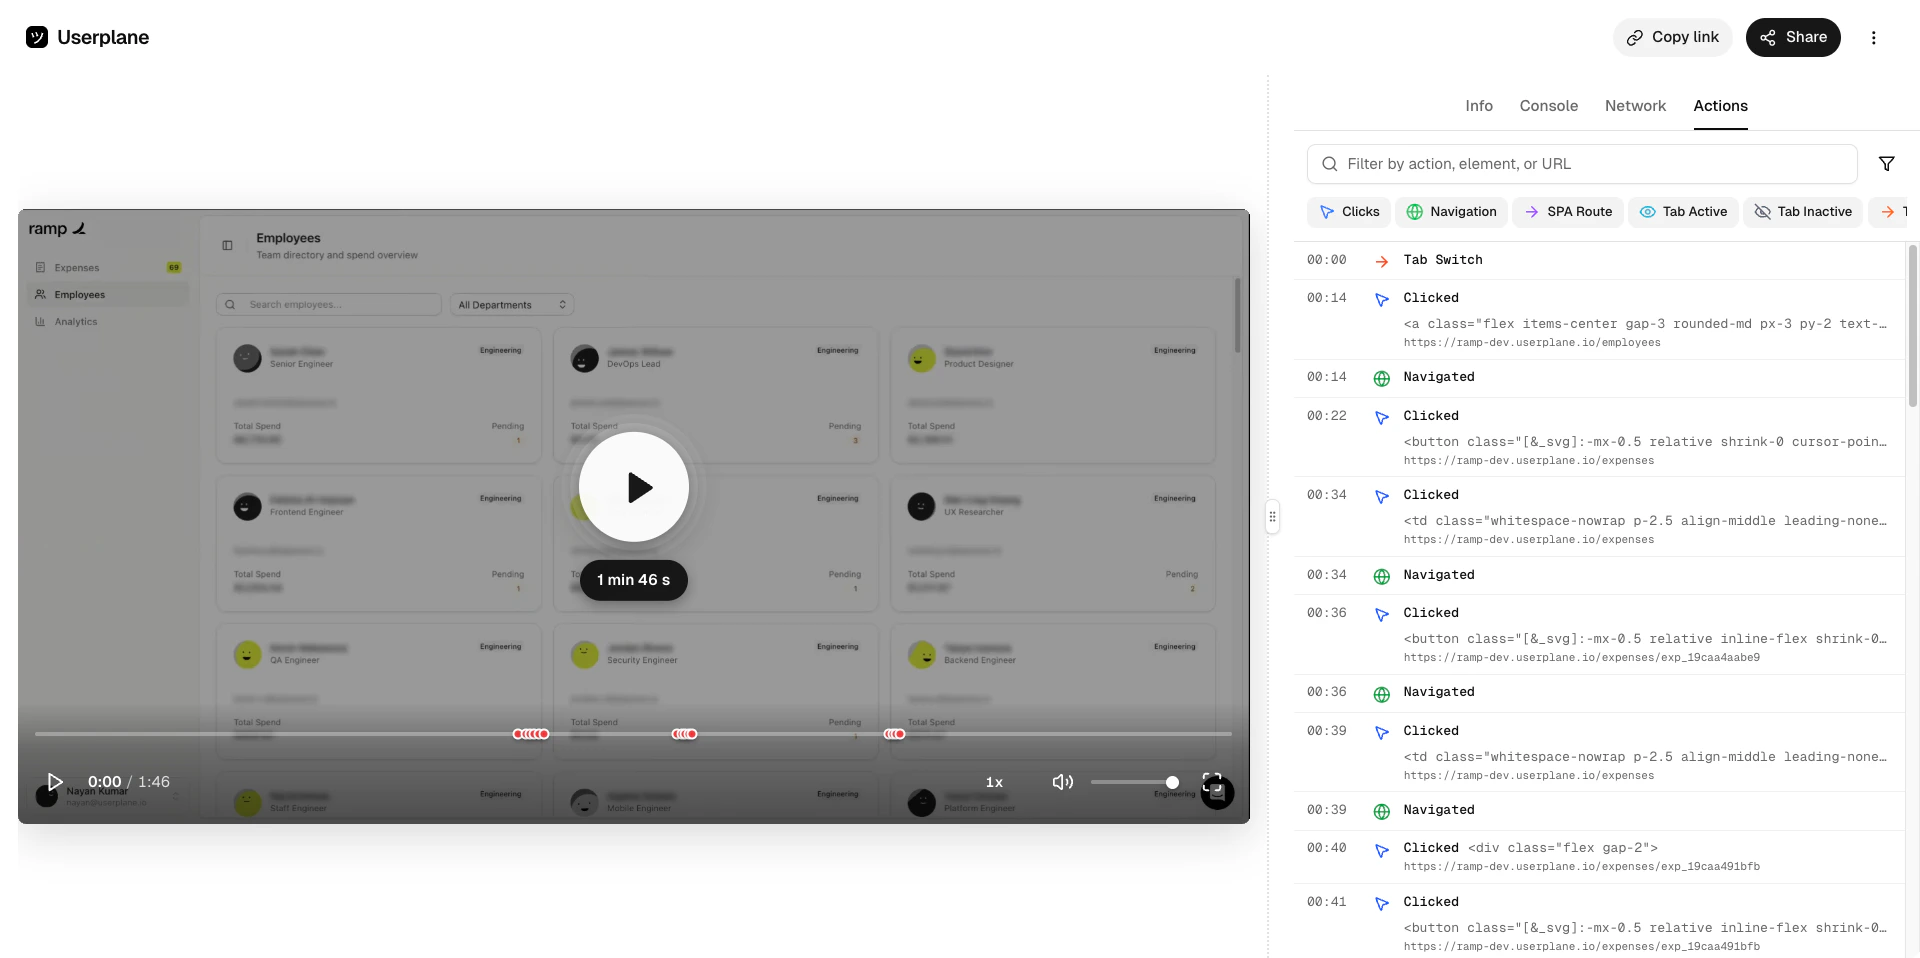
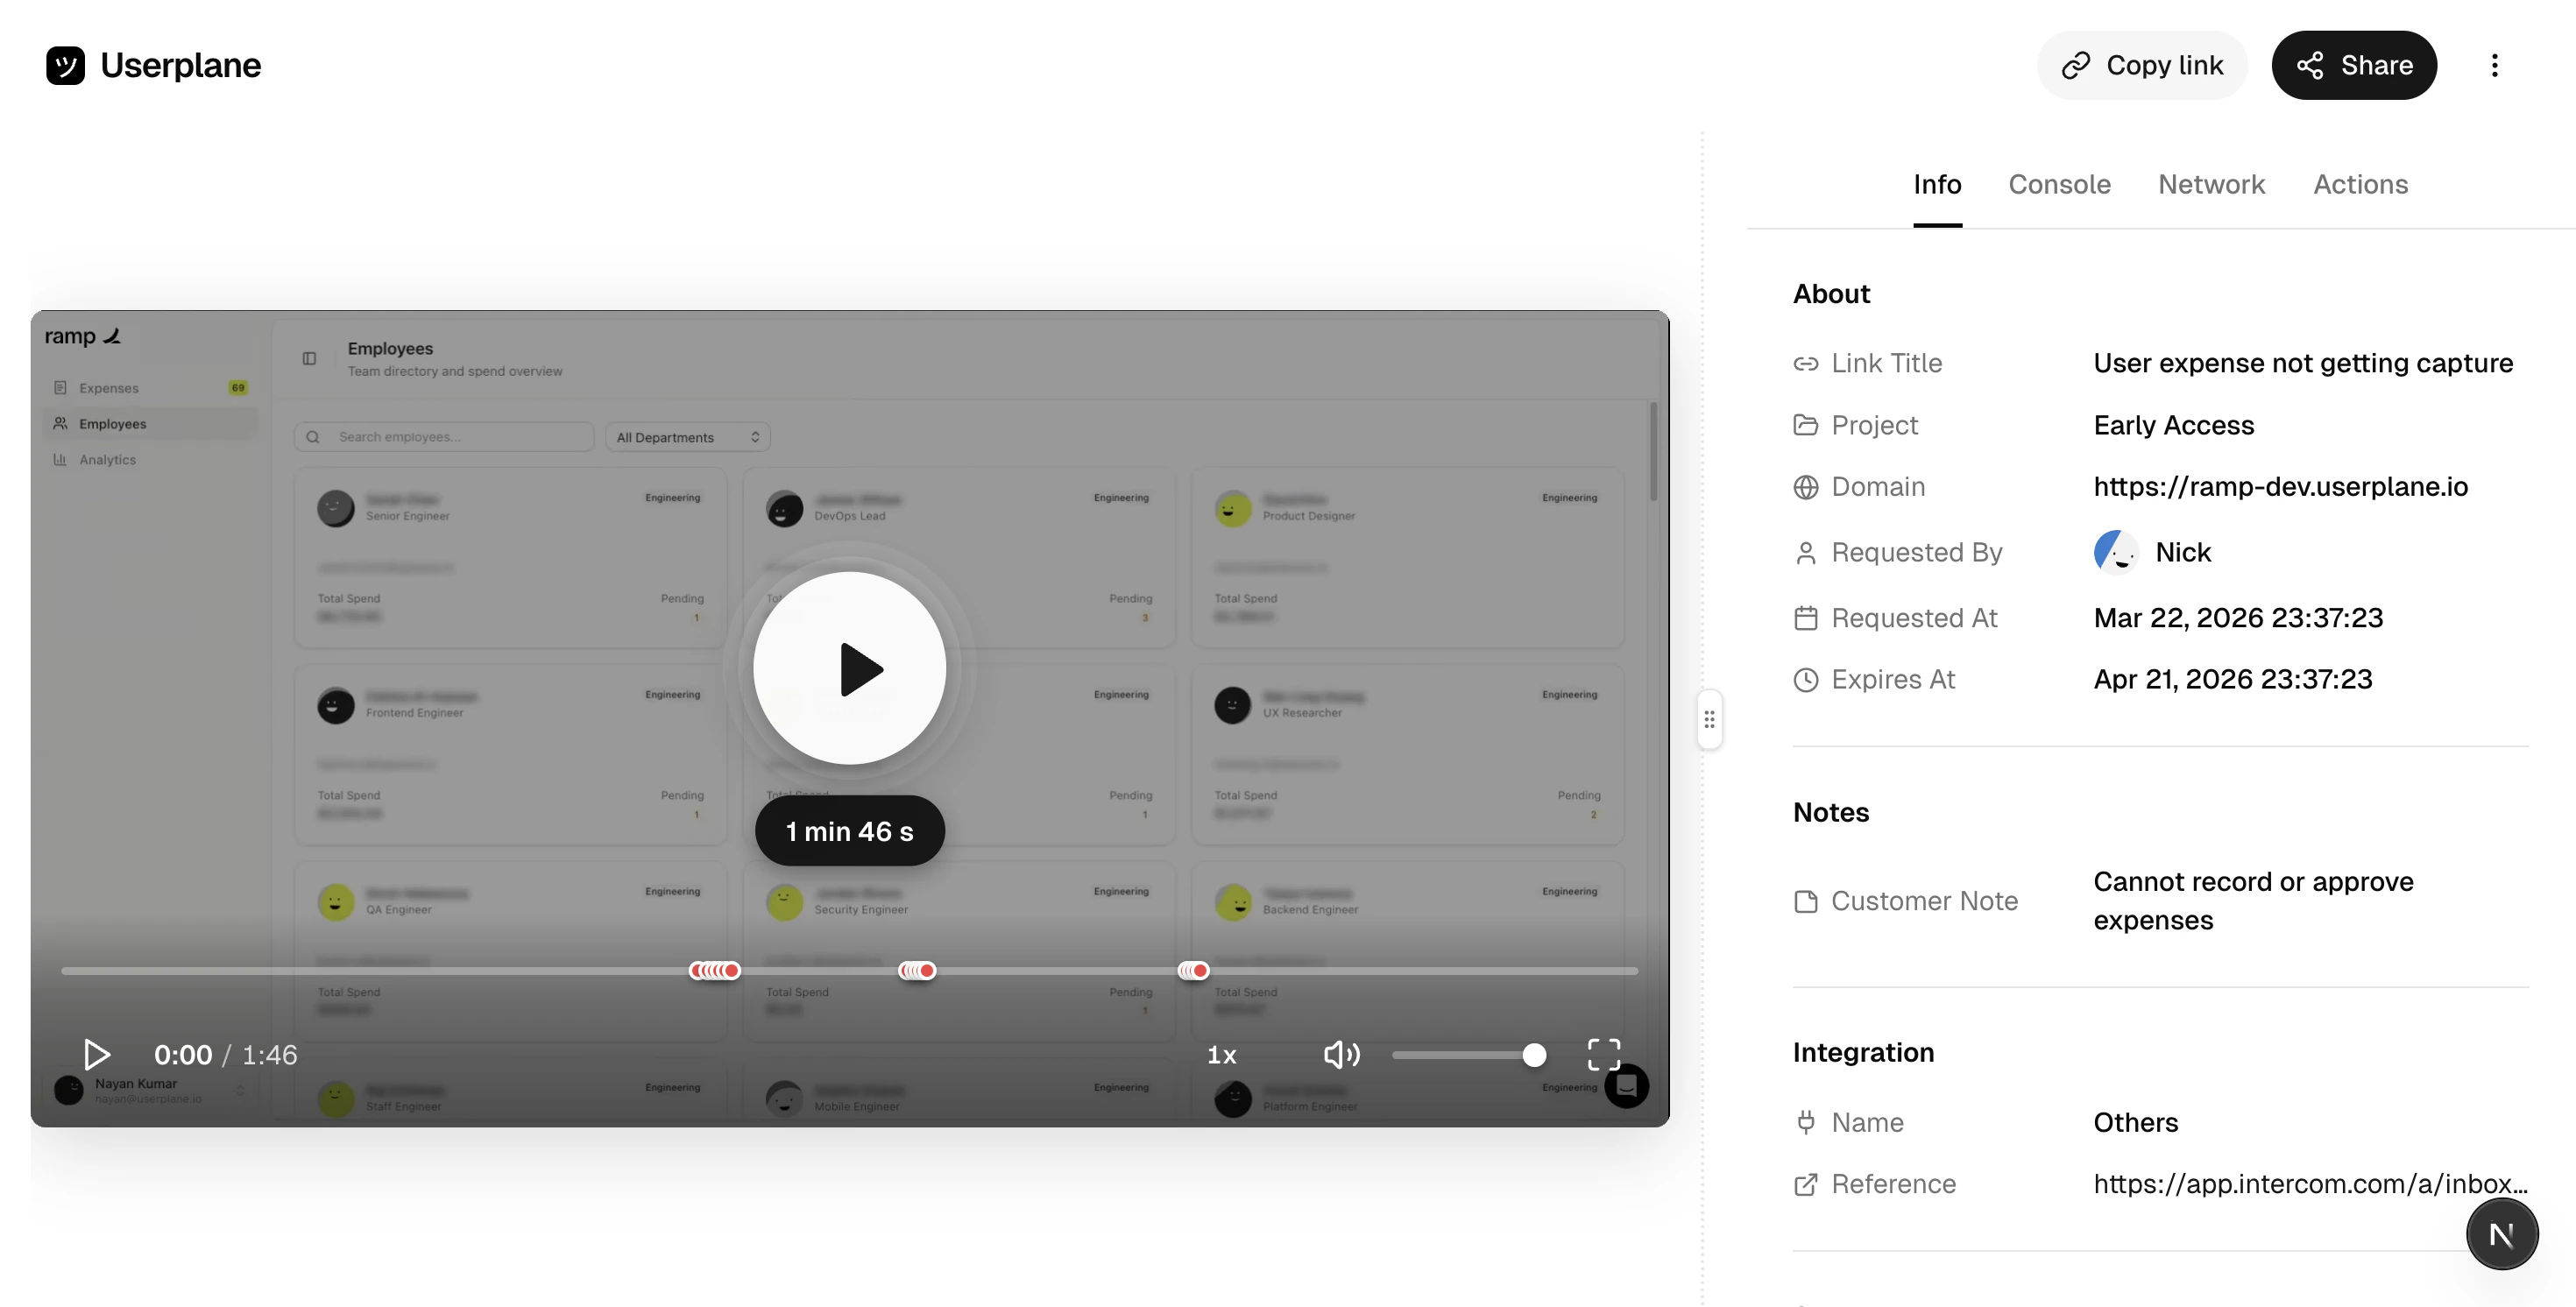 Use the tabs on the right to dig deeper:
| Tab | What it shows |
| ----------- | ----------------------------------------- |
| **Info** | Customer notes, browser, OS, and page URL |
| **Console** | JavaScript errors and warnings |
| **Network** | HTTP requests with status codes |
| **Actions** | Clicks, inputs, and page navigations |
Use the tabs on the right to dig deeper:
| Tab | What it shows |
| ----------- | ----------------------------------------- |
| **Info** | Customer notes, browser, OS, and page URL |
| **Console** | JavaScript errors and warnings |
| **Network** | HTTP requests with status codes |
| **Actions** | Clicks, inputs, and page navigations |
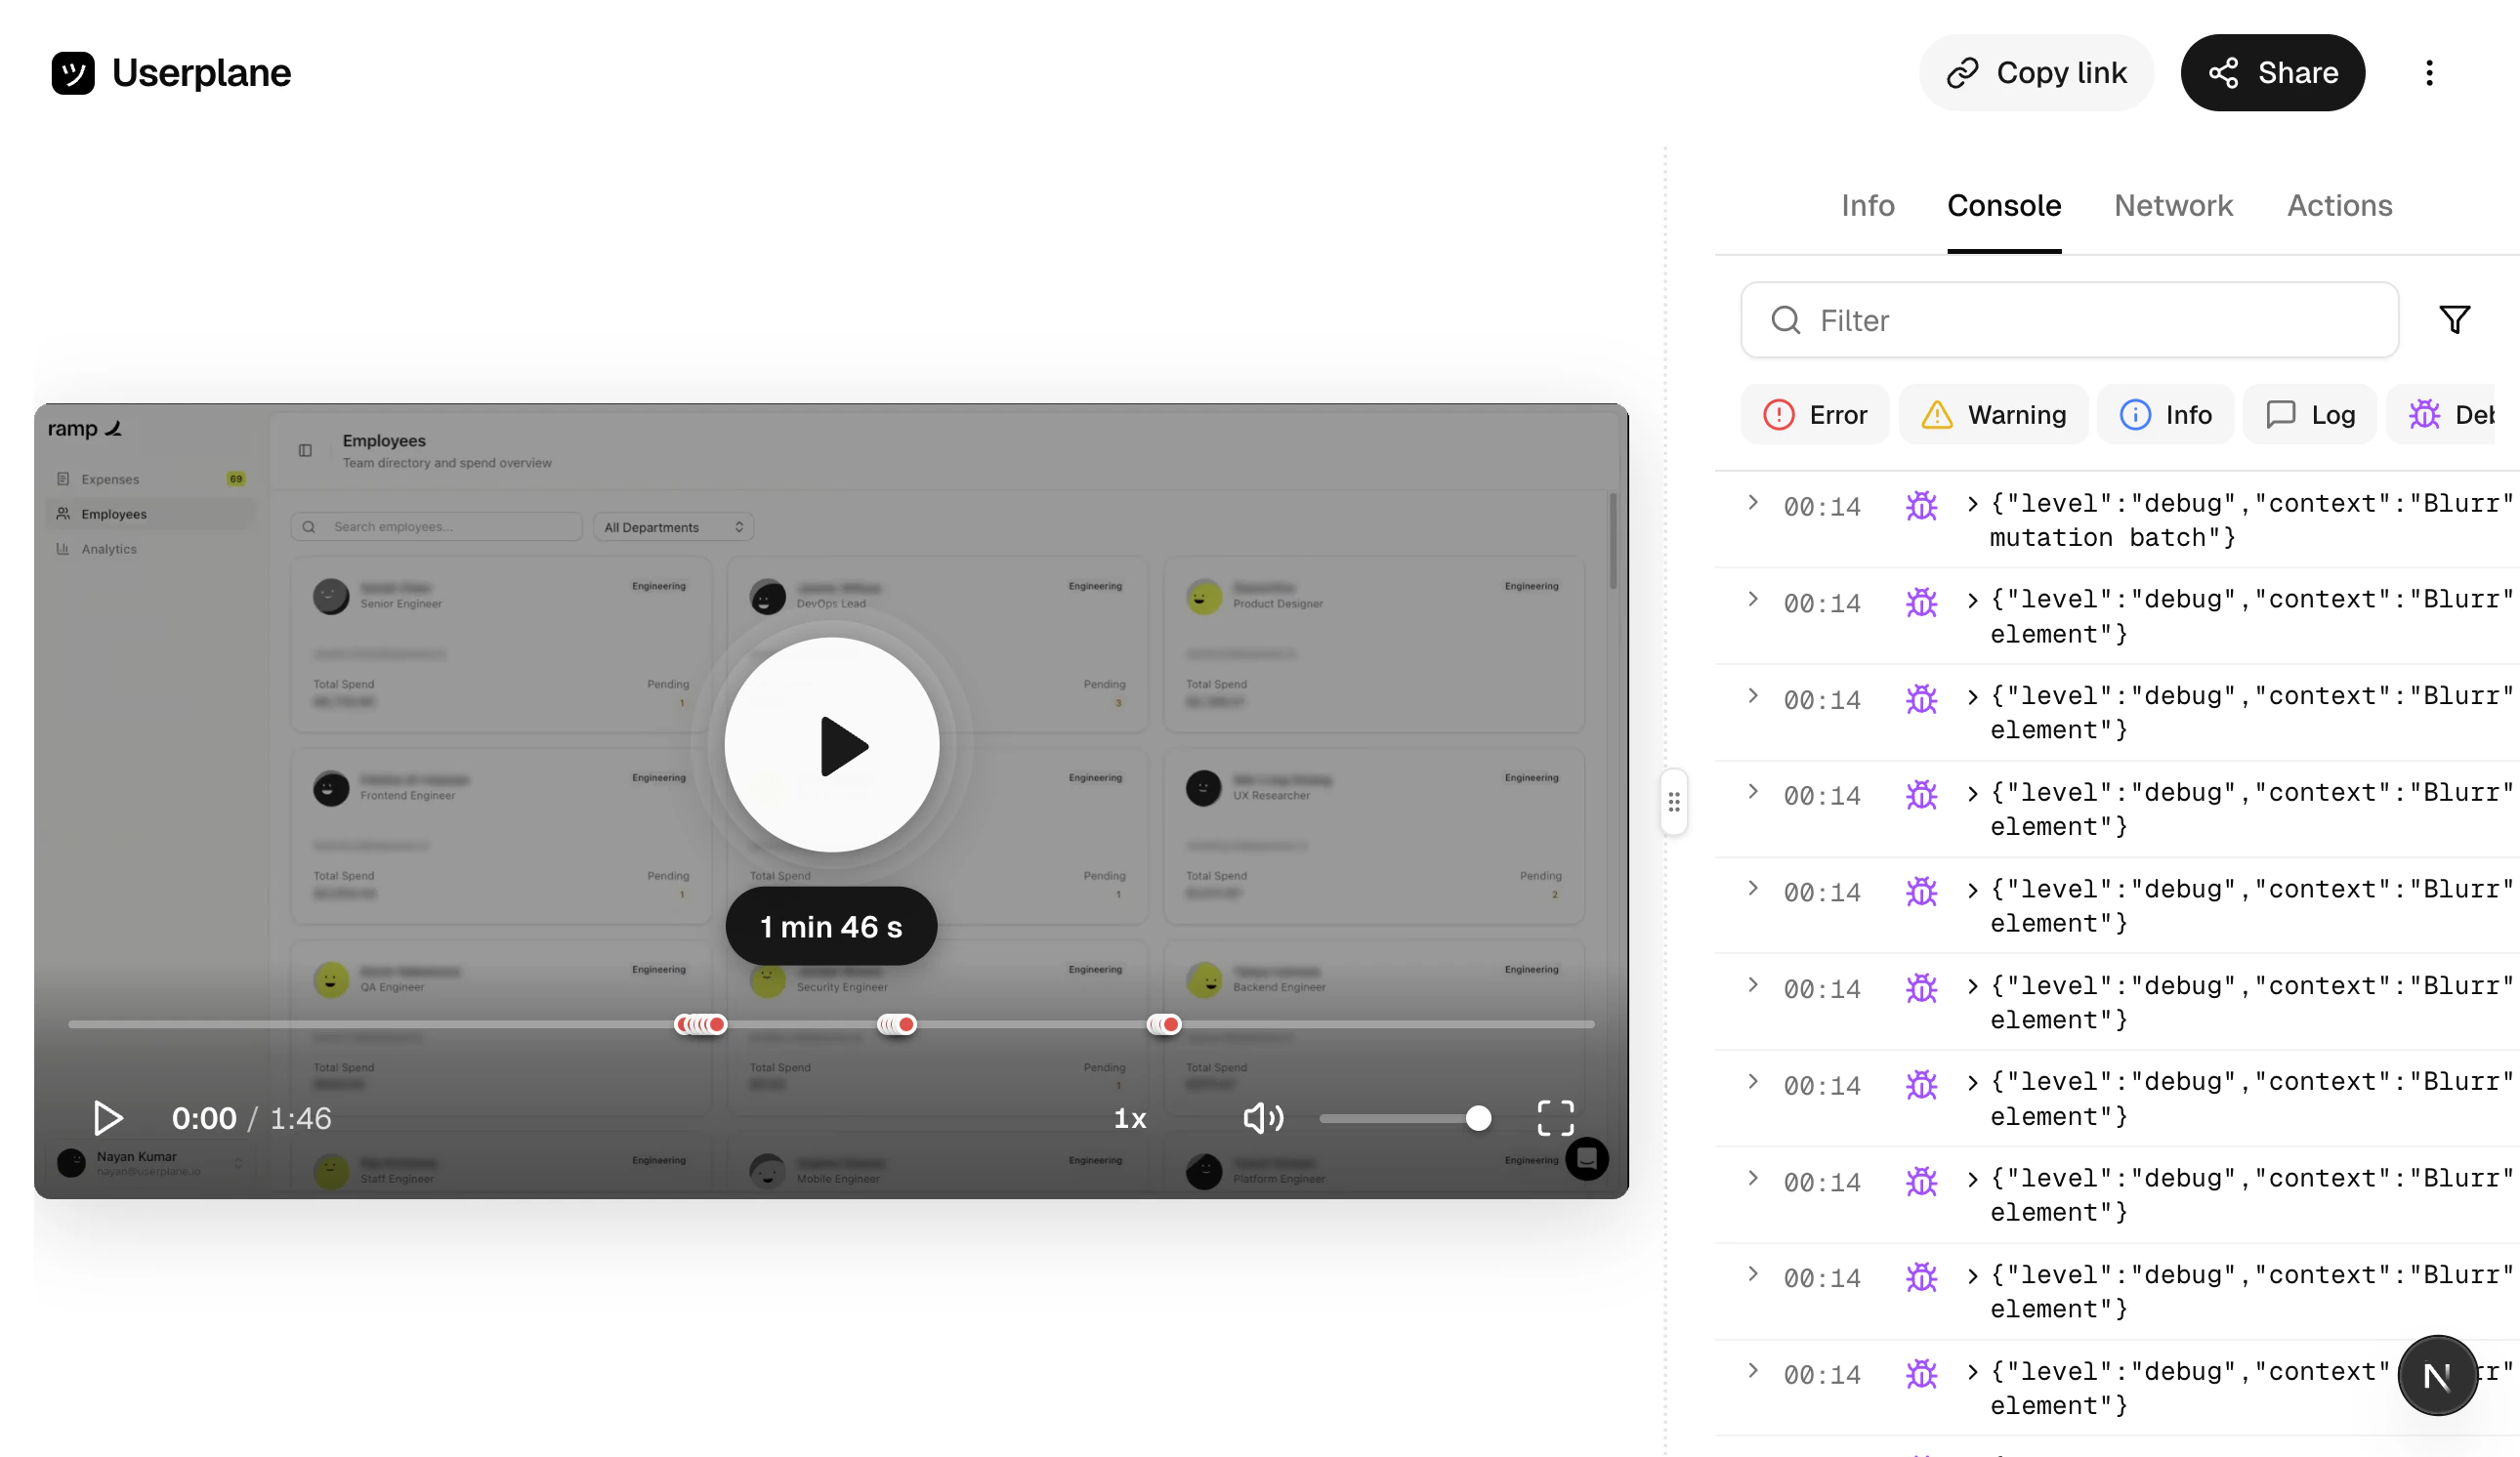
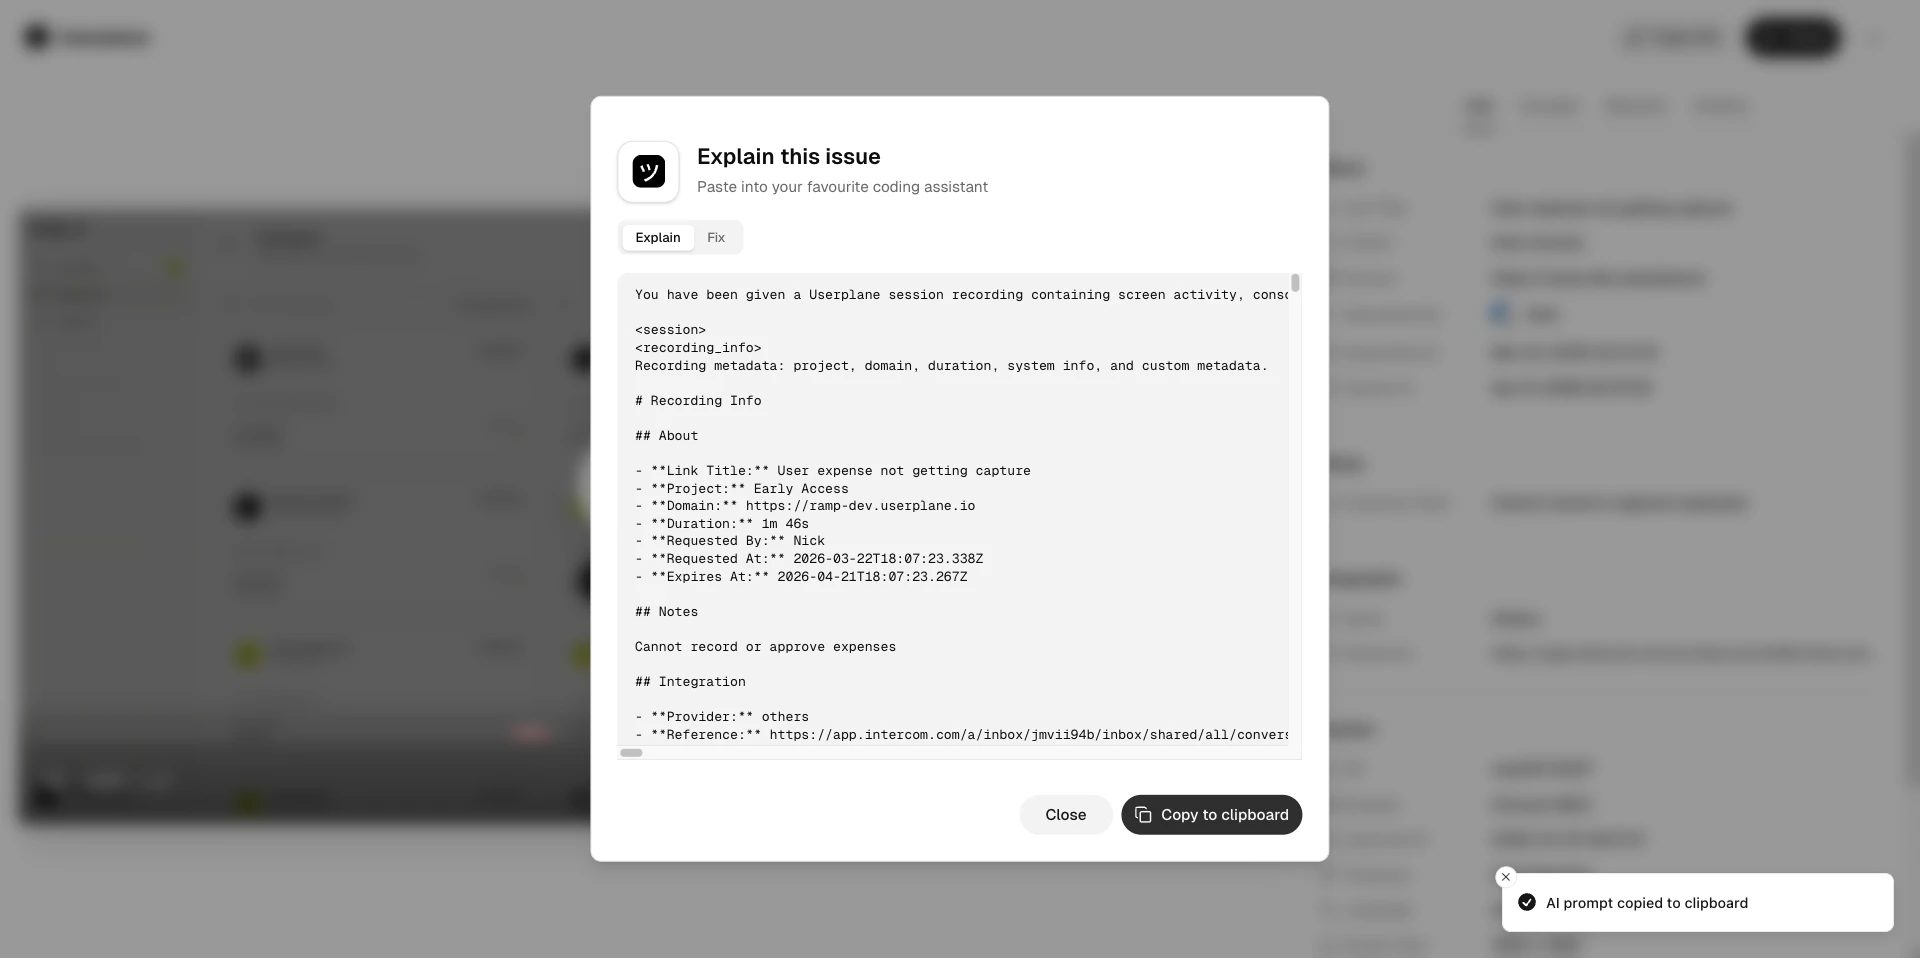
 Click **Analyze** to automatically surface the most likely root cause from the session data — useful for handing off to your engineering team.
 ## Speed up your workflow
* **Intercom Macros** — embed reusable recording links in Intercom macros so you can request recordings with one click. See [Intercom Macros](/integrations/intercom-macros).
* **Intercom Shortcuts** — use `Cmd+K` inside a conversation to insert a link instantly. See [Intercom Shortcuts](/integrations/intercom-shortcuts).
* **Zendesk locations** — use the ticket sidebar, editor button, or top bar to create links from anywhere in Zendesk. See [Zendesk Ticket Sidebar](/integrations/zendesk-ticket-sidebar).
* **Slack Slash Command** — type `/userplane TICKET-ID` to open the link creator with the reference pre-filled. See [Slack Slash Command](/integrations/slack-commands).
* **Slack Message Shortcuts** — right-click any message in Slack to create a recording link tied to that thread. See [Slack Message Shortcuts](/integrations/slack-shortcuts).
* **Chrome Extension Shortcuts** — use `Cmd+Shift+Y`, context menus, or the omnibox for fast link creation from any tab. See [Chrome Extension Shortcuts](/integrations/chrome-extension-shortcuts).
* **Projects** — organize recordings by product area, customer tier, or issue type. See [Projects](/recording/projects).
## Next steps
Learn all the tools available in the recording detail view
Share recordings with teammates or export for engineering handoffs
Full guide to using Userplane from inside Intercom
Full guide to using Userplane from inside Zendesk
Full guide to using Userplane from inside Slack
Use the side panel alongside any browser-based tool
Automatically surface root causes from session data
## Speed up your workflow
* **Intercom Macros** — embed reusable recording links in Intercom macros so you can request recordings with one click. See [Intercom Macros](/integrations/intercom-macros).
* **Intercom Shortcuts** — use `Cmd+K` inside a conversation to insert a link instantly. See [Intercom Shortcuts](/integrations/intercom-shortcuts).
* **Zendesk locations** — use the ticket sidebar, editor button, or top bar to create links from anywhere in Zendesk. See [Zendesk Ticket Sidebar](/integrations/zendesk-ticket-sidebar).
* **Slack Slash Command** — type `/userplane TICKET-ID` to open the link creator with the reference pre-filled. See [Slack Slash Command](/integrations/slack-commands).
* **Slack Message Shortcuts** — right-click any message in Slack to create a recording link tied to that thread. See [Slack Message Shortcuts](/integrations/slack-shortcuts).
* **Chrome Extension Shortcuts** — use `Cmd+Shift+Y`, context menus, or the omnibox for fast link creation from any tab. See [Chrome Extension Shortcuts](/integrations/chrome-extension-shortcuts).
* **Projects** — organize recordings by product area, customer tier, or issue type. See [Projects](/recording/projects).
## Next steps
Learn all the tools available in the recording detail view
Share recordings with teammates or export for engineering handoffs
Full guide to using Userplane from inside Intercom
Full guide to using Userplane from inside Zendesk
Full guide to using Userplane from inside Slack
Use the side panel alongside any browser-based tool
Automatically surface root causes from session data