> ## Documentation Index
> Fetch the complete documentation index at: https://docs.userplane.io/llms.txt
> Use this file to discover all available pages before exploring further.
# Zendesk Ticket Sidebar
> Create recording links and view recordings from the Zendesk ticket sidebar
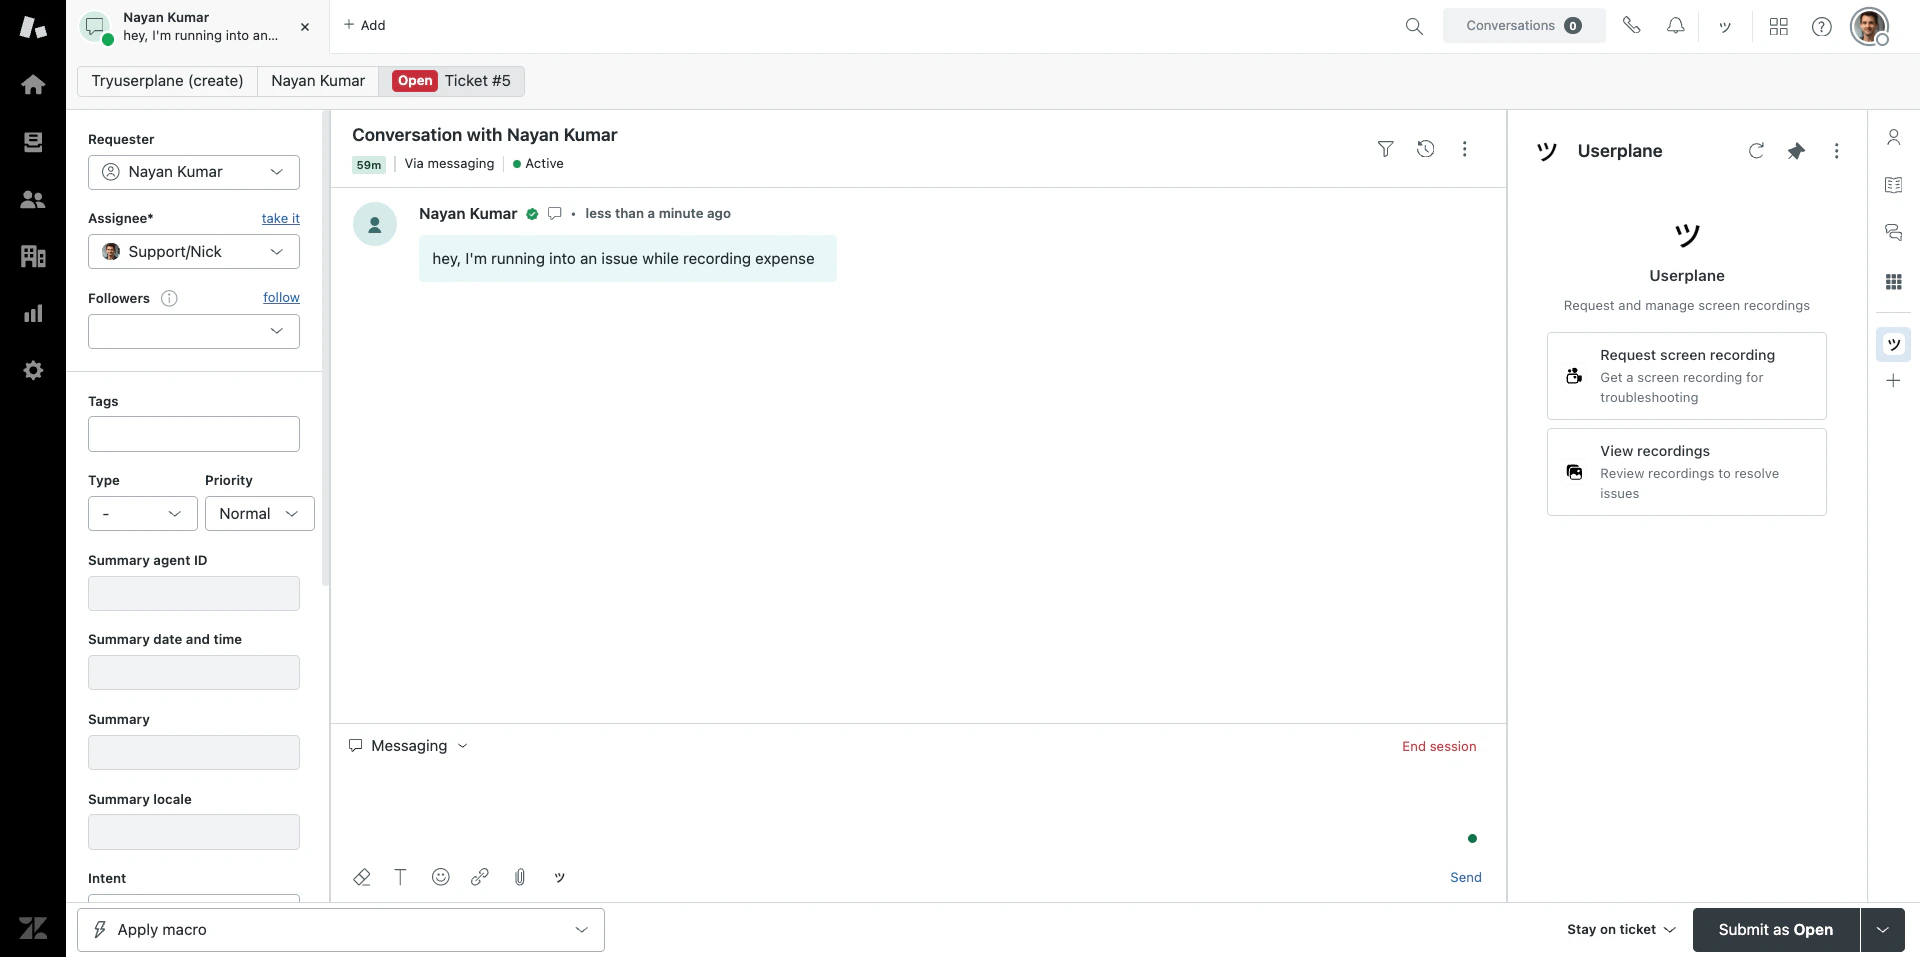
After [connecting Zendesk](/integrations/zendesk), a Userplane sidebar app appears in every ticket. This is the primary surface for creating recording links, viewing recordings, and managing ticket context — all without leaving the ticket.
## Creating a recording link
Open a ticket in Zendesk.
Click the **Userplane** app in the ticket sidebar.
 Click **Request Recording**, select a **project** and **domain** from the dropdowns, and
optionally customize the message to the customer.
Click **Request Recording**, select a **project** and **domain** from the dropdowns, and
optionally customize the message to the customer.
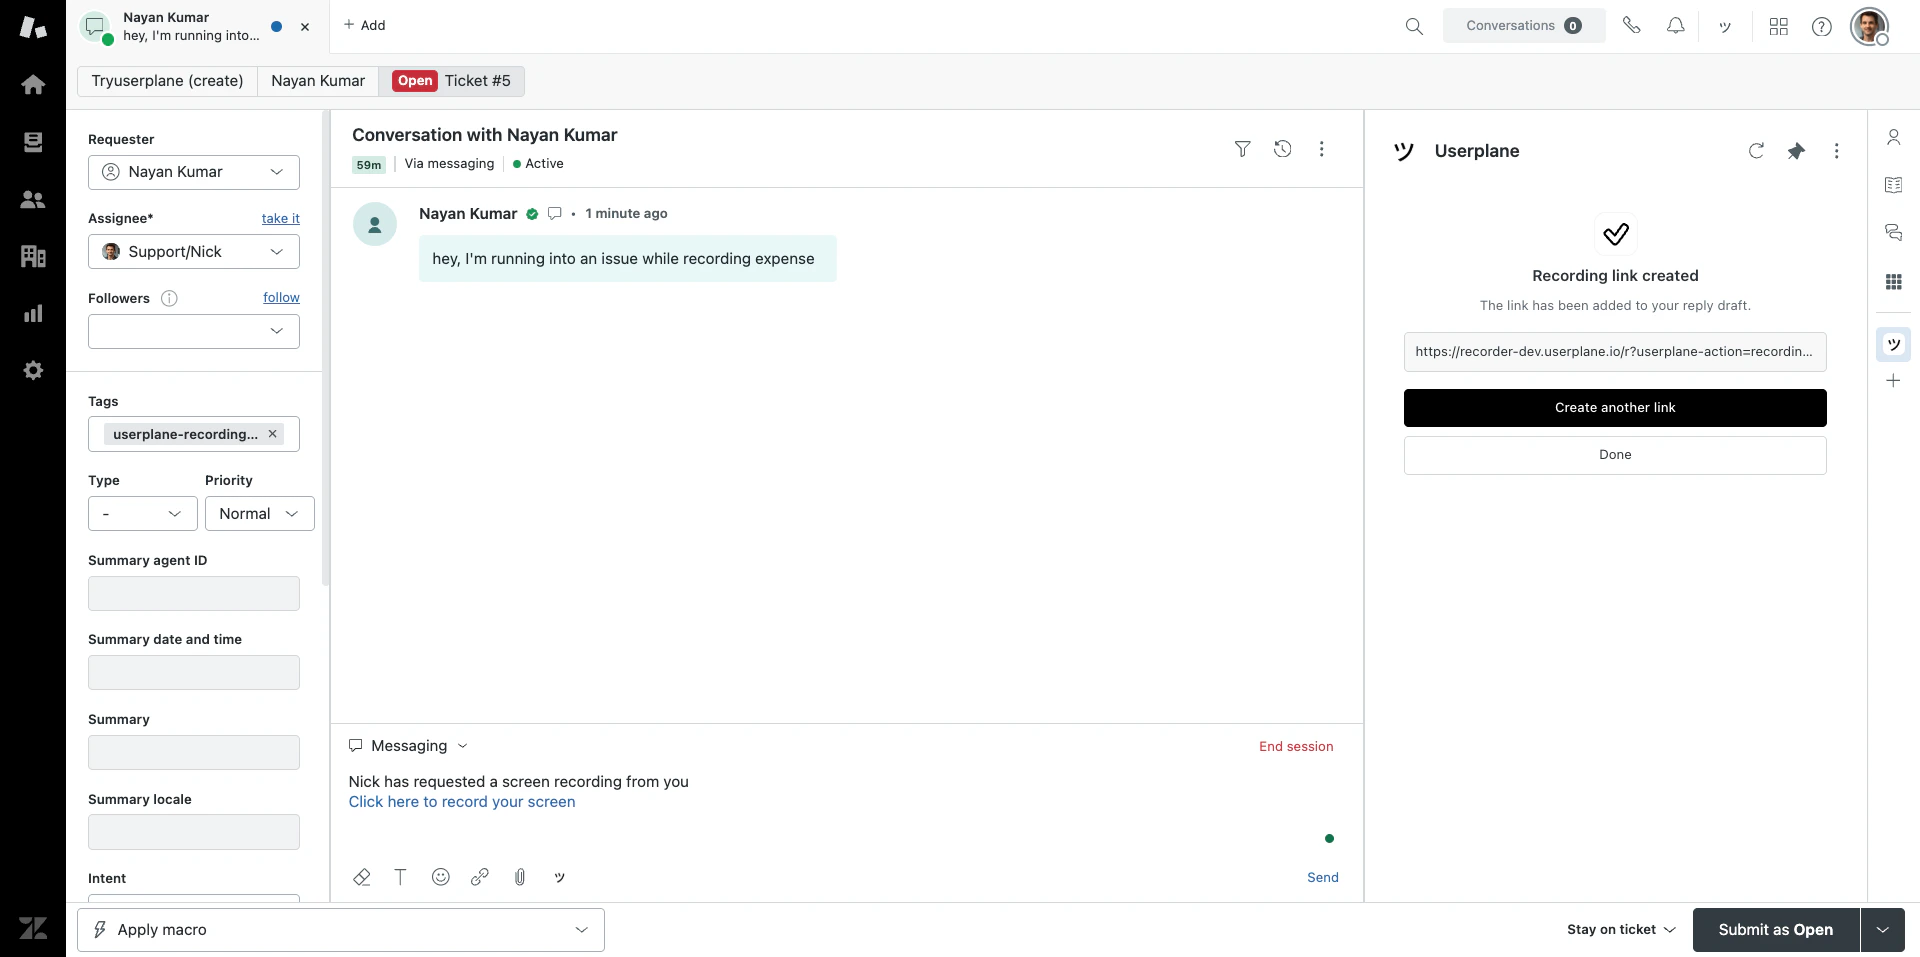
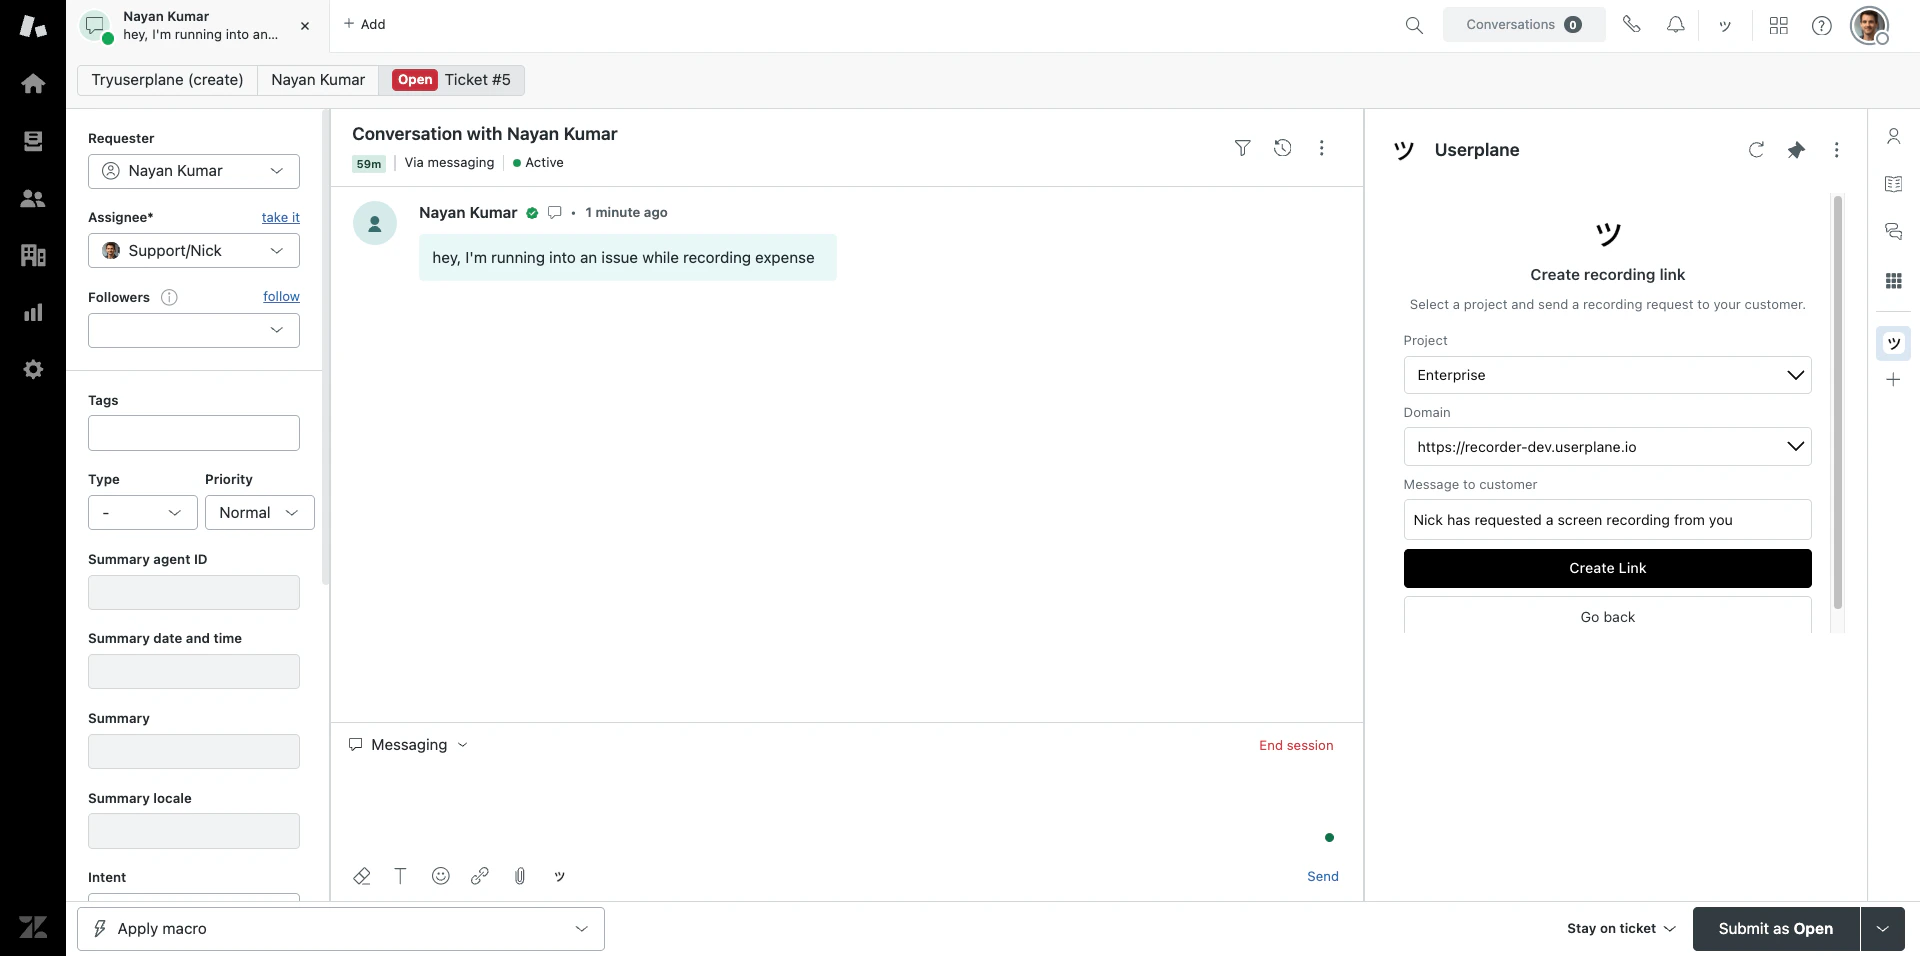 Click **Create Link**. The recording link is created and ready to share with the customer.
 ## Viewing and reviewing recordings
Once a customer completes a recording, there are two ways to access it:
When the recording is received, Userplane posts an **internal note** on the ticket — visible only to agents — with a direct link to the recording playback. Click the link to jump straight to the recording. See [Zendesk Notifications](/integrations/zendesk-notifications) for details.
Click **View Recordings** in the sidebar opener to browse all recordings for your workspace in the Userplane dashboard.
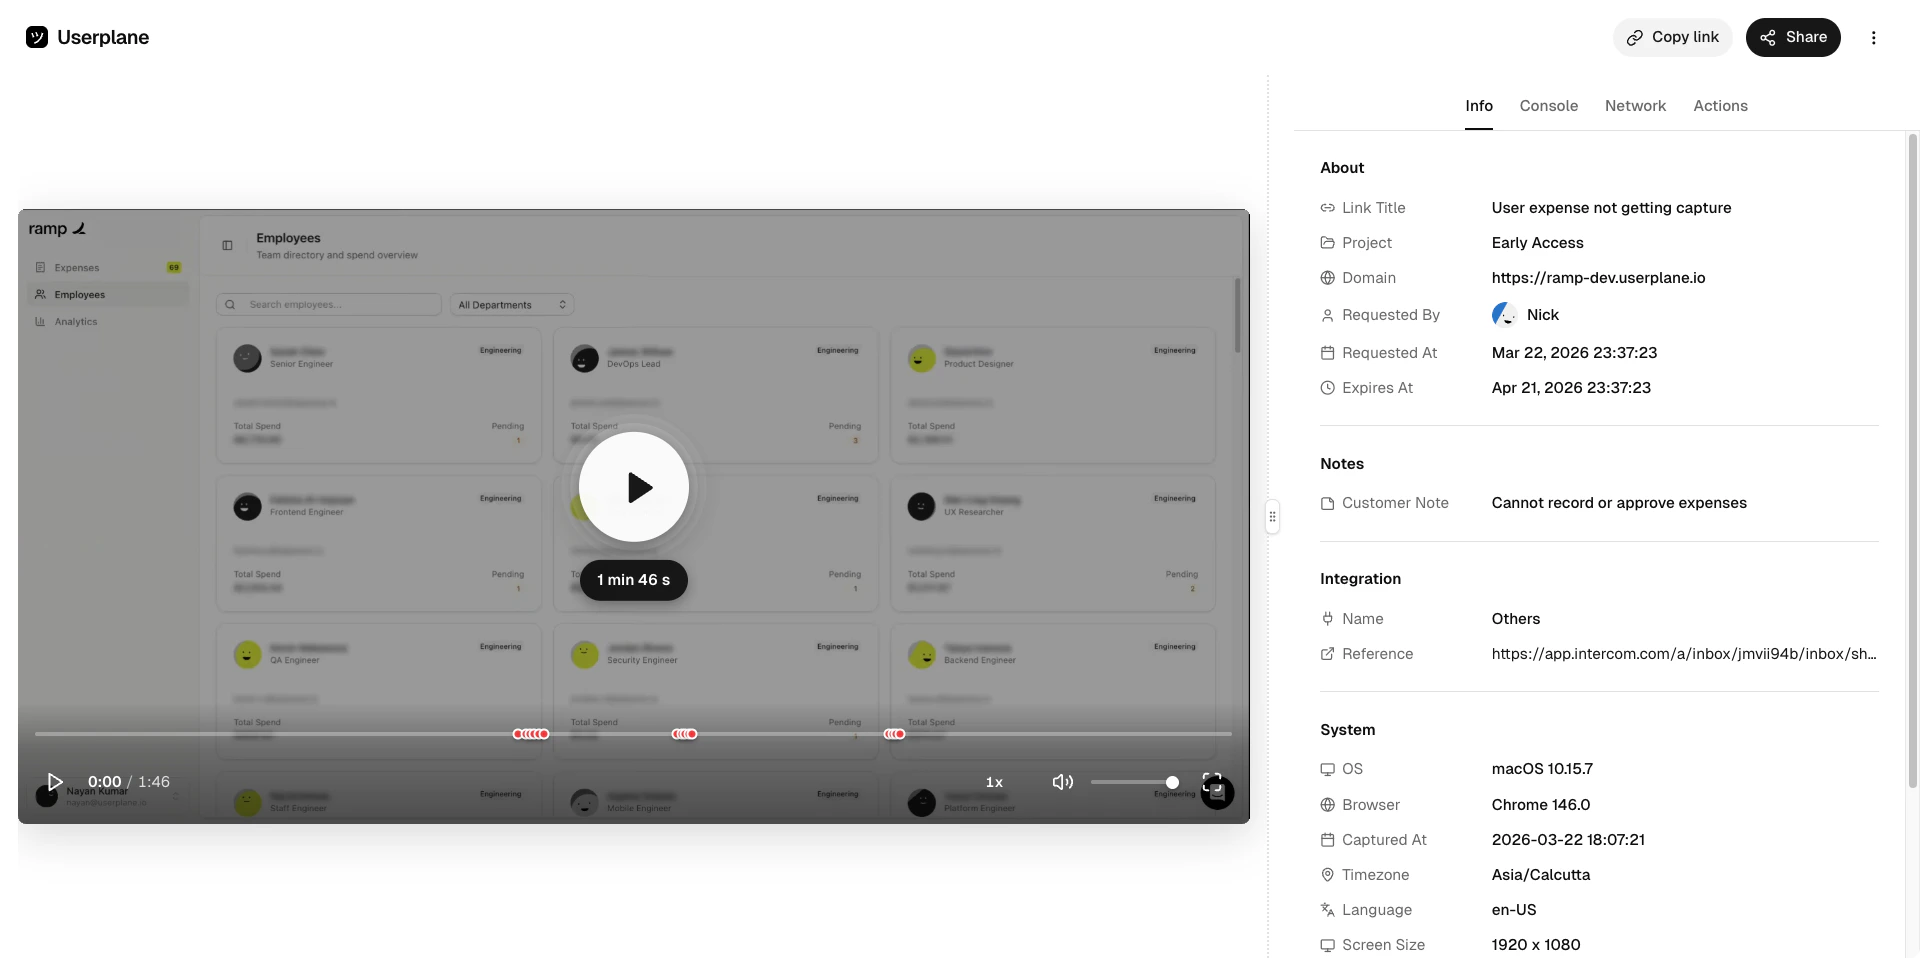
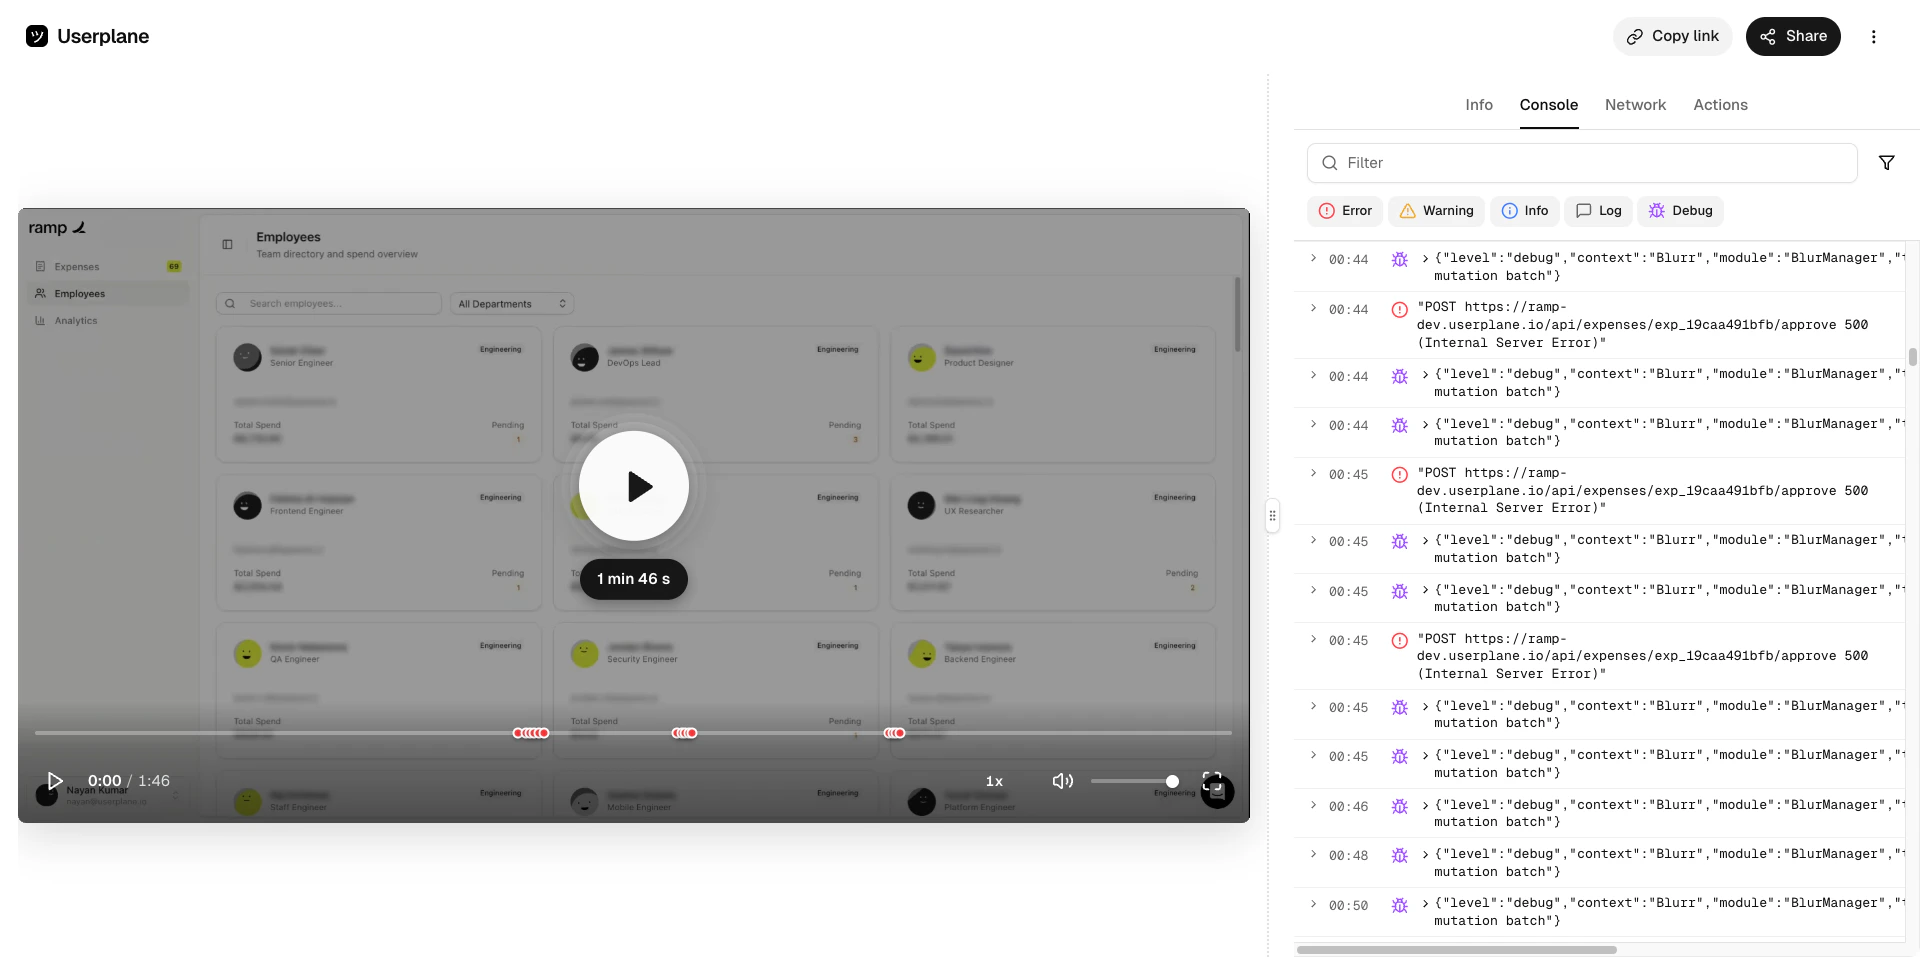
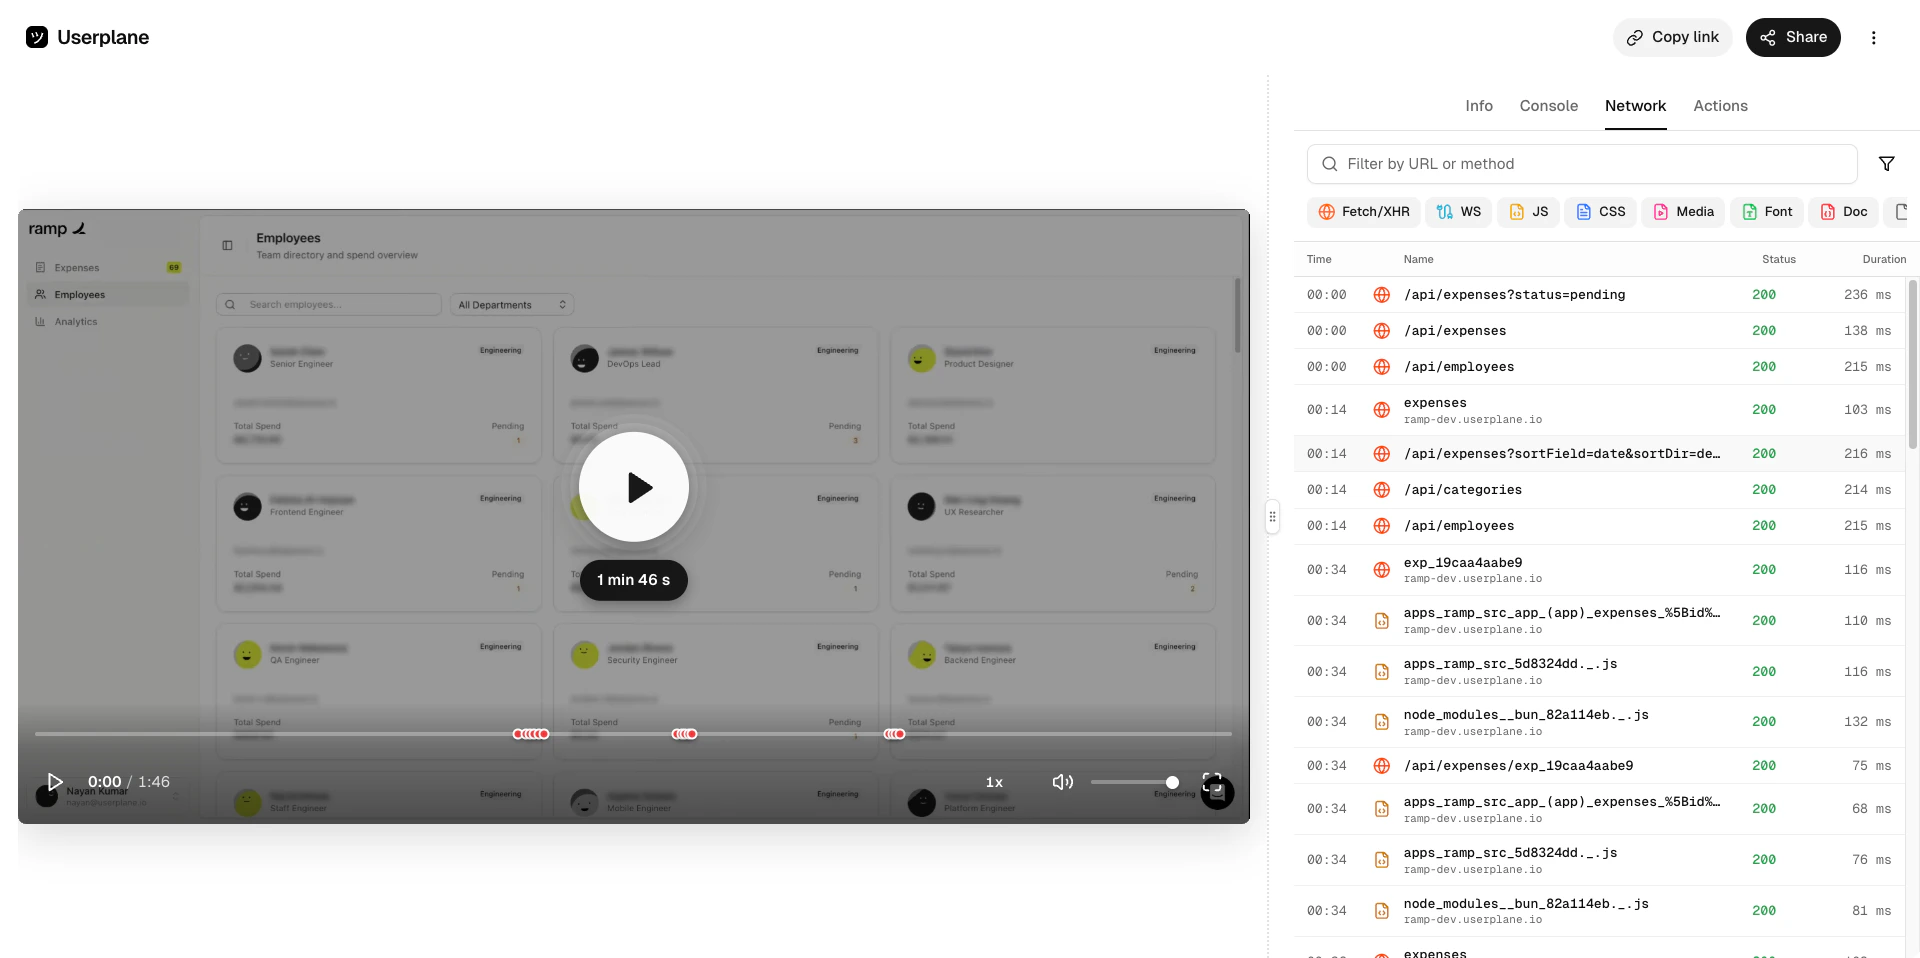
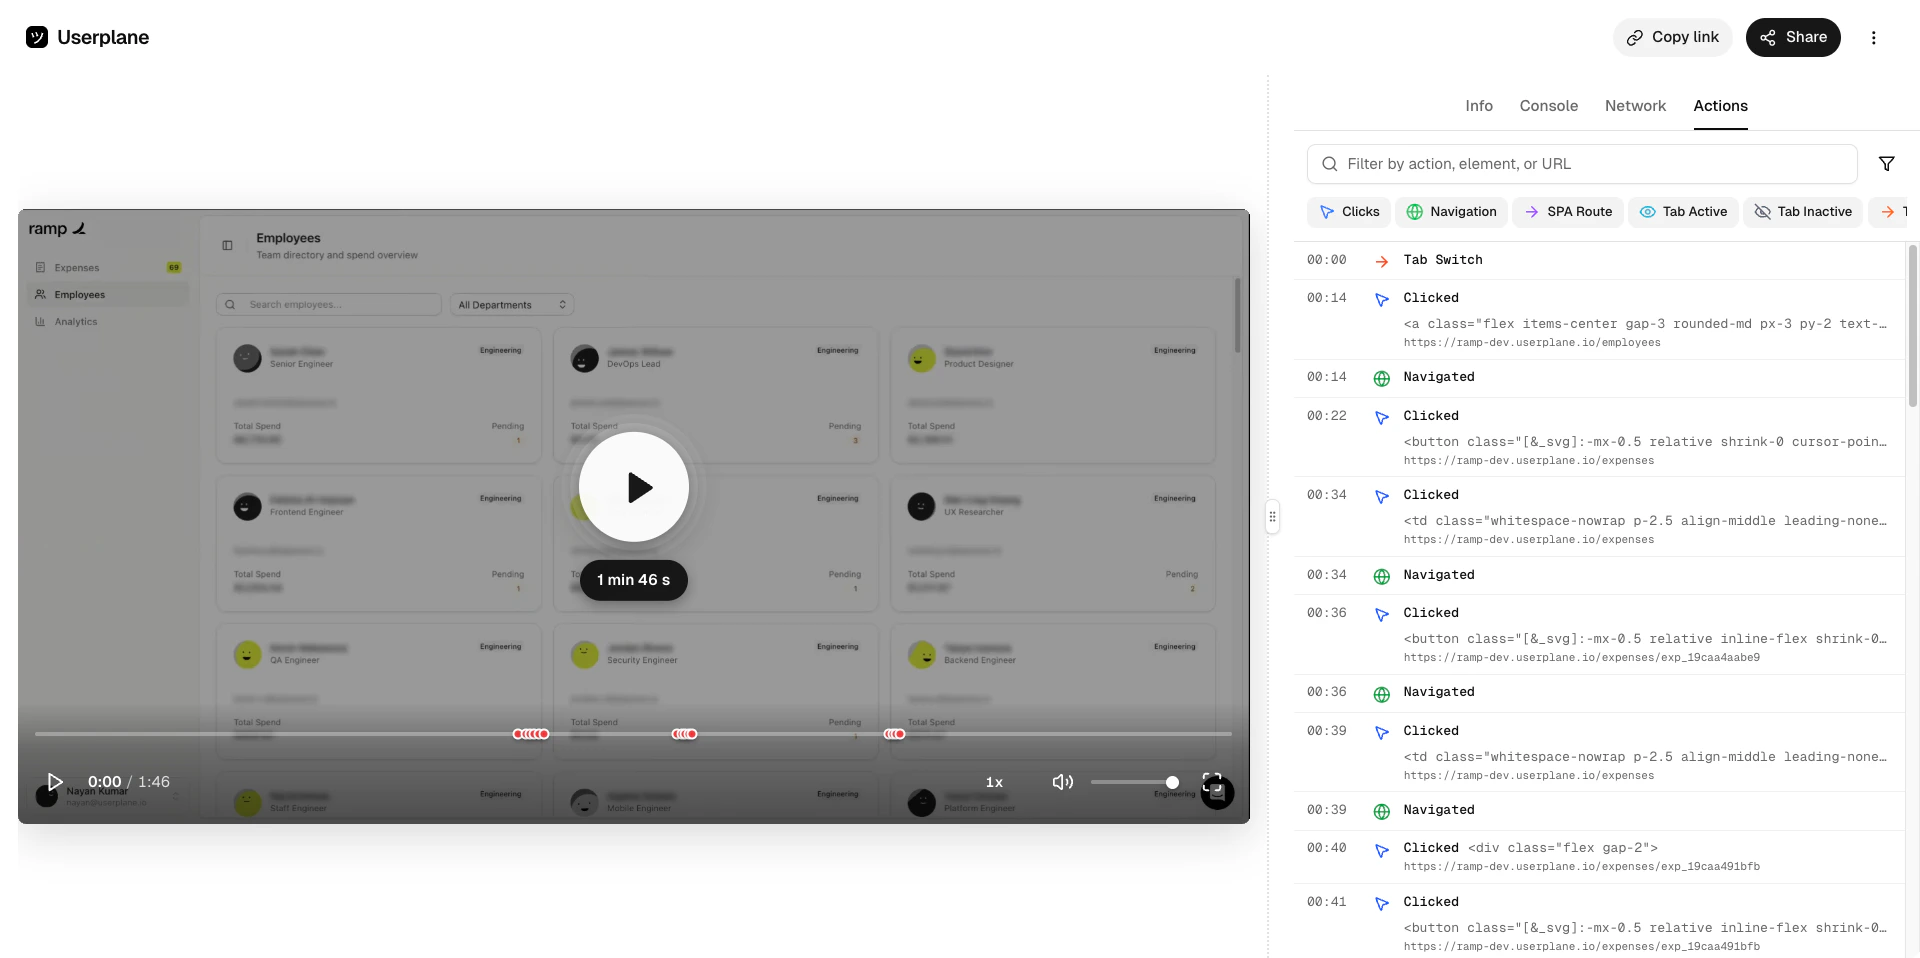
Watch the video and inspect the captured data — console logs, network requests, user actions, and metadata.
## Viewing and reviewing recordings
Once a customer completes a recording, there are two ways to access it:
When the recording is received, Userplane posts an **internal note** on the ticket — visible only to agents — with a direct link to the recording playback. Click the link to jump straight to the recording. See [Zendesk Notifications](/integrations/zendesk-notifications) for details.
Click **View Recordings** in the sidebar opener to browse all recordings for your workspace in the Userplane dashboard.
Watch the video and inspect the captured data — console logs, network requests, user actions, and metadata.
 ## Ticket context capture
When you create a recording link from a ticket, Userplane automatically captures:
* **Ticket ID** and **subject**
* **Priority** and **type**
* **Tags**
* **Requester** name and email
* **Agent** name and email
This metadata appears in the recording's **Info** tab, making it easy to trace recordings back to the original support conversation.
## Automatic ticket tagging
When a recording link is created from a ticket, Userplane adds the tag `userplane-recording-requested` to the ticket. You can use this tag in Zendesk views, triggers, and automations to track which tickets have pending recording requests.
## Using the ticket editor instead
If you prefer a faster workflow, use the **ticket editor button** to create and insert a recording
link directly into your reply draft — without opening the sidebar. See [Zendesk Ticket
Editor](/integrations/zendesk-ticket-editor) for details.
## Requirements
* The Zendesk integration must be [connected](/integrations/zendesk).
* The agent must be a member of the Userplane workspace.
* Domains must be [verified](/workspace/domain-verification) to appear in the domain dropdown.
## Related articles
* [Zendesk Integration](/integrations/zendesk) — overview and connection guide.
* [Zendesk Ticket Editor](/integrations/zendesk-ticket-editor) — insert links from the reply editor toolbar.
* [Zendesk Notifications](/integrations/zendesk-notifications) — automatic internal notes when recordings arrive.
* [Requesting a Recording](/recording/requesting) — creating links from the Userplane dashboard.
## Ticket context capture
When you create a recording link from a ticket, Userplane automatically captures:
* **Ticket ID** and **subject**
* **Priority** and **type**
* **Tags**
* **Requester** name and email
* **Agent** name and email
This metadata appears in the recording's **Info** tab, making it easy to trace recordings back to the original support conversation.
## Automatic ticket tagging
When a recording link is created from a ticket, Userplane adds the tag `userplane-recording-requested` to the ticket. You can use this tag in Zendesk views, triggers, and automations to track which tickets have pending recording requests.
## Using the ticket editor instead
If you prefer a faster workflow, use the **ticket editor button** to create and insert a recording
link directly into your reply draft — without opening the sidebar. See [Zendesk Ticket
Editor](/integrations/zendesk-ticket-editor) for details.
## Requirements
* The Zendesk integration must be [connected](/integrations/zendesk).
* The agent must be a member of the Userplane workspace.
* Domains must be [verified](/workspace/domain-verification) to appear in the domain dropdown.
## Related articles
* [Zendesk Integration](/integrations/zendesk) — overview and connection guide.
* [Zendesk Ticket Editor](/integrations/zendesk-ticket-editor) — insert links from the reply editor toolbar.
* [Zendesk Notifications](/integrations/zendesk-notifications) — automatic internal notes when recordings arrive.
* [Requesting a Recording](/recording/requesting) — creating links from the Userplane dashboard.