> ## Documentation Index
> Fetch the complete documentation index at: https://docs.userplane.io/llms.txt
> Use this file to discover all available pages before exploring further.
# Zendesk Integration
> Connect Userplane to Zendesk for in-ticket screen recording requests
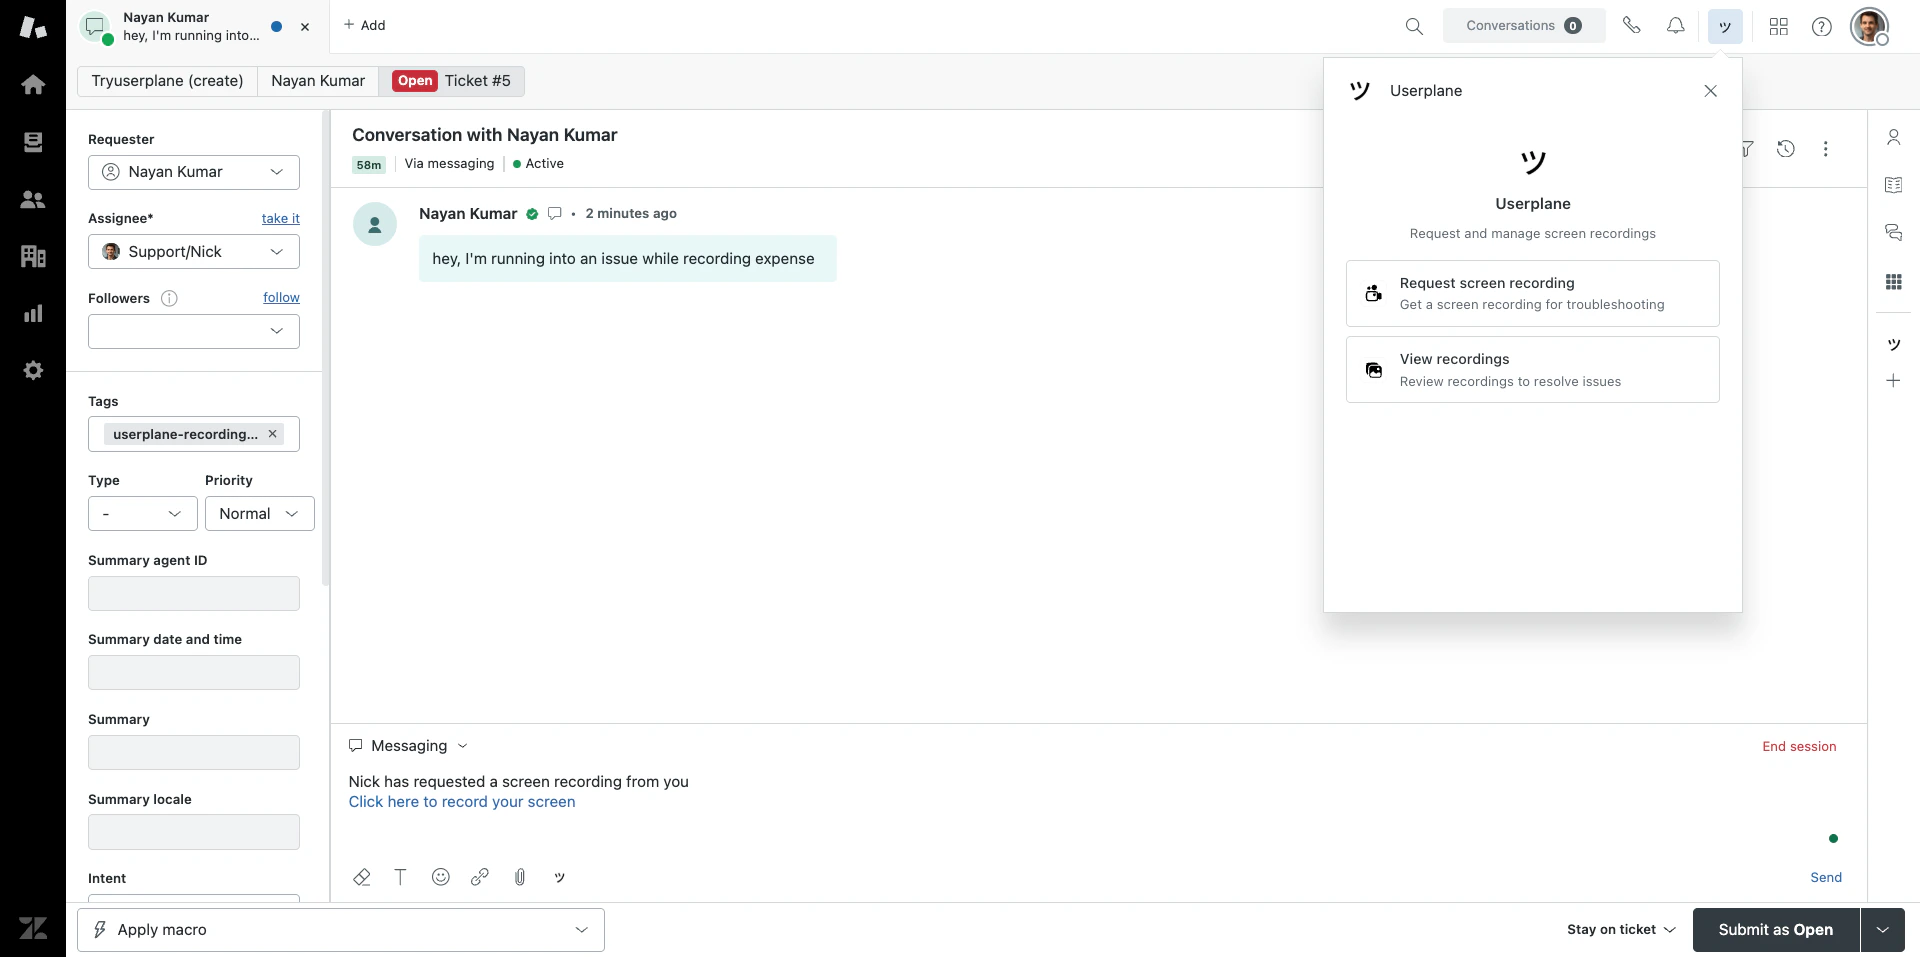
The Zendesk integration lets your support team request and review screen recordings directly from Zendesk tickets. Agents can create recording links, insert them into replies, and get notified when recordings arrive — all without leaving Zendesk.
## What the integration does
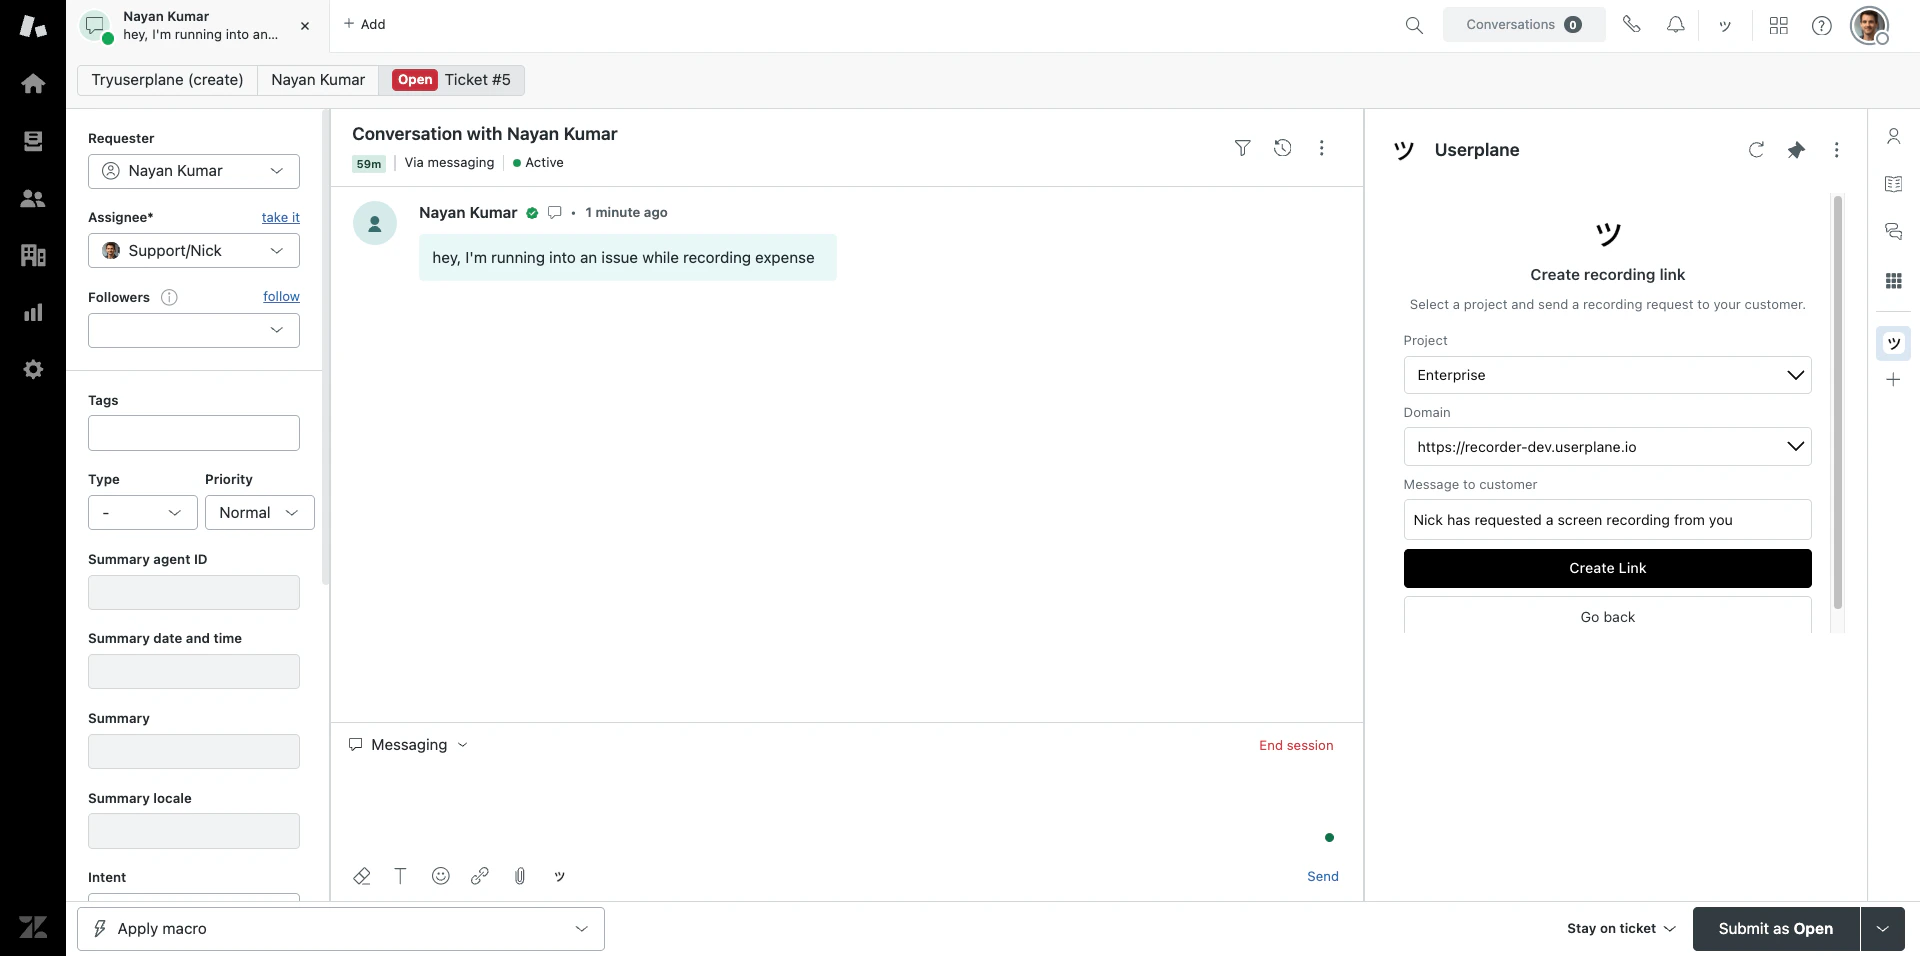
* Installs a **ticket sidebar app** for creating recording links and viewing recordings.
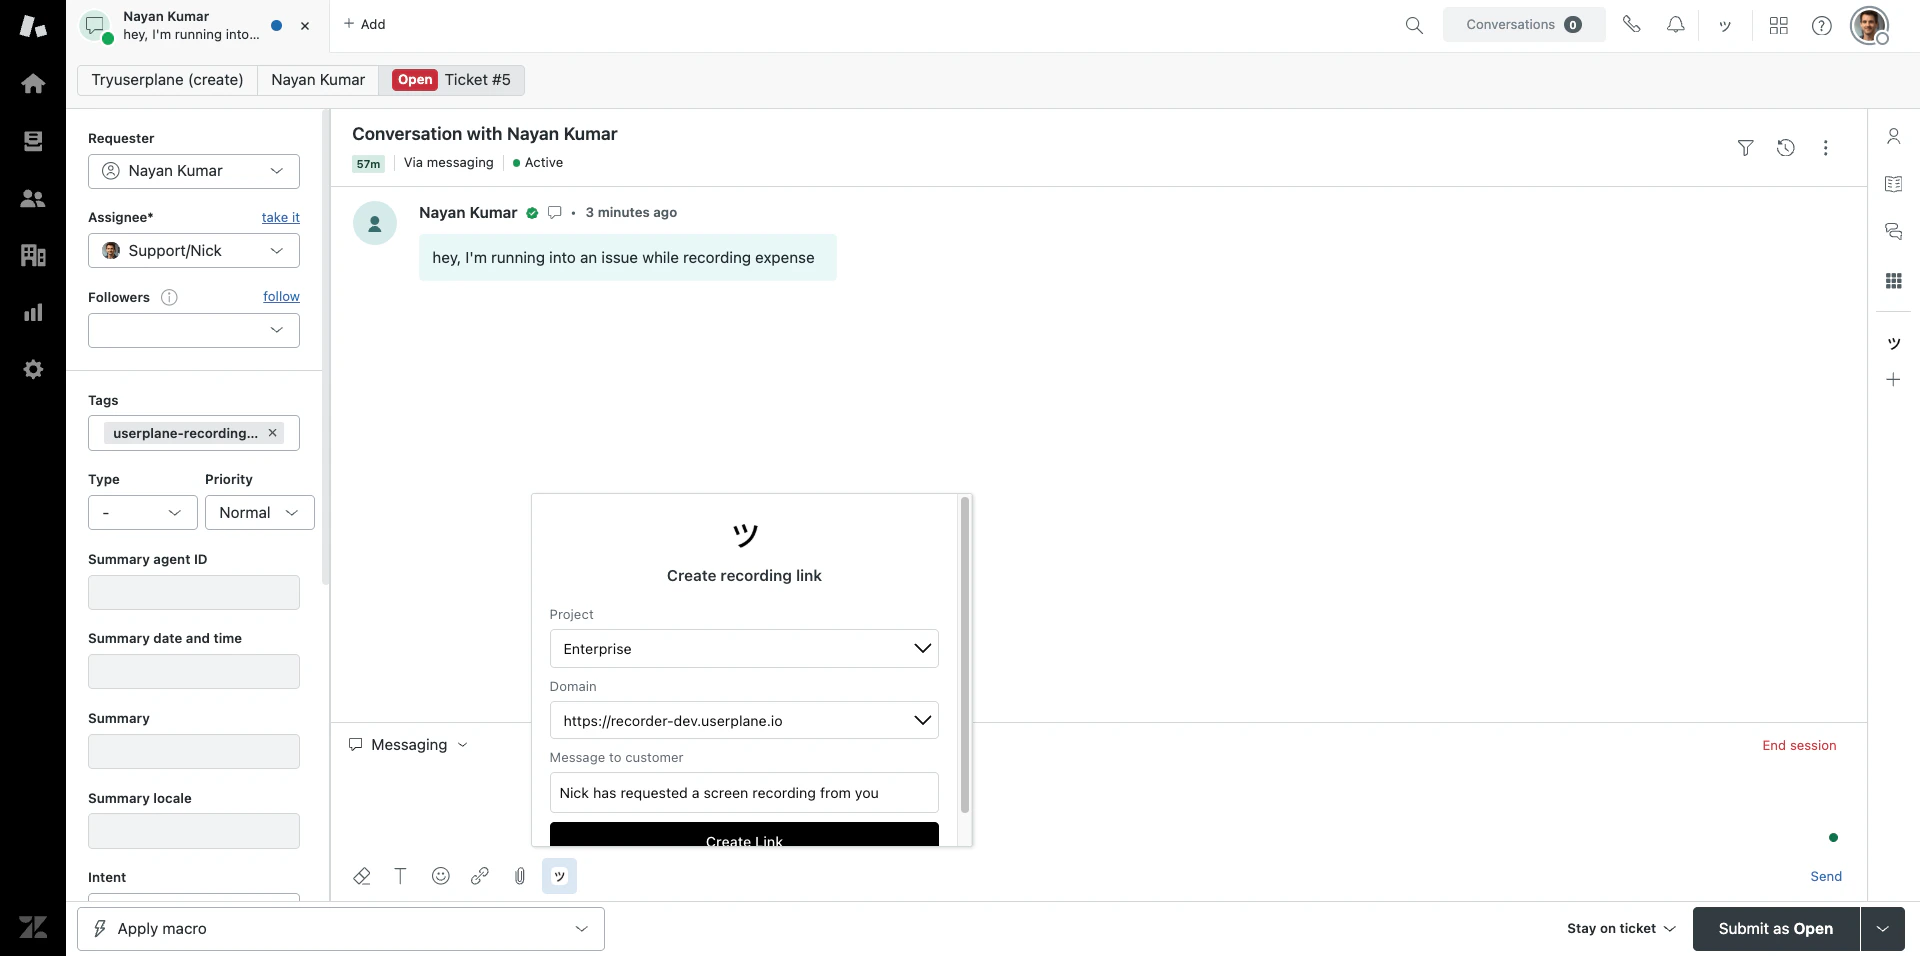
* Adds a **ticket editor button** so agents can insert recording links directly into reply drafts.
* Adds a **top bar app** for quick link creation from anywhere in Zendesk.
* Automatically **tags tickets** with `userplane-recording-requested` when a link is created.
* Posts **internal notes** to tickets when recordings are received.
* Captures **ticket context** — ID, subject, priority, type, tags, and requester info — with each recording link.
## Connecting Zendesk
There are two ways to connect Userplane to Zendesk — create a new workspace during setup or connect an existing one:
Only workspace **owners** and **admins** can authorize the Zendesk connection.
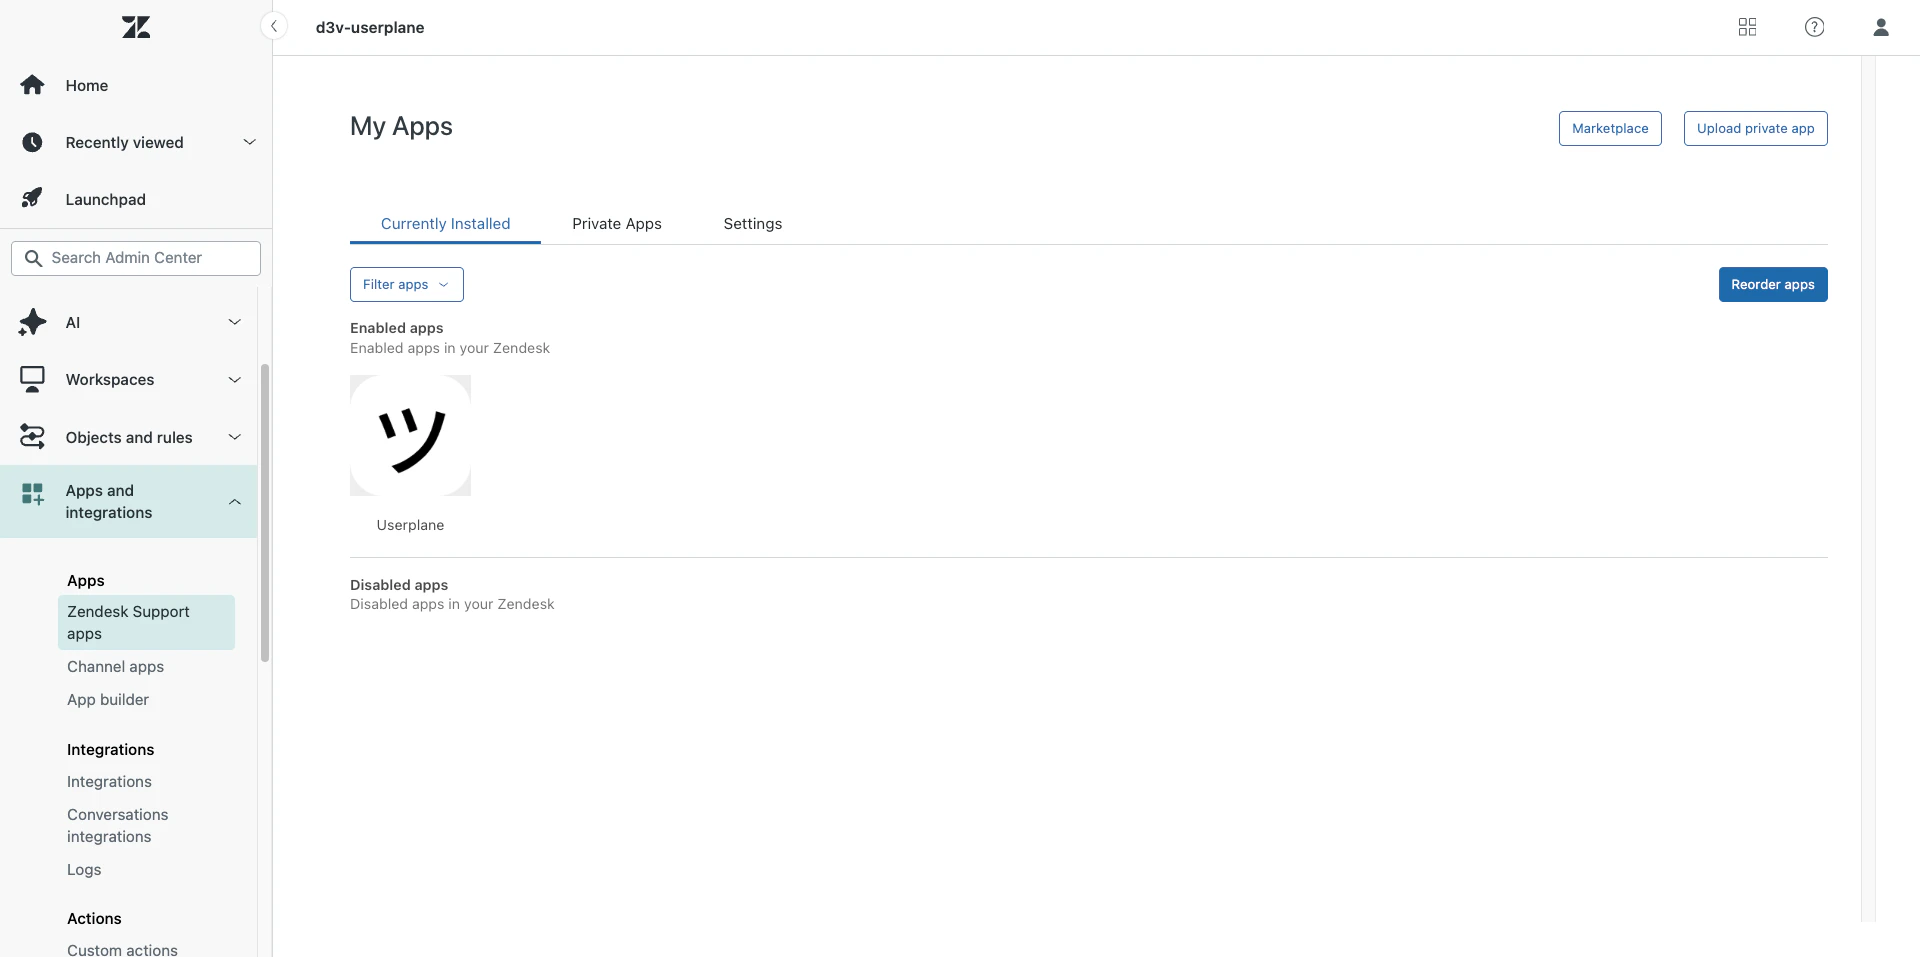
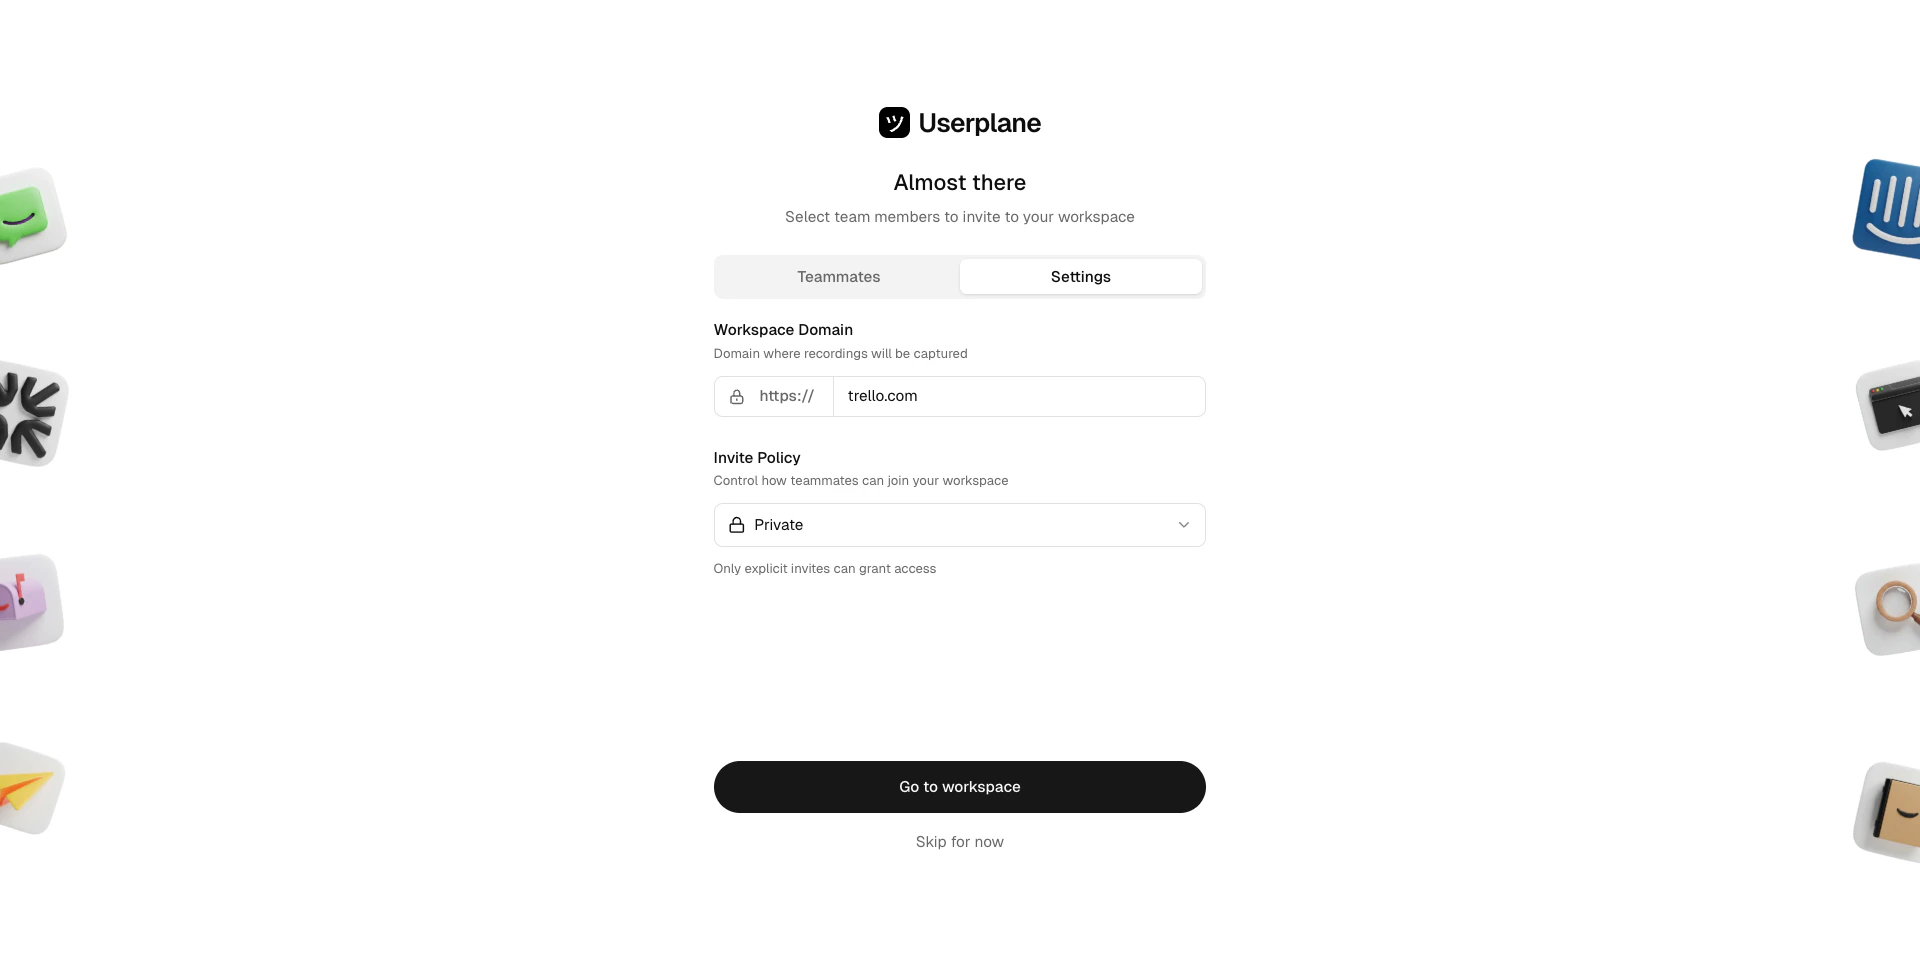
Install the Zendesk app and create a new Userplane workspace during the authorization flow.
Find Userplane in the [Zendesk Marketplace](https://www.zendesk.com/marketplace/apps/support/1229987/screen-recording-by-userplane/) and install it to your Zendesk account.
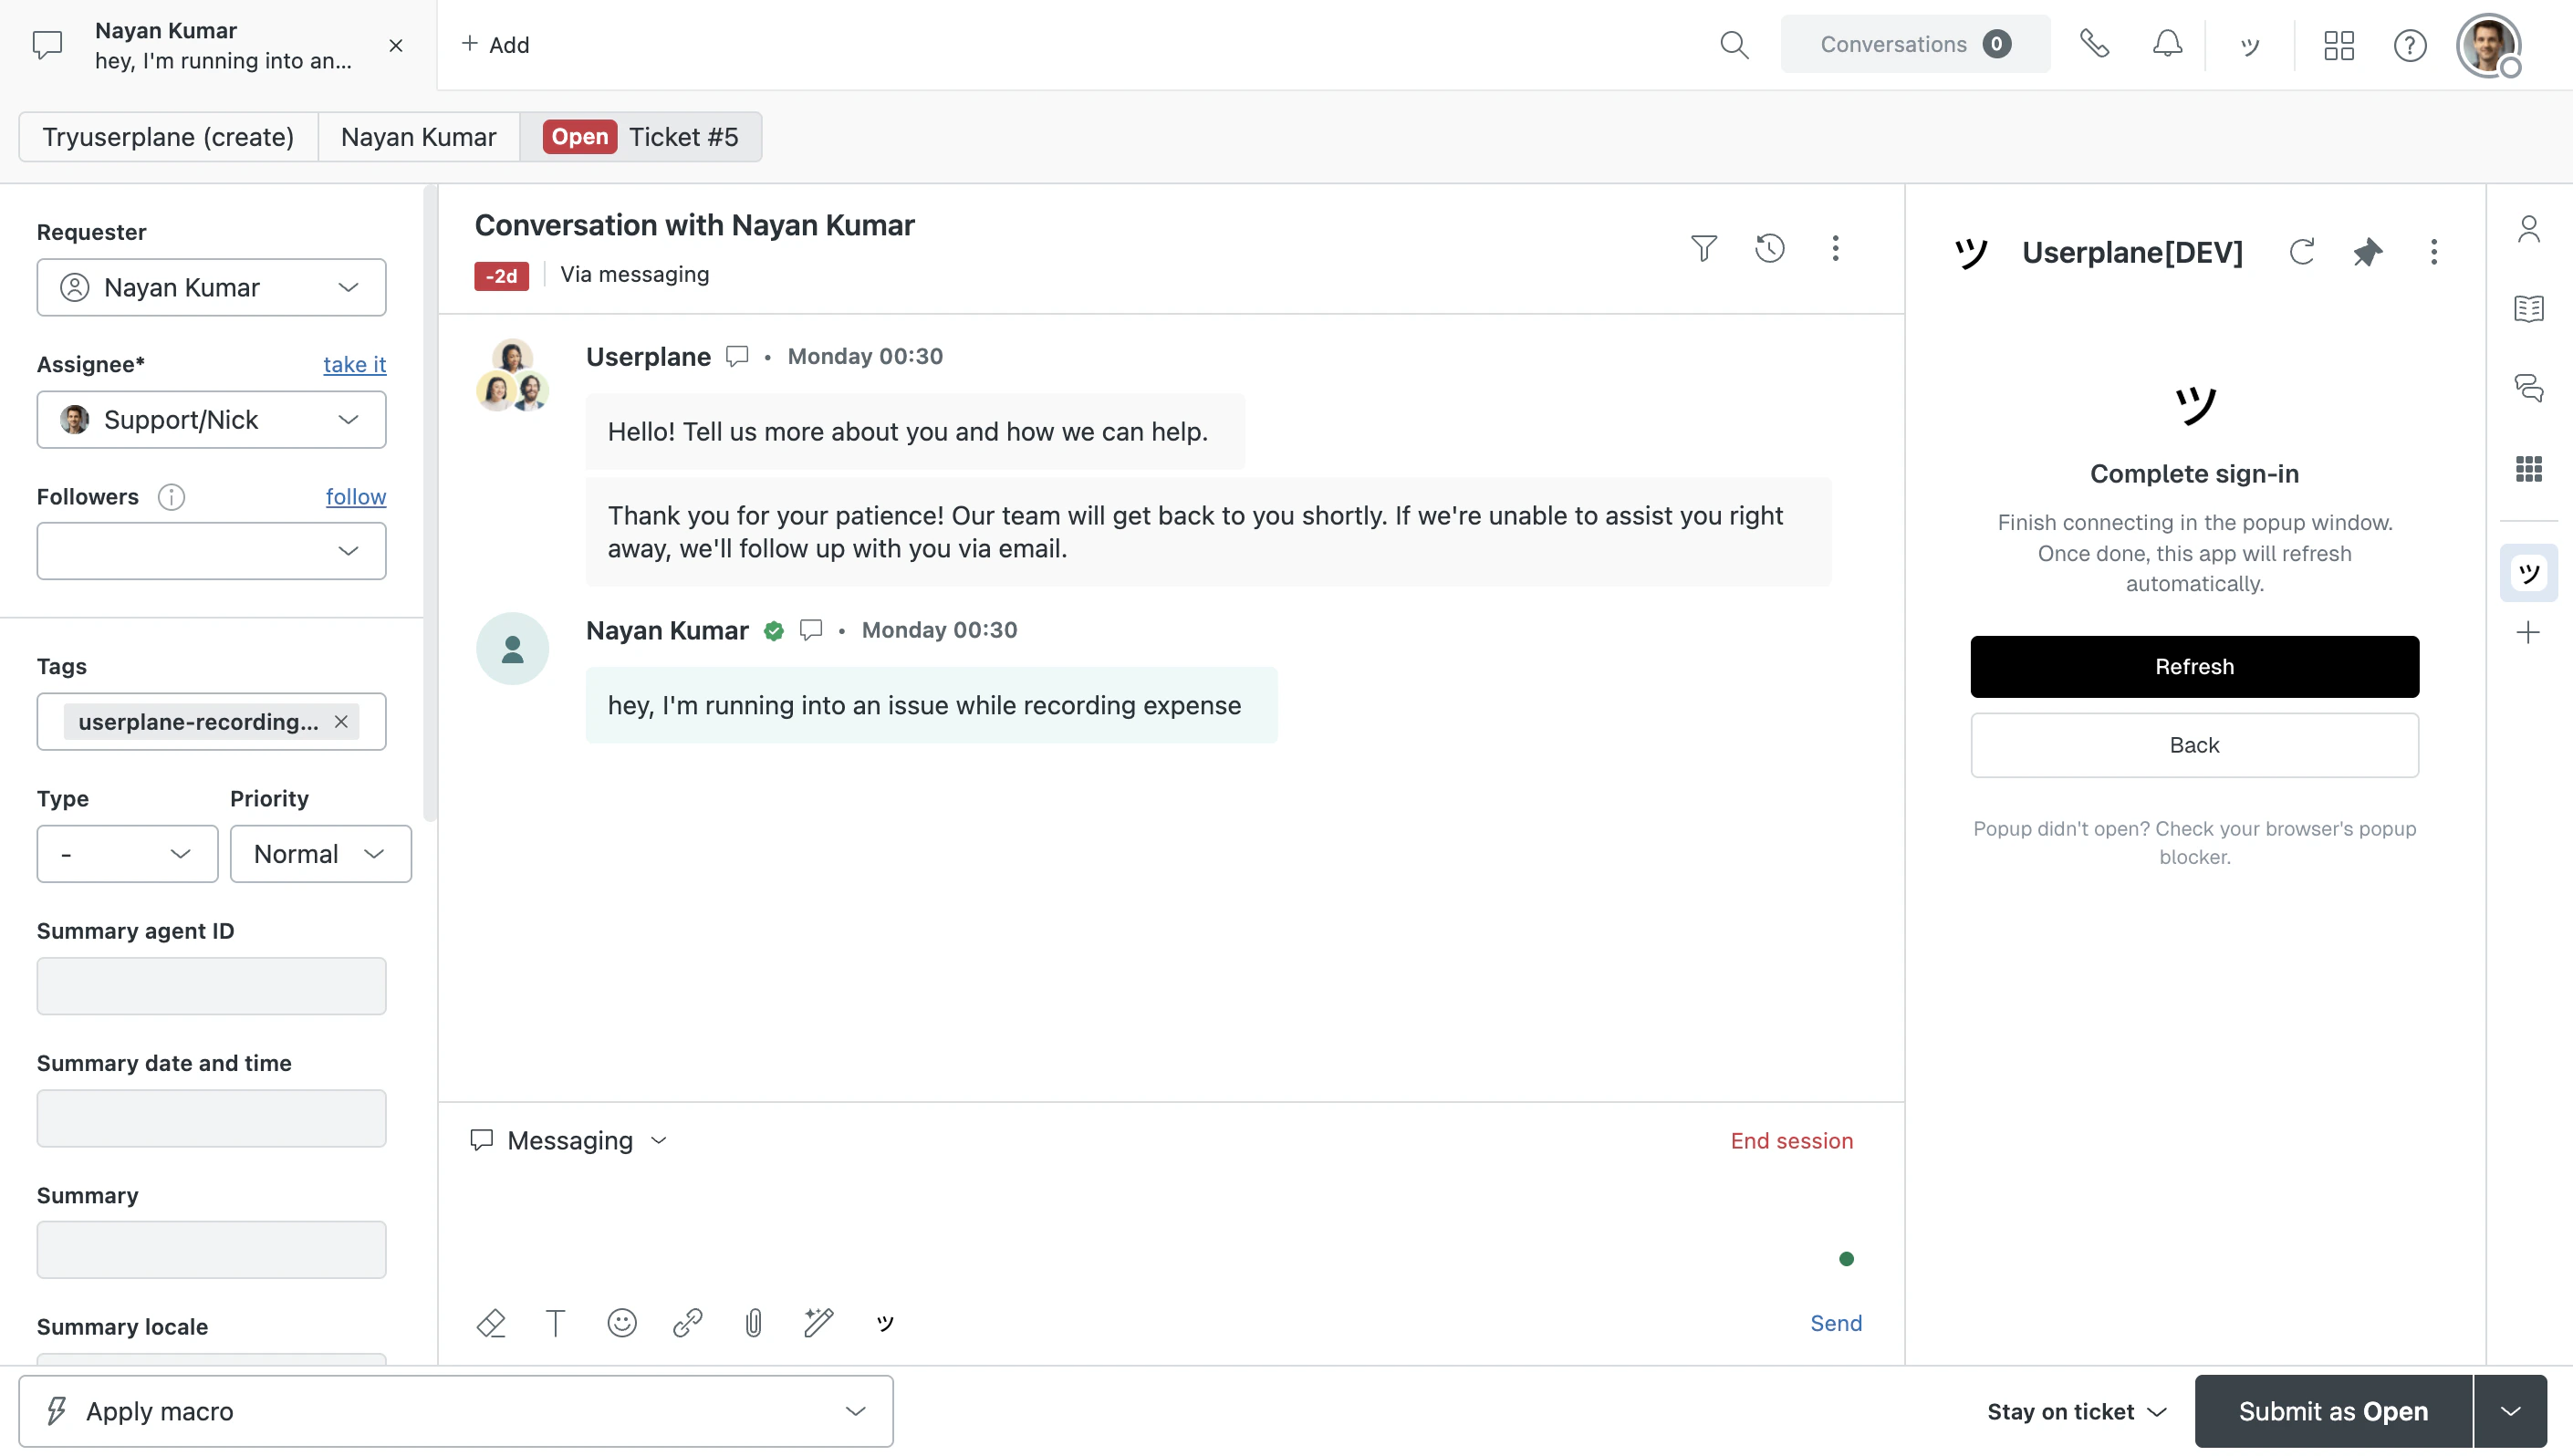
 Open any ticket in Zendesk and click the **Userplane** app in the ticket sidebar to start the authorization flow.
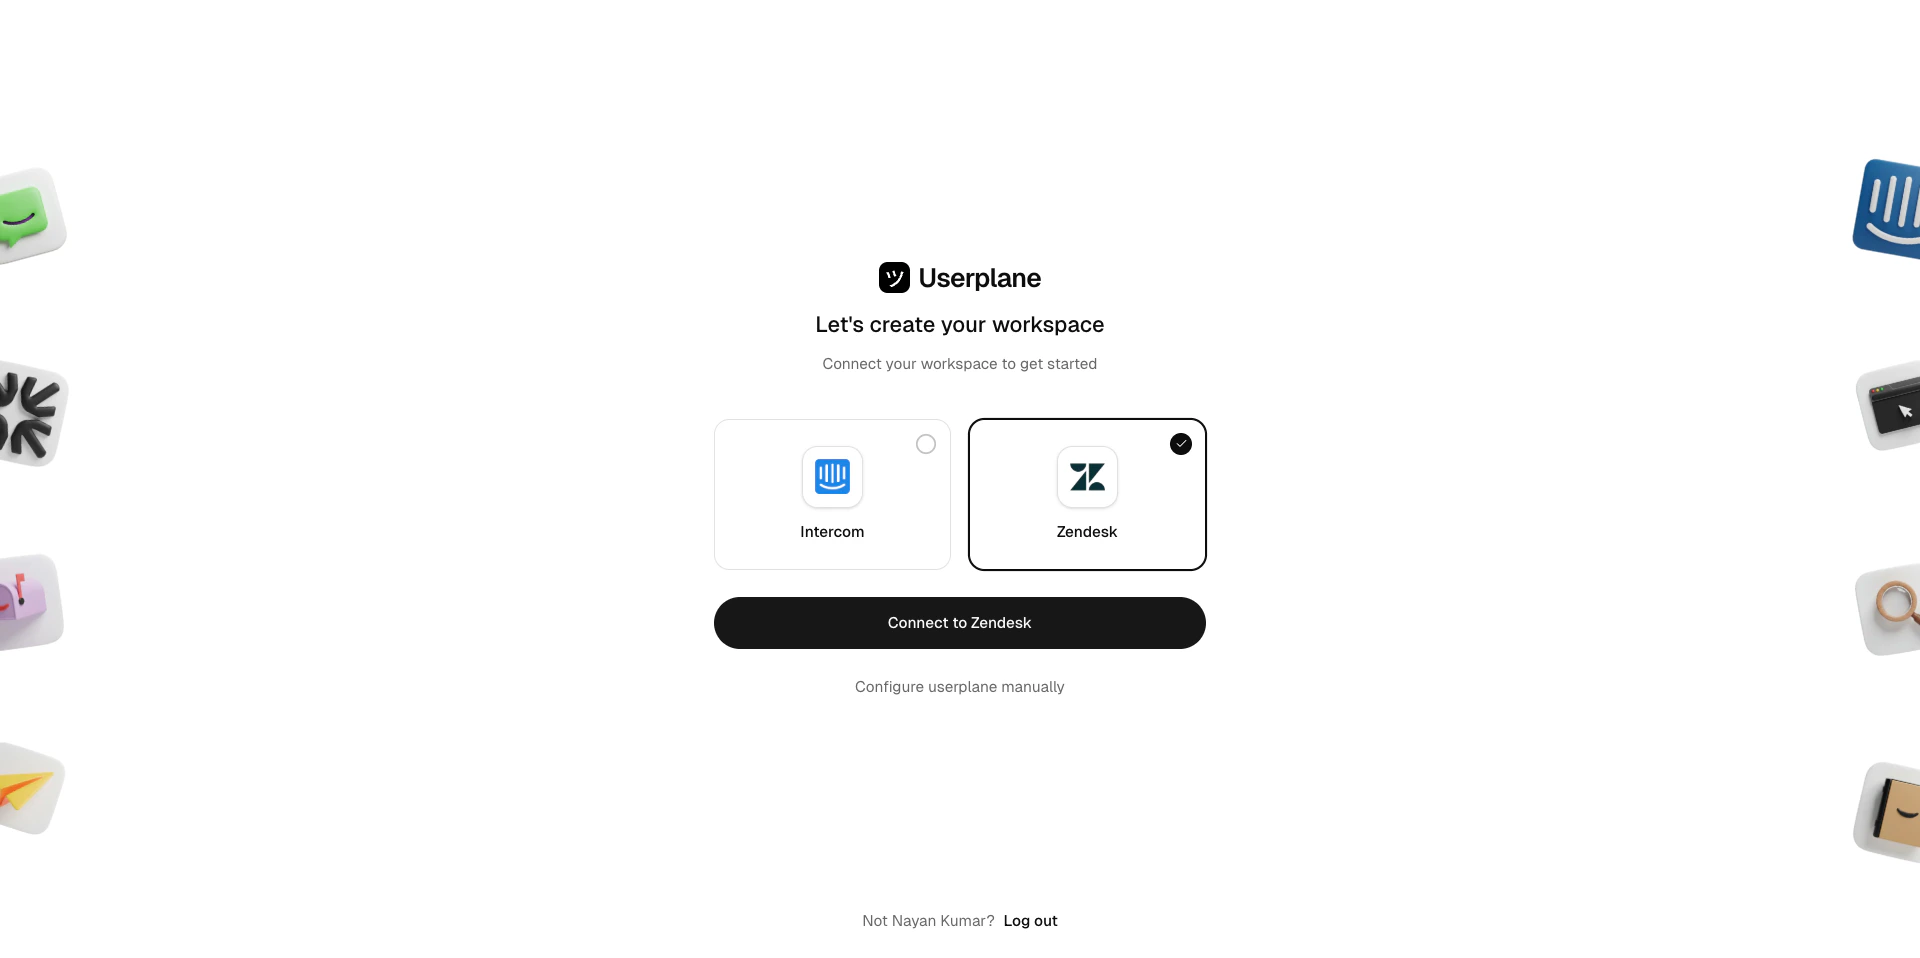
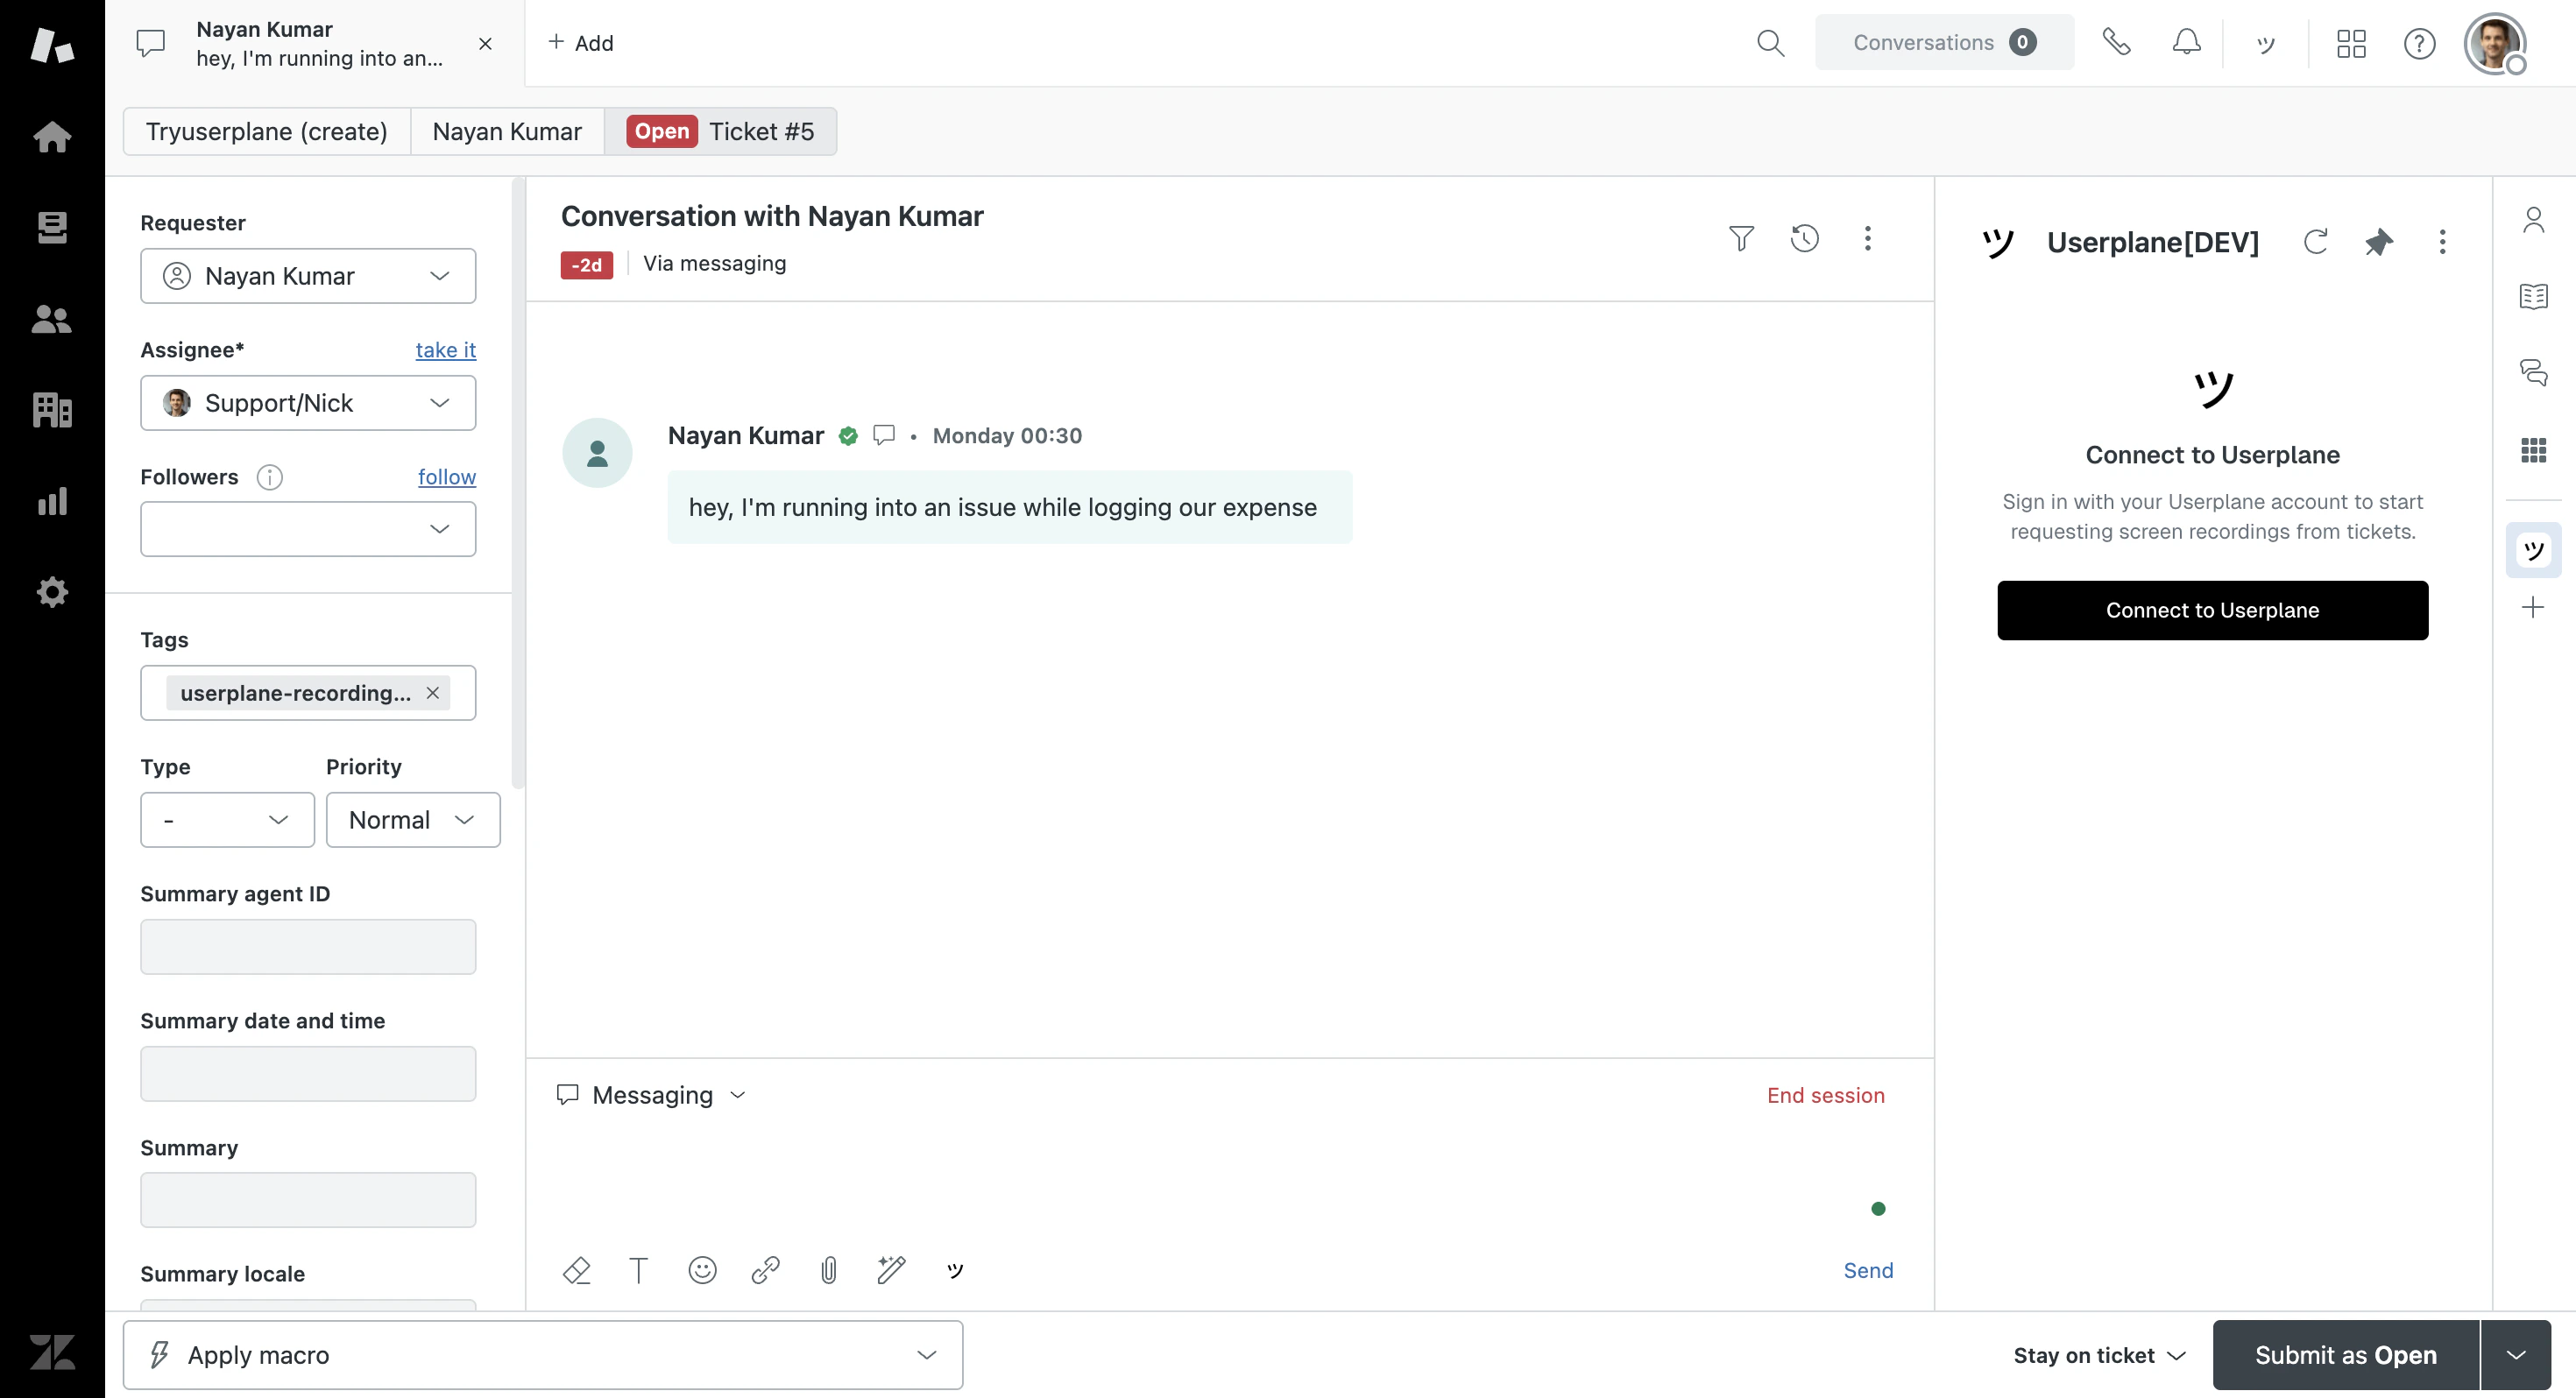 Click **Connect to Userplane** and choose to create a new workspace.
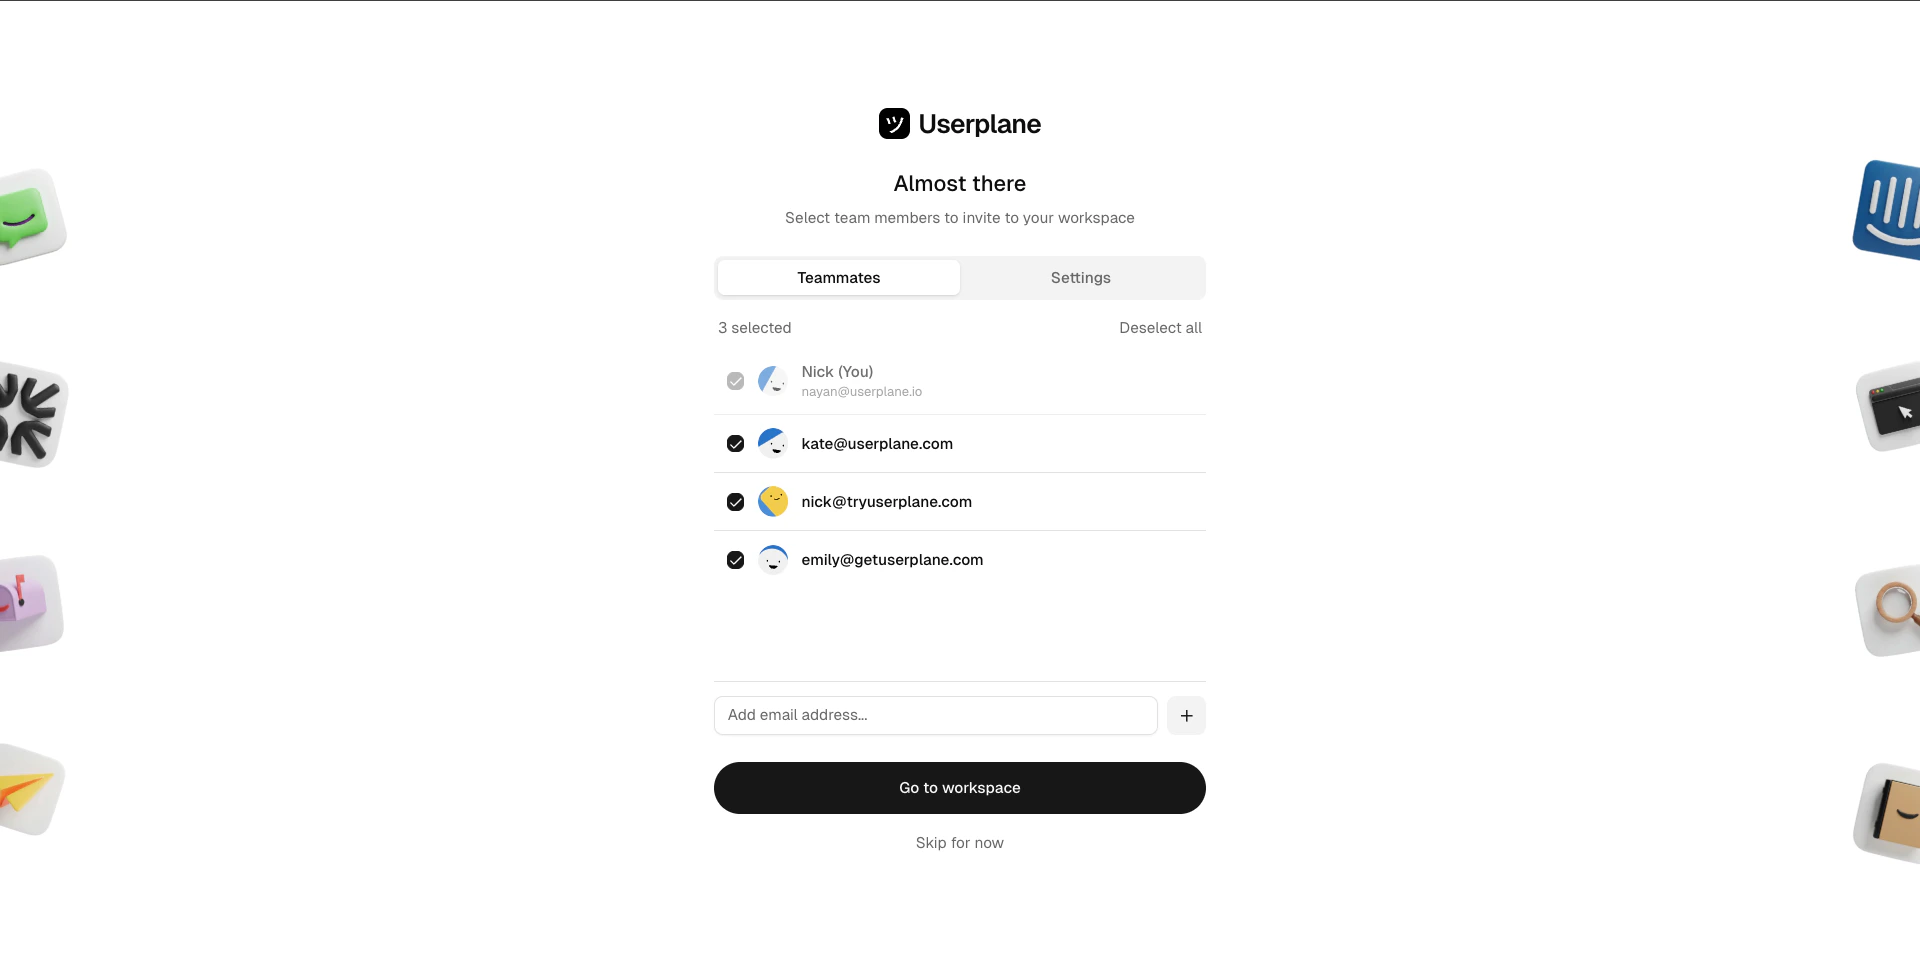
 Invite your support team to the new Userplane workspace.
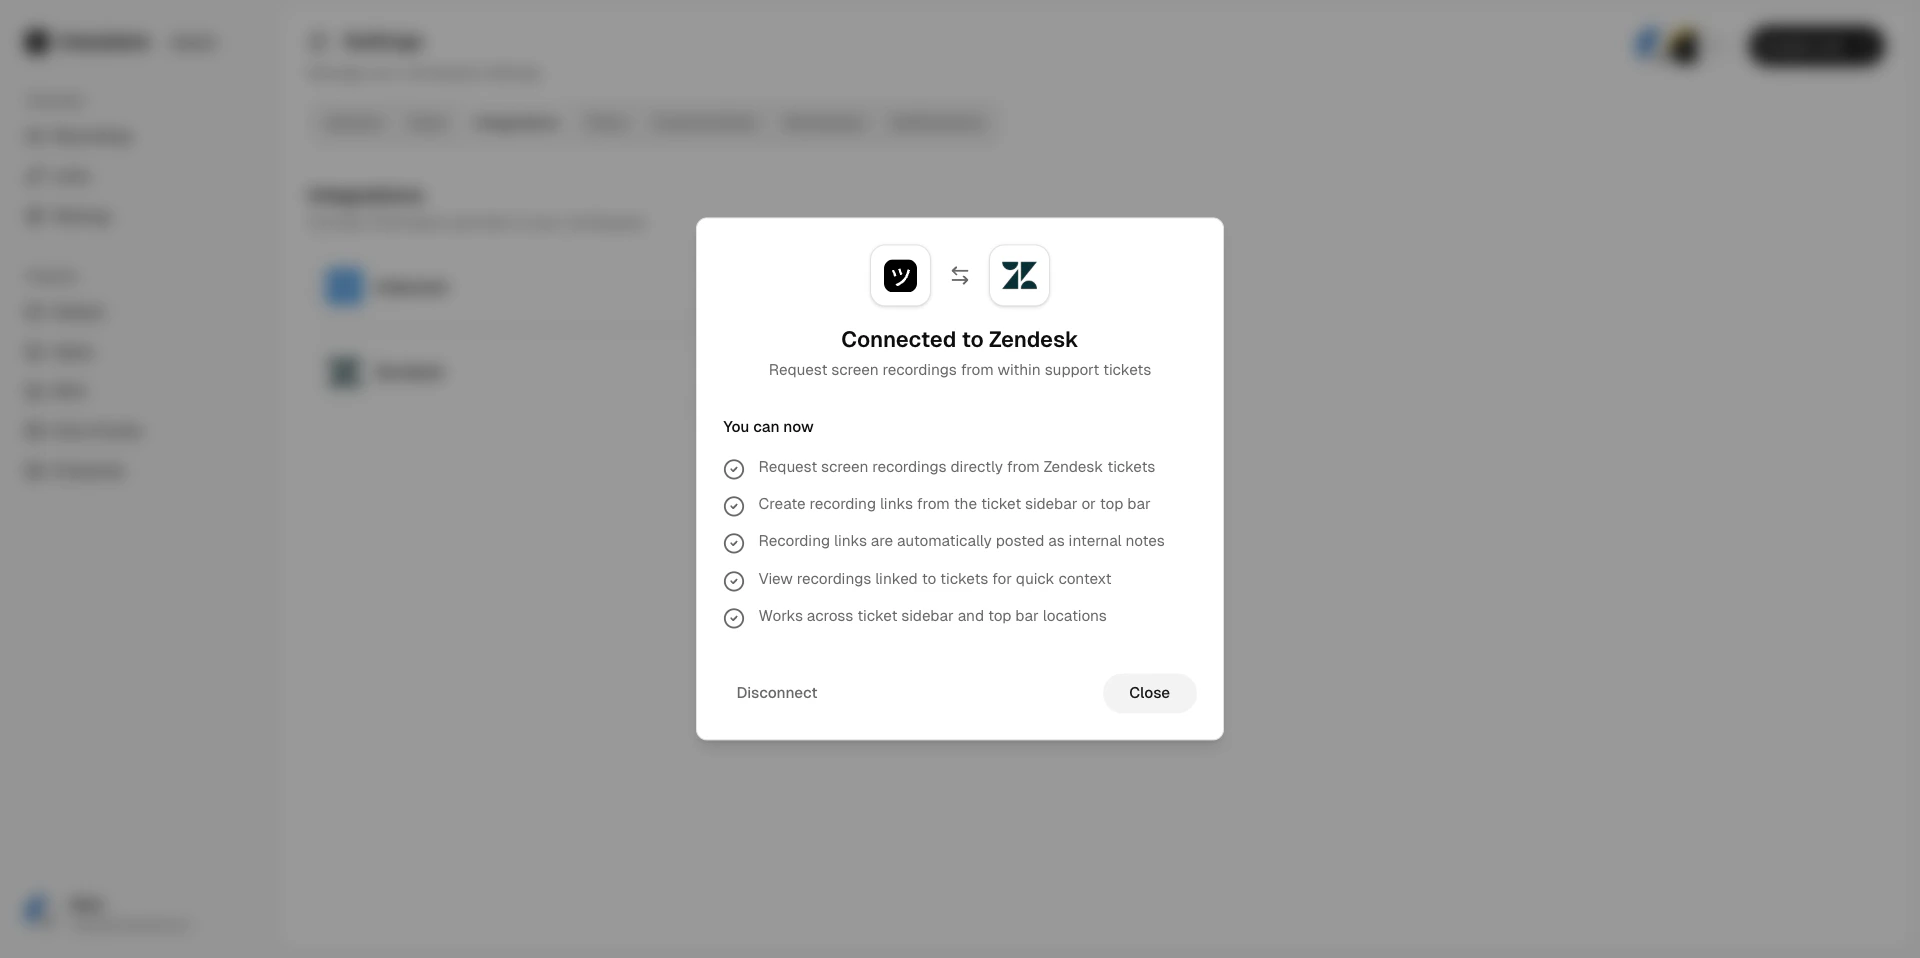
 Confirm the integration is connected in your workspace settings.
 Go back to the Zendesk app and click **Refresh** to pick up the newly connected workspace.
 The Userplane app is now available across Zendesk — ticket sidebar, ticket editor, and top bar.
 If you already have a Userplane workspace, install the Zendesk app and connect it to your existing workspace.
Find Userplane in the [Zendesk Marketplace](https://www.zendesk.com/marketplace/apps/support/1229987/screen-recording-by-userplane/) and install it to your Zendesk account.
Open any ticket in Zendesk and click the **Userplane** app in the ticket sidebar to start the authorization flow.
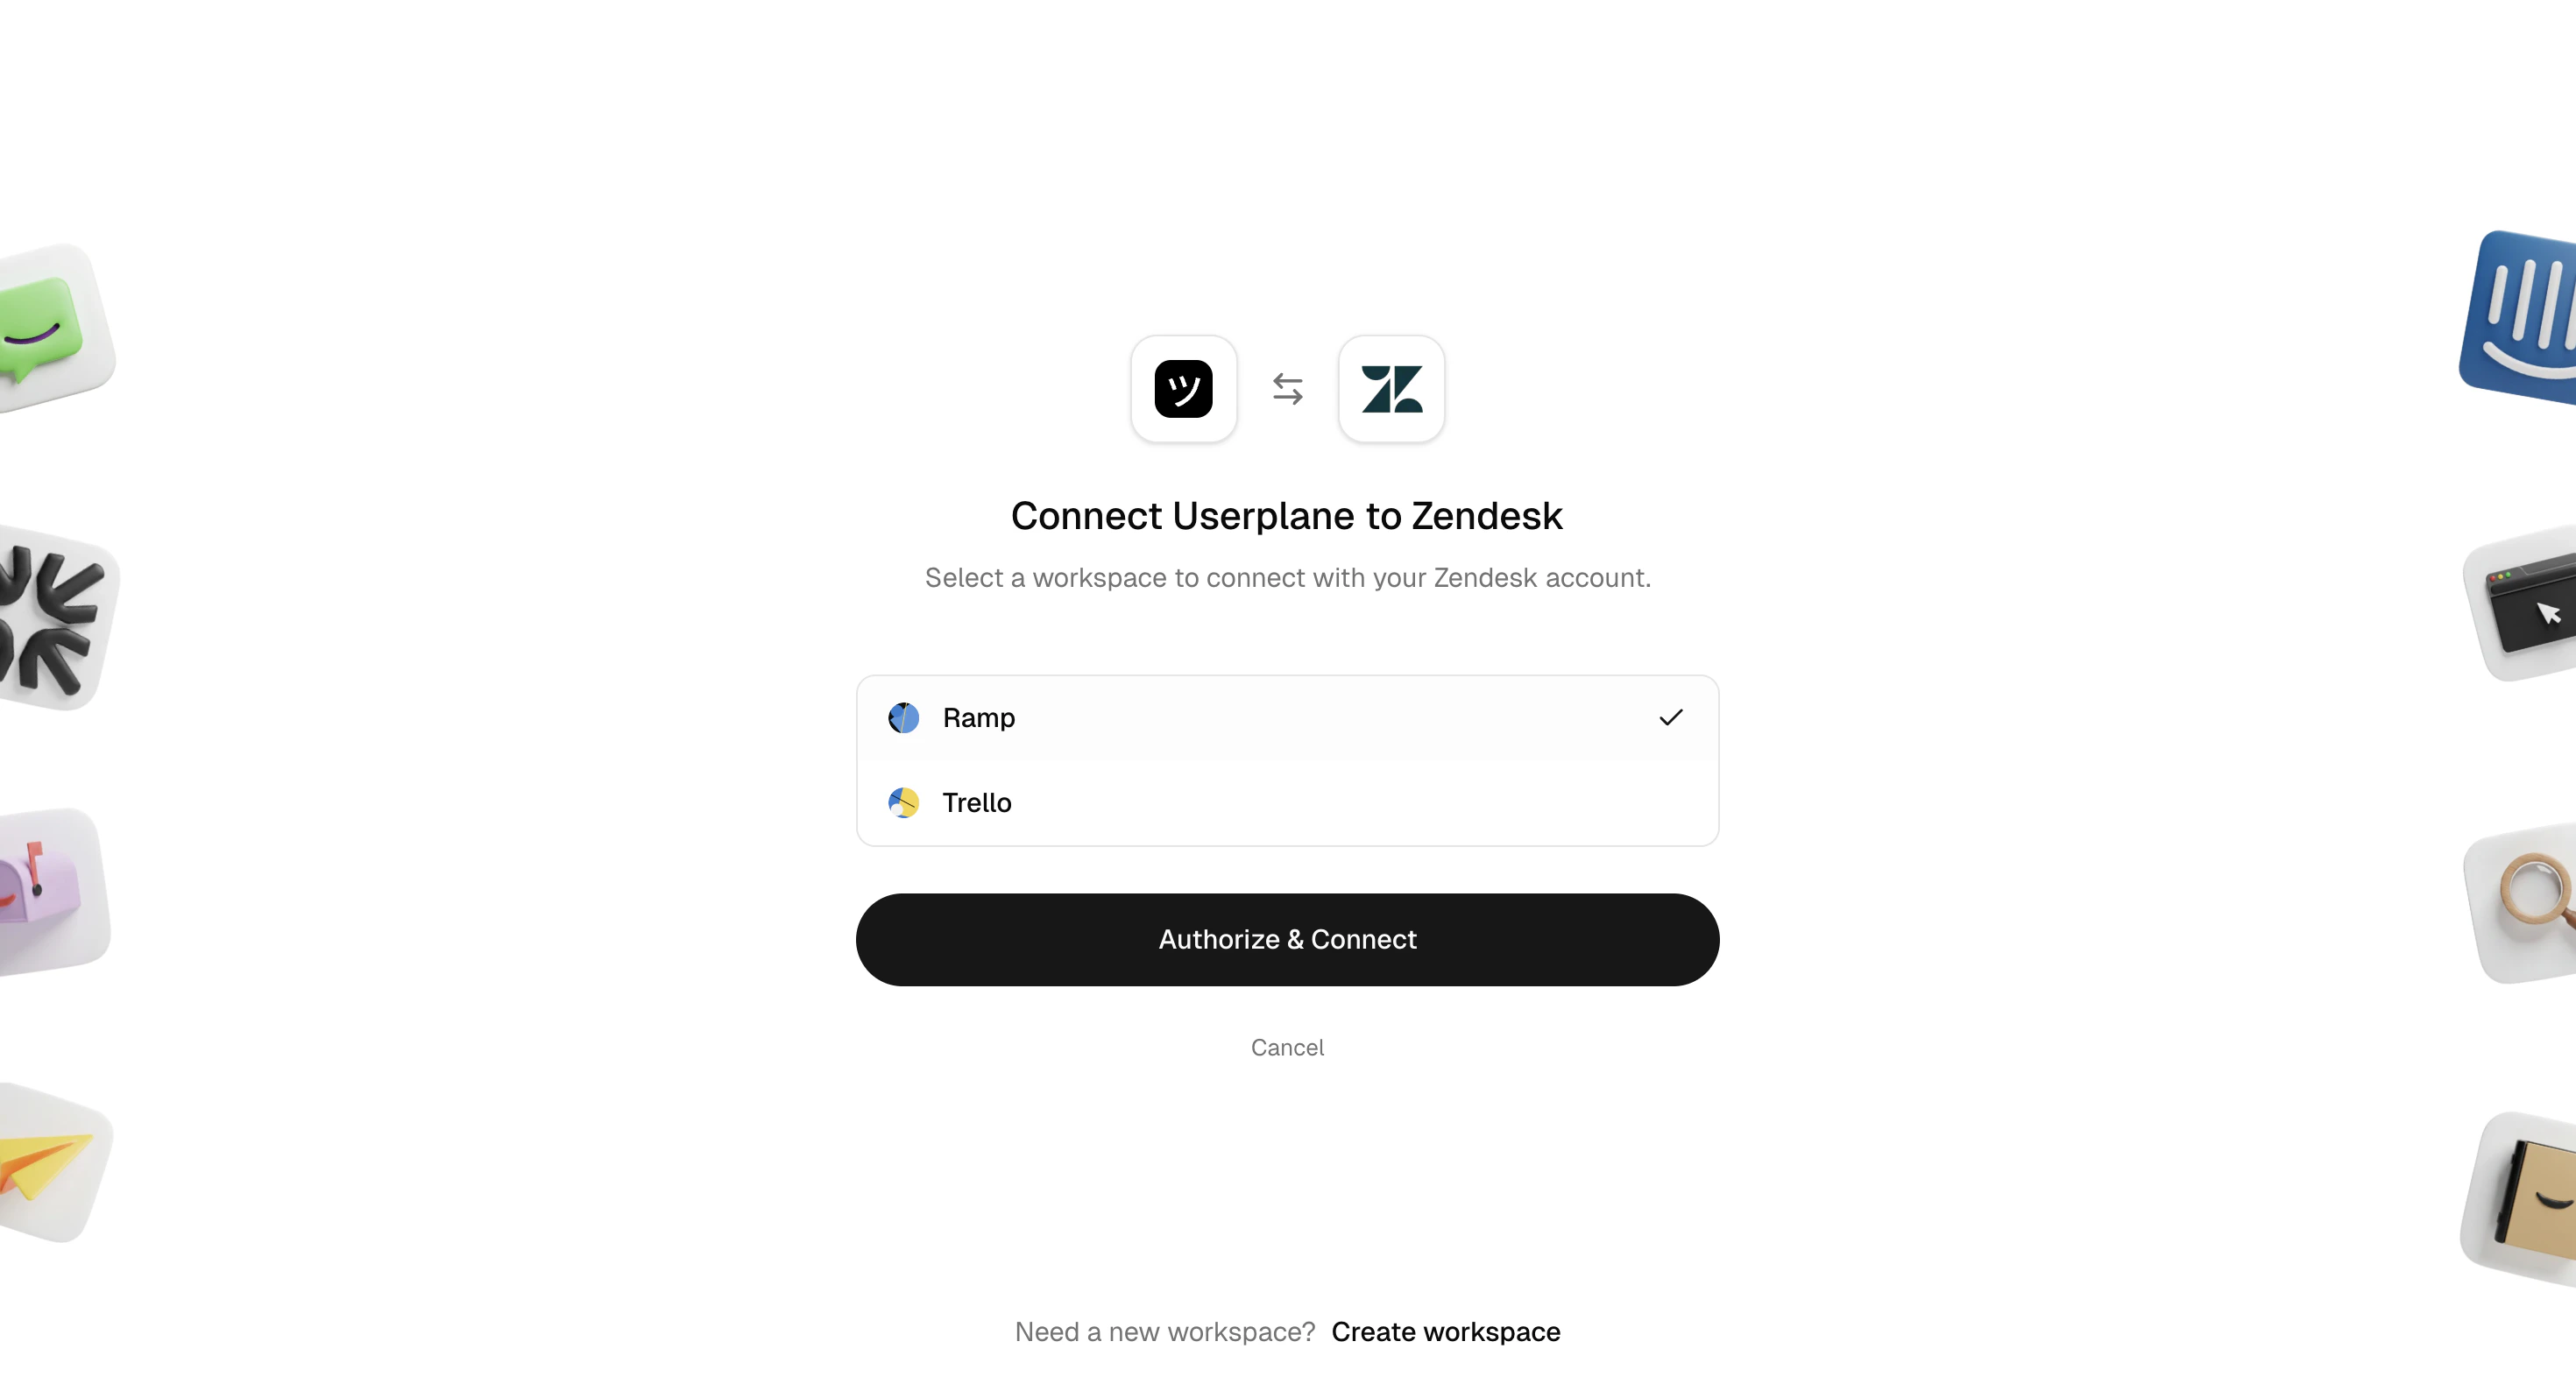
Complete the sign-in in the popup window and select your existing workspace from the list.
If you already have a Userplane workspace, install the Zendesk app and connect it to your existing workspace.
Find Userplane in the [Zendesk Marketplace](https://www.zendesk.com/marketplace/apps/support/1229987/screen-recording-by-userplane/) and install it to your Zendesk account.
Open any ticket in Zendesk and click the **Userplane** app in the ticket sidebar to start the authorization flow.
Complete the sign-in in the popup window and select your existing workspace from the list.
 Go back to the Zendesk app and click **Refresh** to pick up the newly connected workspace.
Confirm the integration is connected in your workspace settings.
Go back to the Zendesk app and click **Refresh** to pick up the newly connected workspace.
Confirm the integration is connected in your workspace settings.
 The Userplane app is now available across Zendesk — ticket sidebar, ticket editor, and top bar.
## Permissions granted
When you authorize the Zendesk connection, Userplane receives the following permissions:
* Read ticket data to capture context and associate recordings with tickets.
* Manage ticket tags to mark tickets with `userplane-recording-requested`.
* Post internal comments to notify agents when recordings arrive.
## Disconnecting Zendesk
Go to [Workspace Settings > Integrations](https://dash.userplane.io/_/settings?tab=integrations).
Click **Disconnect** next to Zendesk and confirm.
Disconnecting removes the Userplane app from Zendesk. Existing recordings and links are preserved.
## Related articles
* [Help Desk Setup](/getting-started/helpdesk-setup) — setup guide for connecting your help desk.
* [Zendesk Ticket Sidebar](/integrations/zendesk-ticket-sidebar) — create links and view recordings from the ticket sidebar.
* [Zendesk Ticket Editor](/integrations/zendesk-ticket-editor) — insert recording links directly into replies.
* [Zendesk Top Bar](/integrations/zendesk-top-bar) — create links from anywhere in Zendesk.
* [Zendesk Notifications](/integrations/zendesk-notifications) — automatic internal notes when recordings arrive.
The Userplane app is now available across Zendesk — ticket sidebar, ticket editor, and top bar.
## Permissions granted
When you authorize the Zendesk connection, Userplane receives the following permissions:
* Read ticket data to capture context and associate recordings with tickets.
* Manage ticket tags to mark tickets with `userplane-recording-requested`.
* Post internal comments to notify agents when recordings arrive.
## Disconnecting Zendesk
Go to [Workspace Settings > Integrations](https://dash.userplane.io/_/settings?tab=integrations).
Click **Disconnect** next to Zendesk and confirm.
Disconnecting removes the Userplane app from Zendesk. Existing recordings and links are preserved.
## Related articles
* [Help Desk Setup](/getting-started/helpdesk-setup) — setup guide for connecting your help desk.
* [Zendesk Ticket Sidebar](/integrations/zendesk-ticket-sidebar) — create links and view recordings from the ticket sidebar.
* [Zendesk Ticket Editor](/integrations/zendesk-ticket-editor) — insert recording links directly into replies.
* [Zendesk Top Bar](/integrations/zendesk-top-bar) — create links from anywhere in Zendesk.
* [Zendesk Notifications](/integrations/zendesk-notifications) — automatic internal notes when recordings arrive.