> ## Documentation Index
> Fetch the complete documentation index at: https://docs.userplane.io/llms.txt
> Use this file to discover all available pages before exploring further.
# Quickstart
> Get up and running with Userplane — create a recording link, send it to a customer, and see exactly what went wrong.
Userplane helps your support team request screen recordings from customers in just a few seconds. Instead of asking customers to describe what went wrong, you can send them a simple link and get a full video of the issue, complete with console logs, network activity, and more.
## How it works
1. **Create a recording link** — pick a project, domain, and optional reference from the dashboard or the [Chrome extension](/integrations/chrome-extension), then share the link with your customer.
2. **Customer records** — your customer opens the link in their browser and records their screen. No installs or extensions needed.
3. **Review the recording** — watch the video and inspect console errors, network requests, client actions, and any custom metadata.
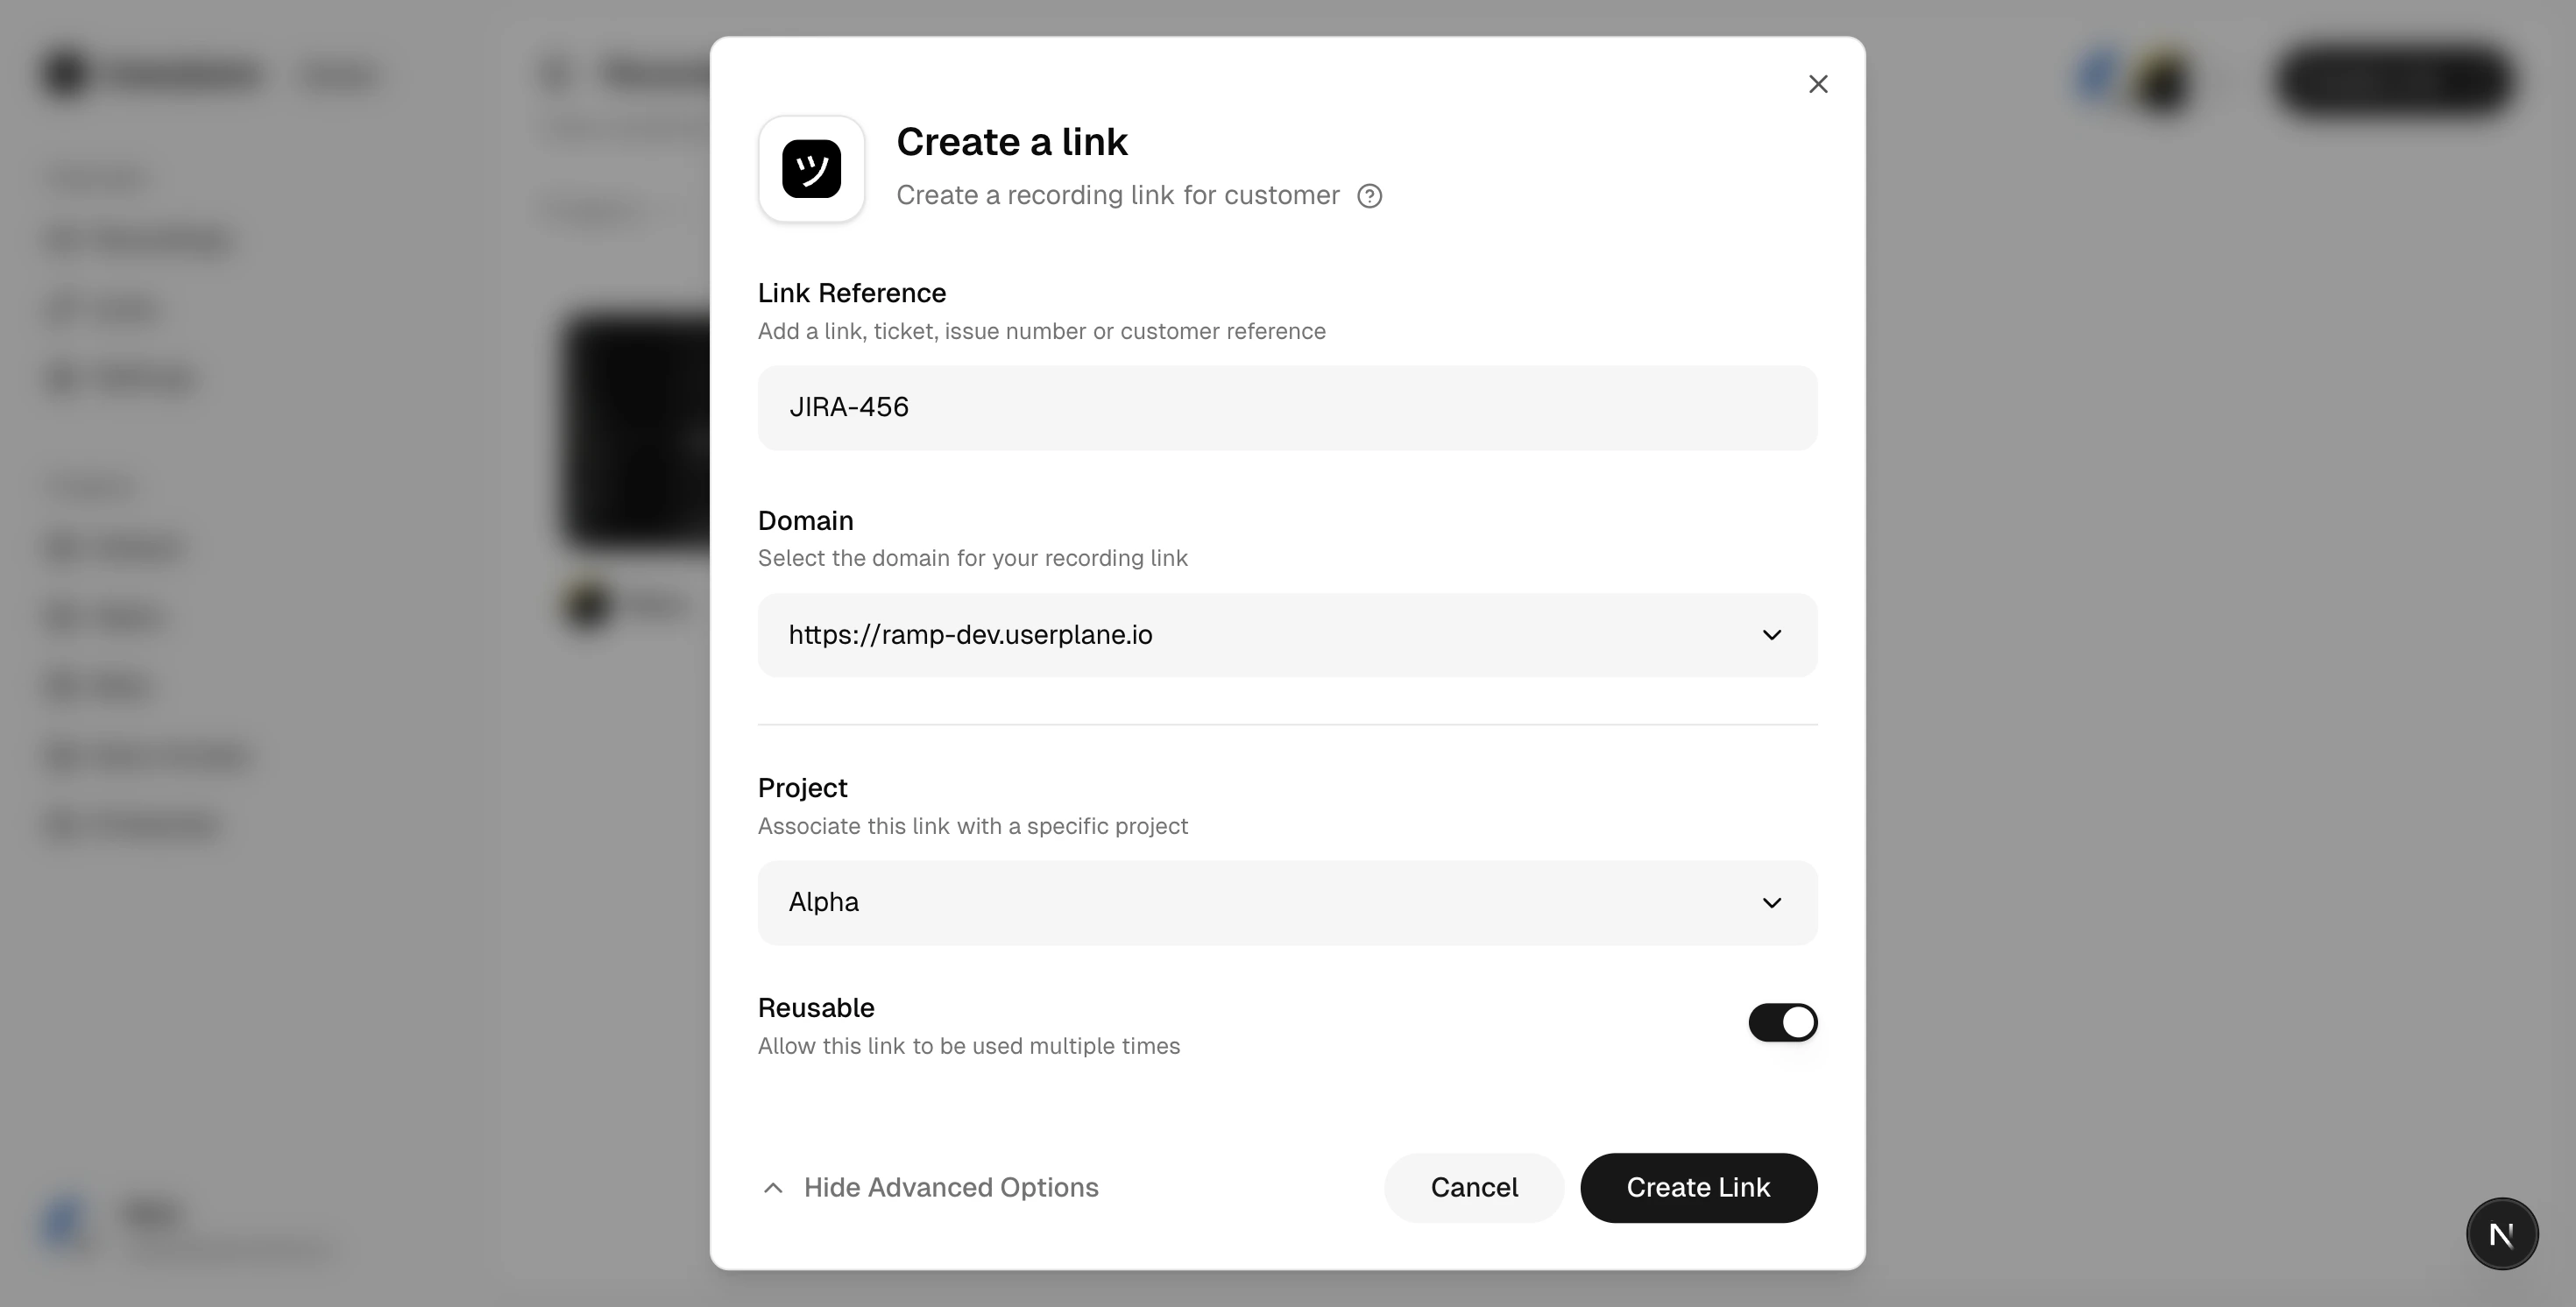
## Create your first recording link
Click [Create Link](https://dash.userplane.io/_/recordings?create_link=true) in the top right of
the navbar.
 * **Project** — choose which project this recording belongs to. - **Domain** — select a verified
domain to brand the link with your site's identity (optional but recommended). - **Reference** —
add an external reference like a ticket number or URL (e.g. `JIRA-456`). - **Reusable** — toggle
whether the link can be used once or multiple times.
* **Project** — choose which project this recording belongs to. - **Domain** — select a verified
domain to brand the link with your site's identity (optional but recommended). - **Reference** —
add an external reference like a ticket number or URL (e.g. `JIRA-456`). - **Reusable** — toggle
whether the link can be used once or multiple times.
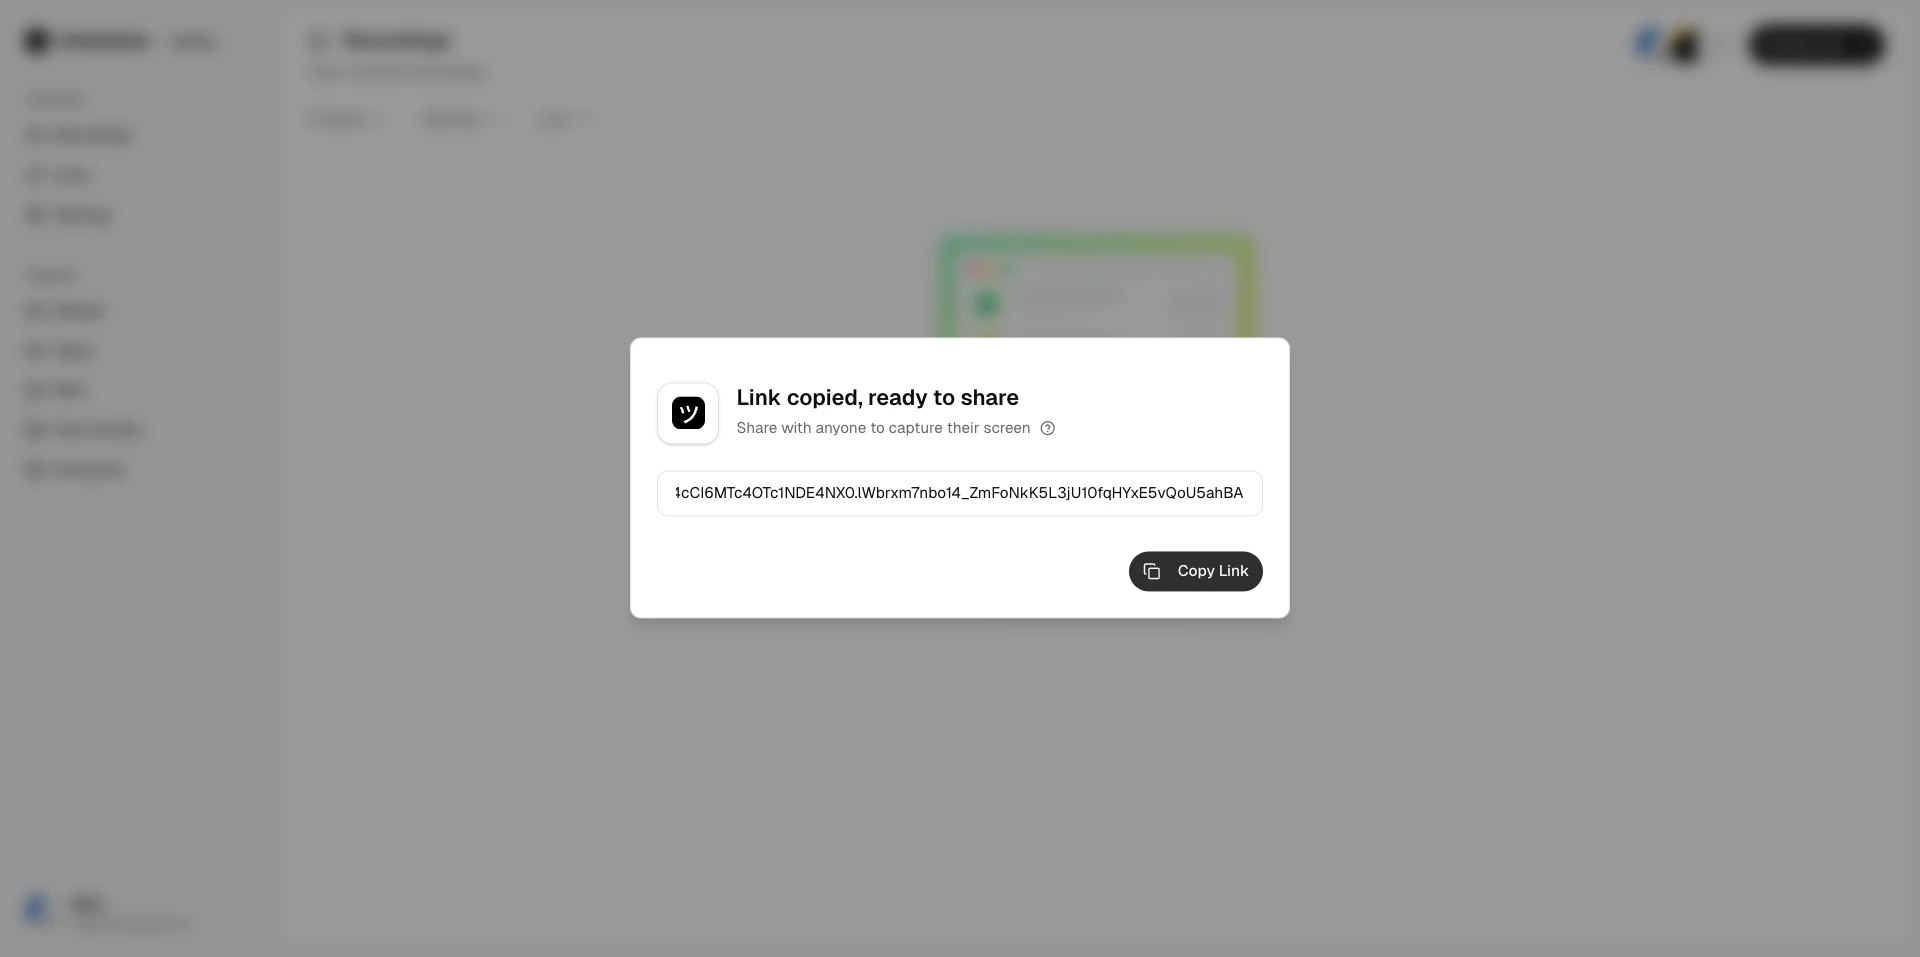
 Click **Create** and copy the link. Send it to your customer through chat, email, or a help desk
macro.
Click **Create** and copy the link. Send it to your customer through chat, email, or a help desk
macro.
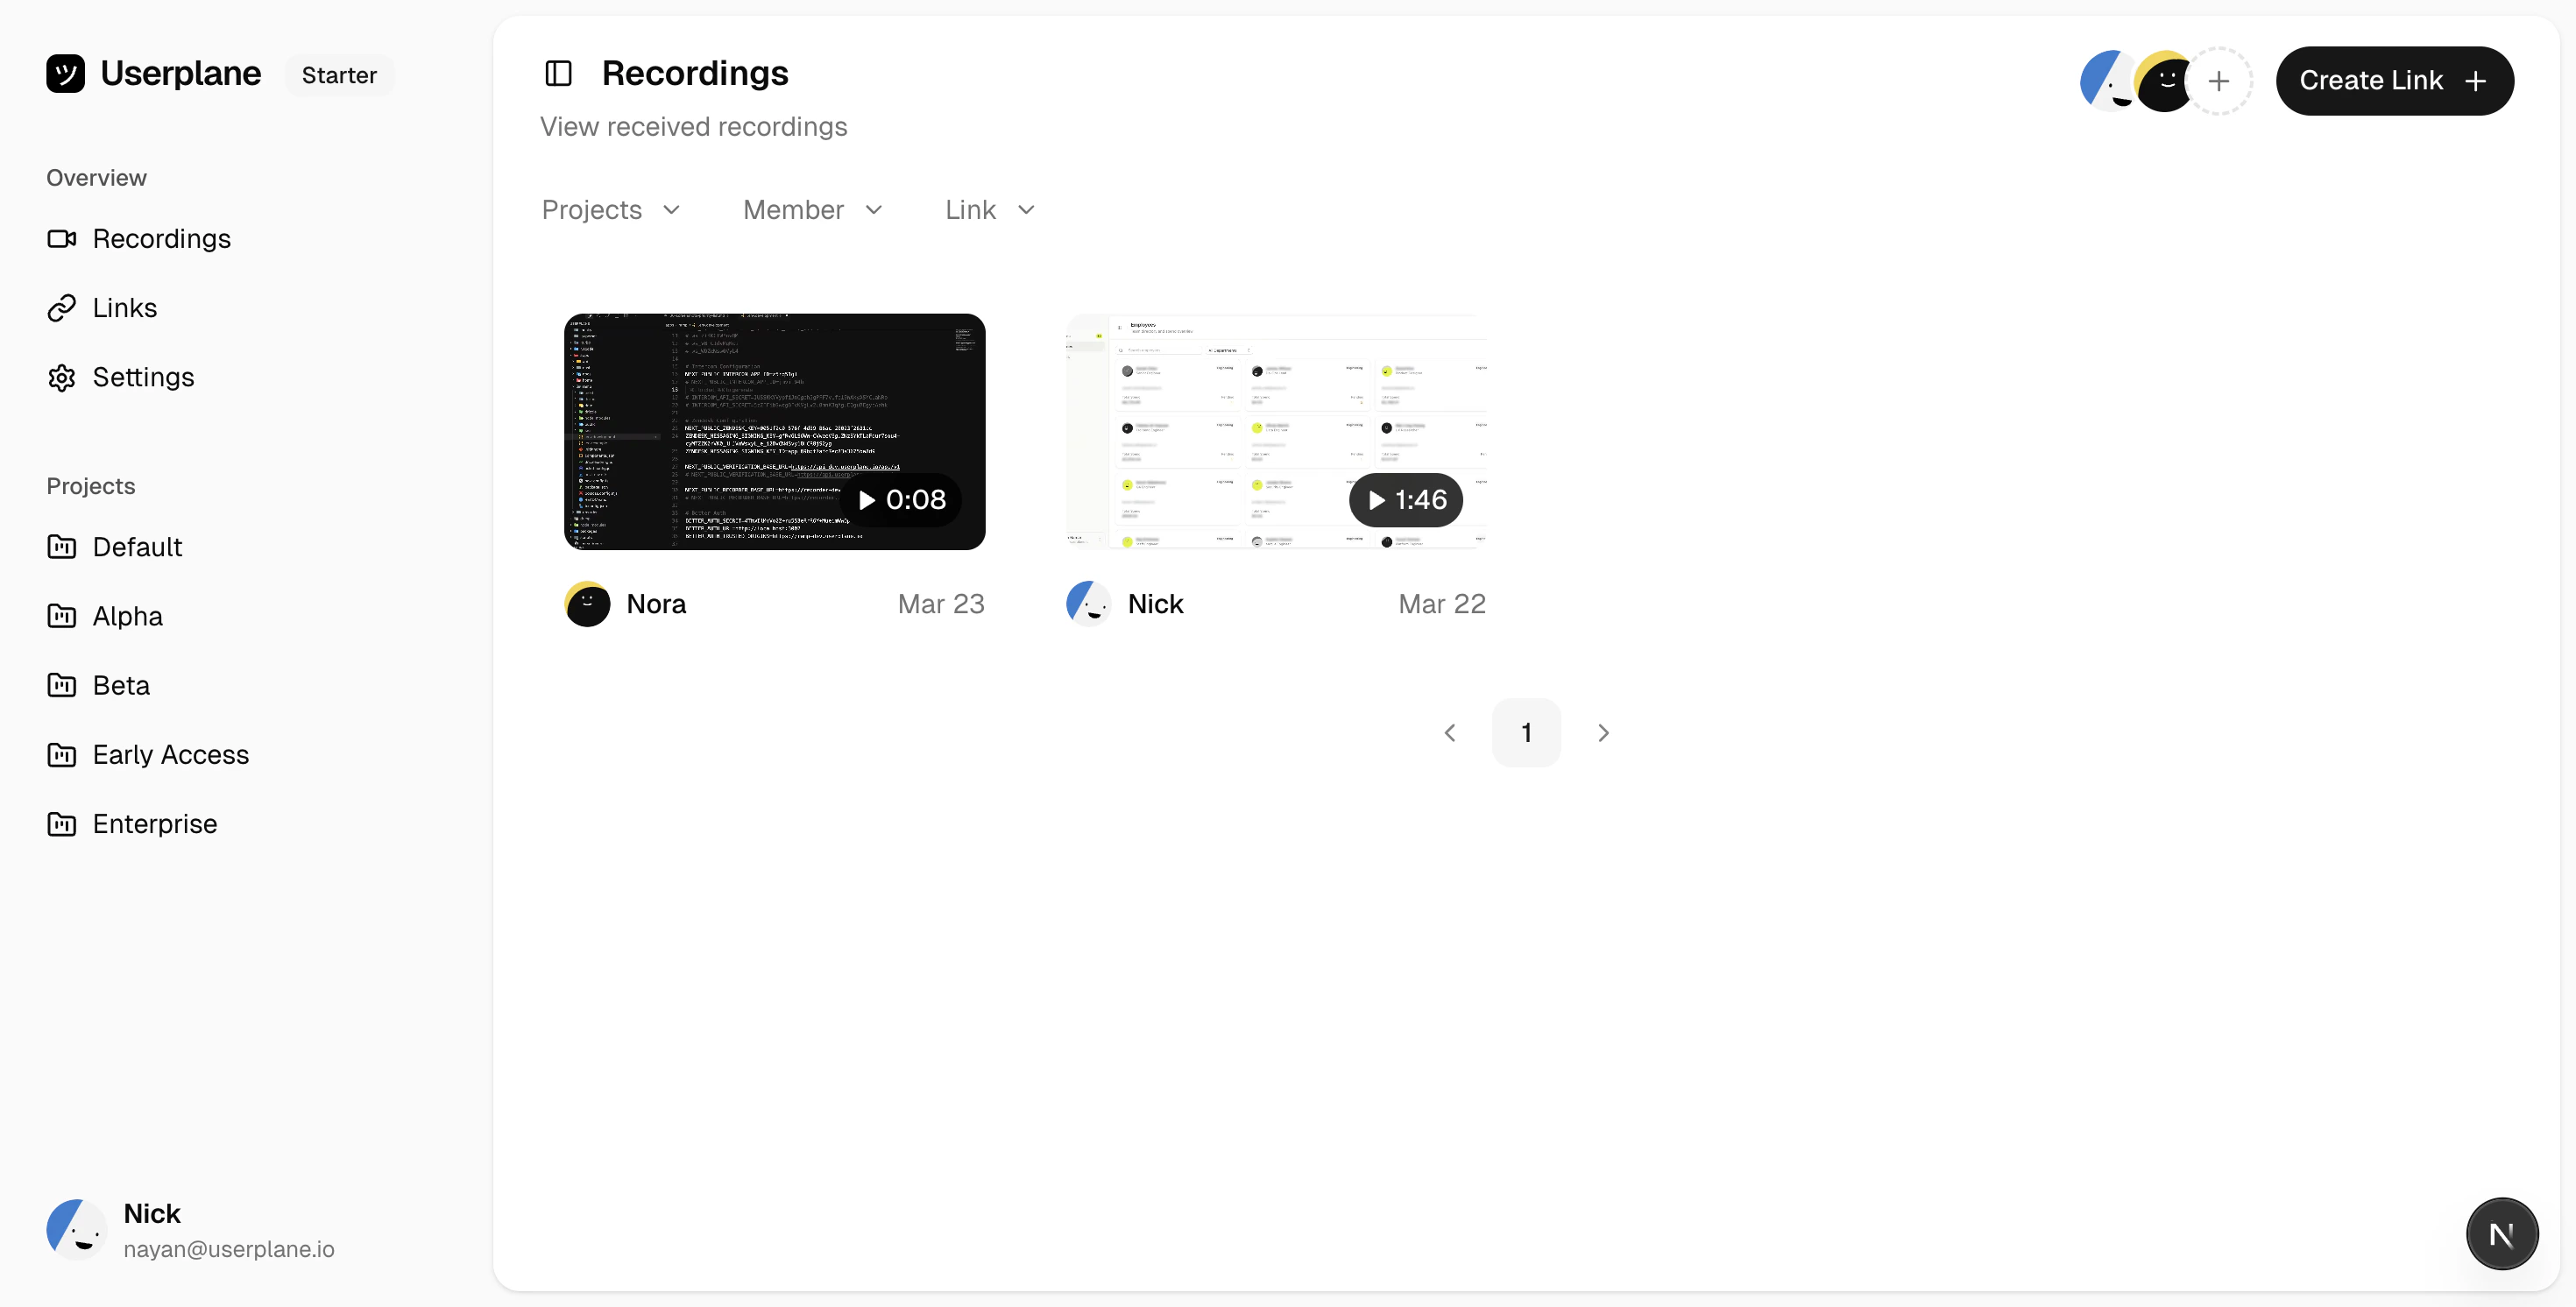
 ## Review a recording
Go to [Recordings](https://dash.userplane.io/_/recordings) from the sidebar.
Browse recordings in the grid view, or filter by project, member, or link.
## Review a recording
Go to [Recordings](https://dash.userplane.io/_/recordings) from the sidebar.
Browse recordings in the grid view, or filter by project, member, or link.
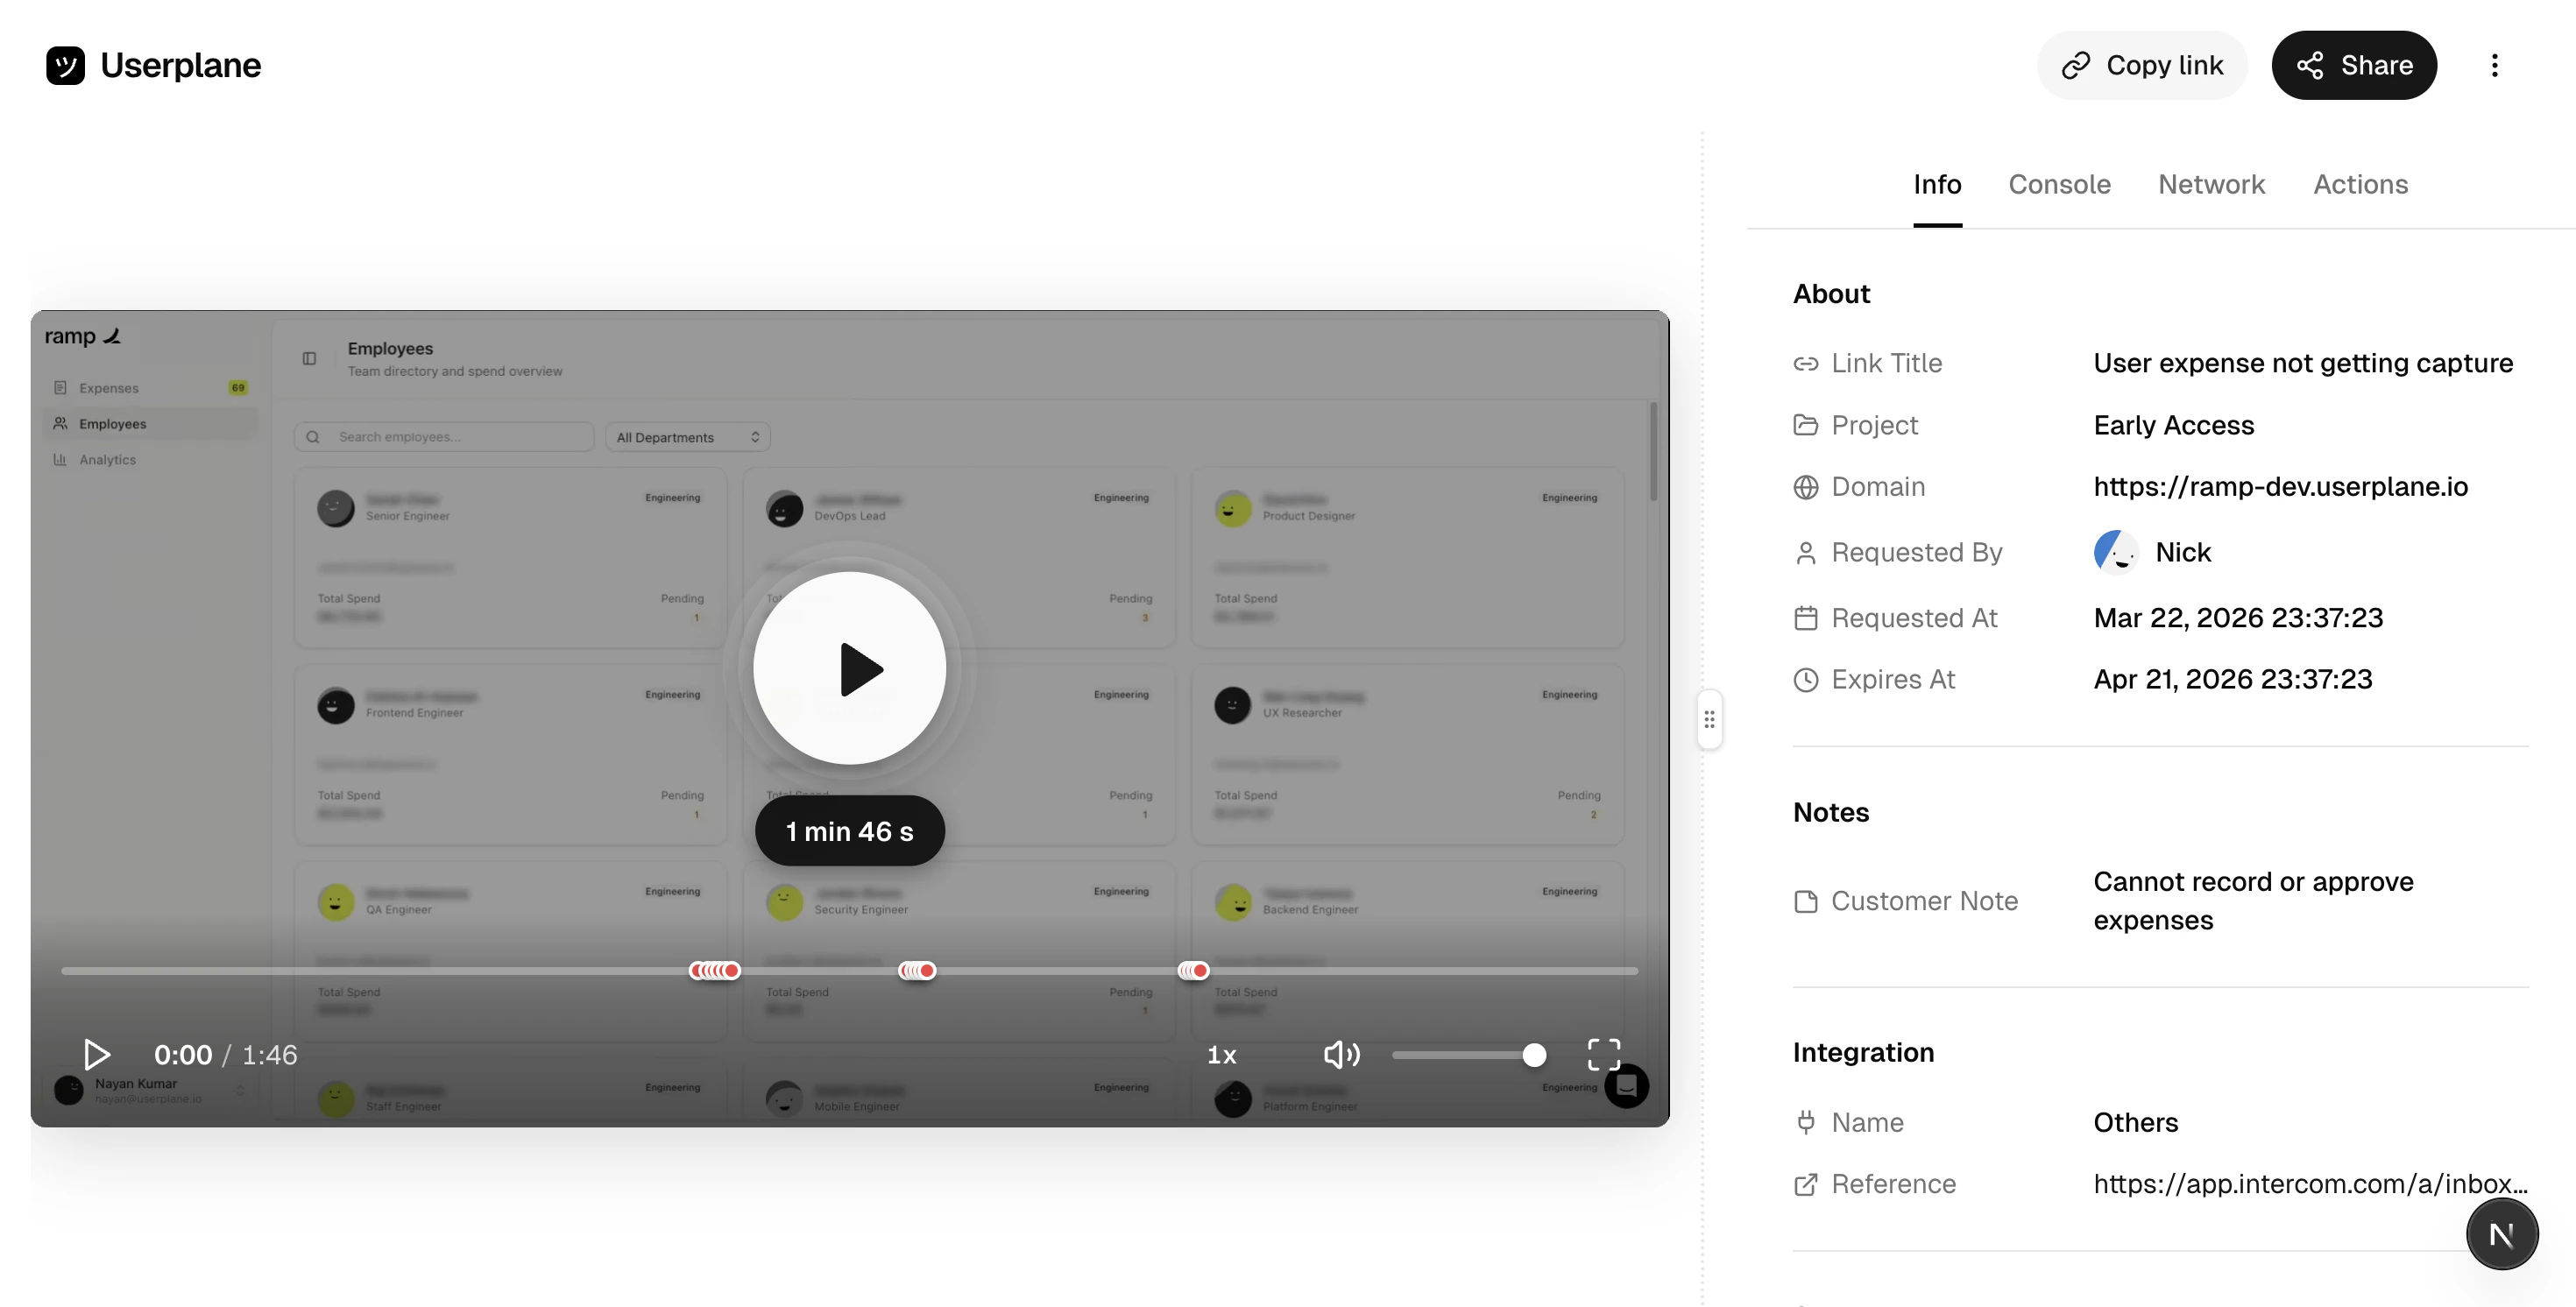
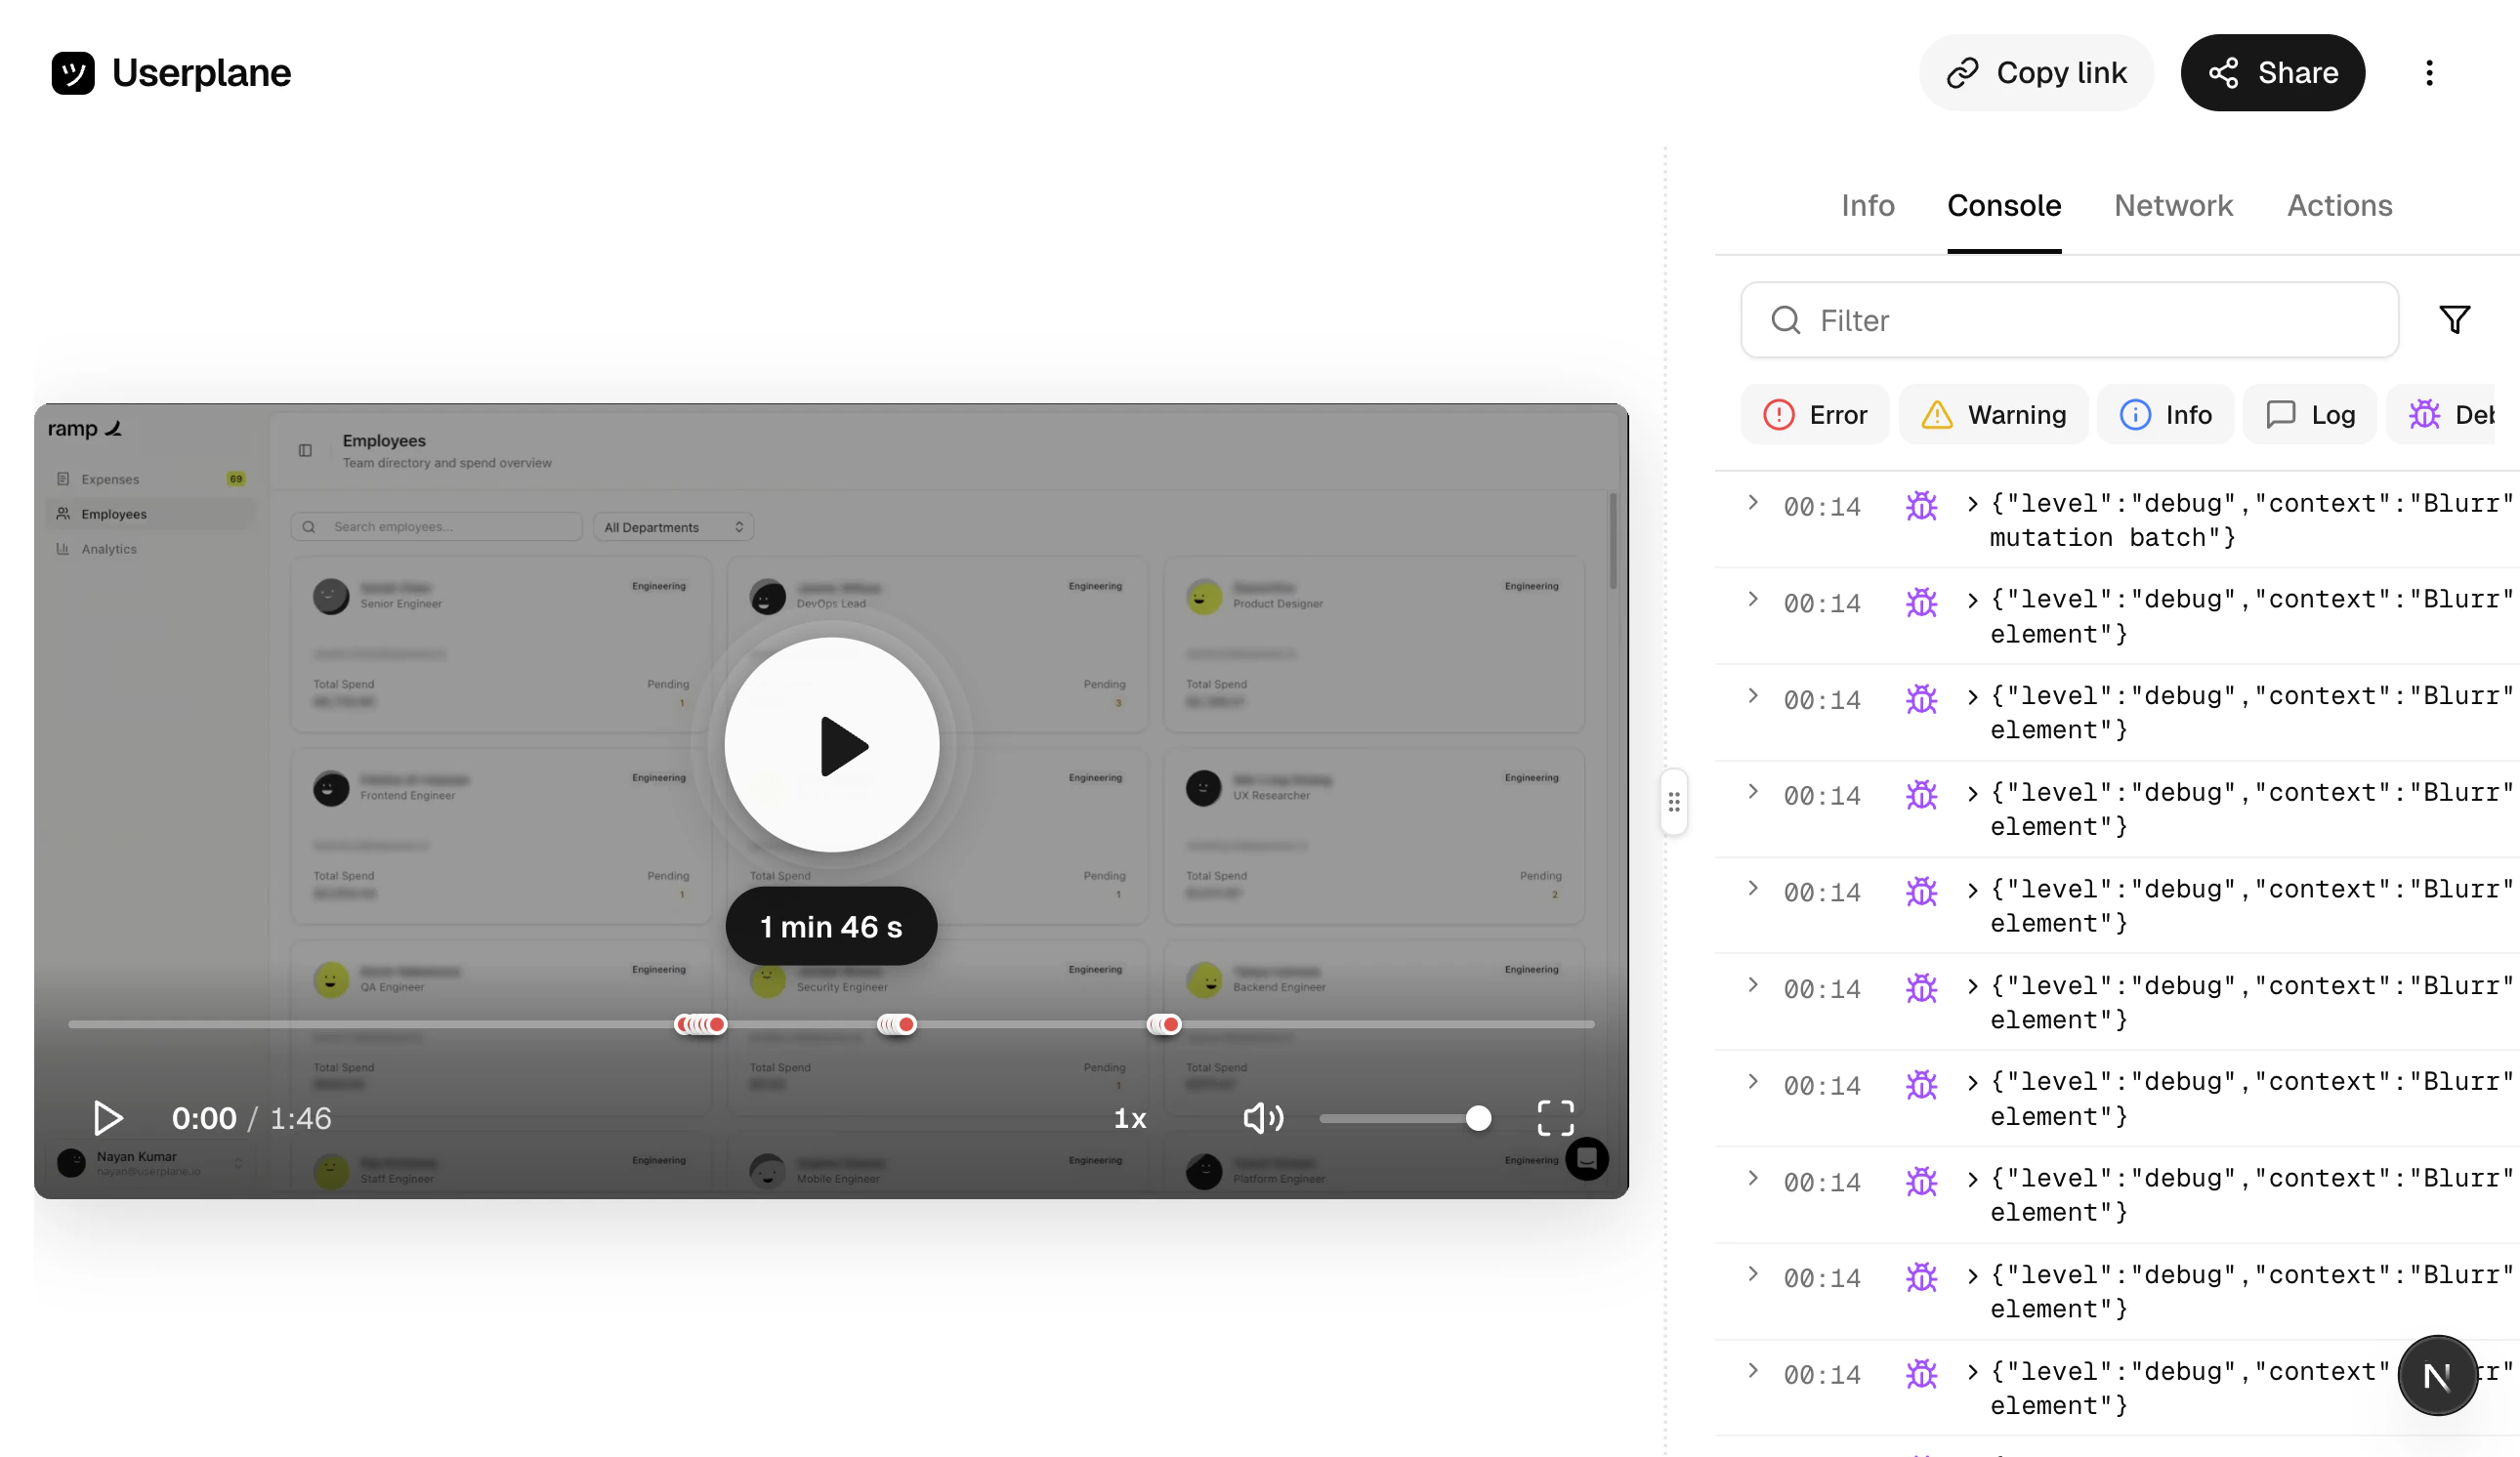
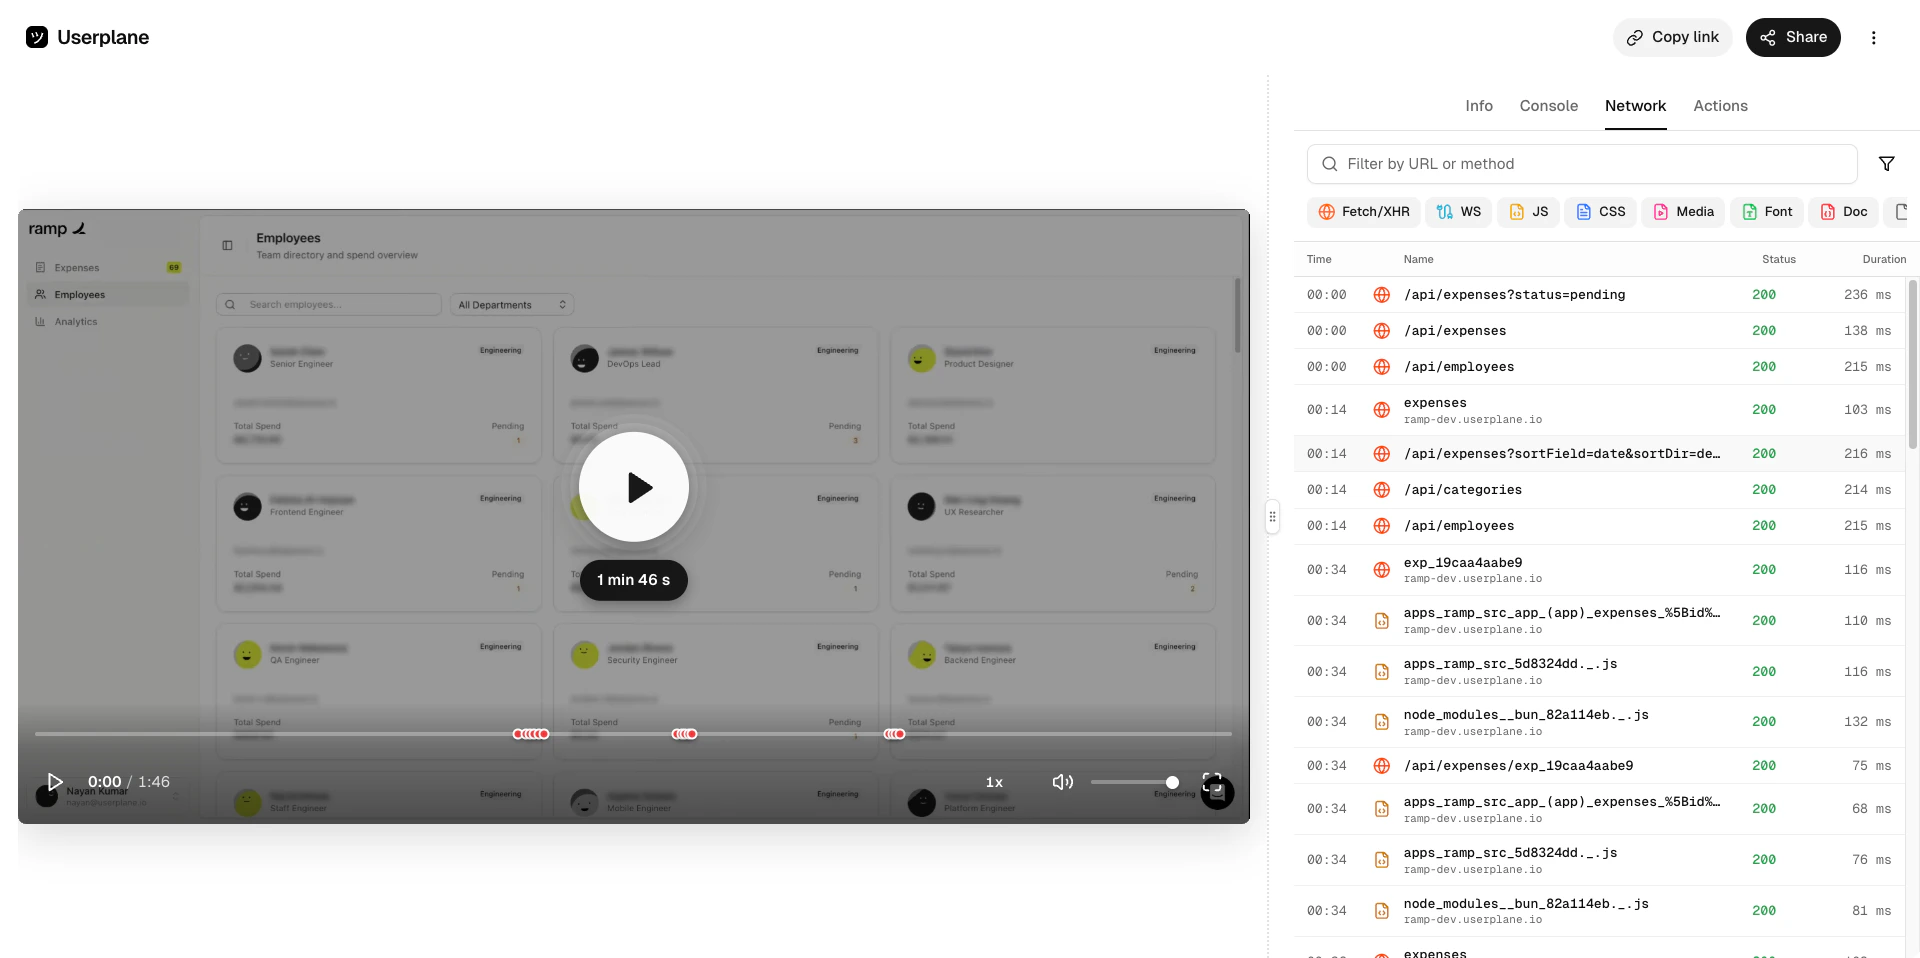
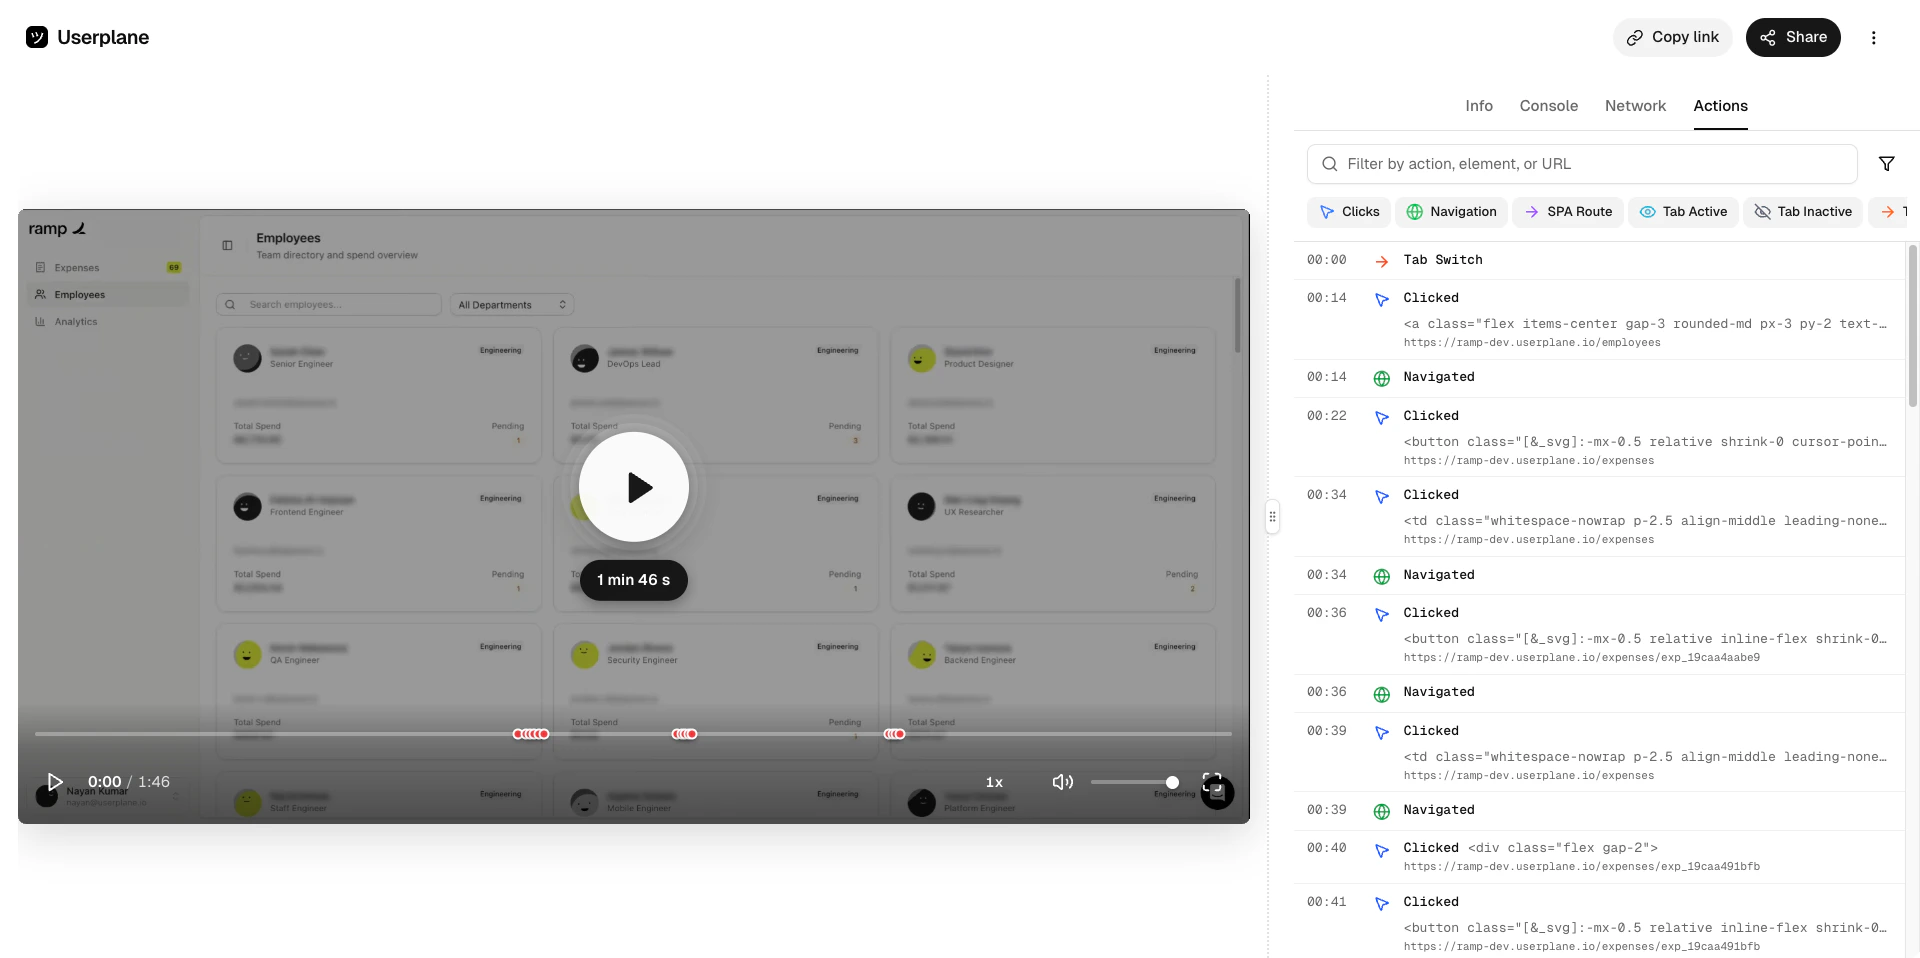
 Click a recording to open the detail view. Use the right-hand tabs to dig into:
| Tab | What it shows |
| ----------- | ------------------------------------------------------------------ |
| **Info** | Link details, customer notes, system metadata, and custom metadata |
| **Console** | Browser console logs including errors, warnings, and messages |
| **Network** | HTTP requests with timing and status codes |
| **Actions** | Clicks, inputs, and page navigations |
| **Backend** | Server-side logs if you've configured them |
Click a recording to open the detail view. Use the right-hand tabs to dig into:
| Tab | What it shows |
| ----------- | ------------------------------------------------------------------ |
| **Info** | Link details, customer notes, system metadata, and custom metadata |
| **Console** | Browser console logs including errors, warnings, and messages |
| **Network** | HTTP requests with timing and status codes |
| **Actions** | Clicks, inputs, and page navigations |
| **Backend** | Server-side logs if you've configured them |
 ## What gets captured
Every recording includes a video of your customer's screen. Depending on your [domain recording preferences](/recording-links/domain-preferences), you can also capture:
* Browser console logs
* Network request and response data
* Client-side actions (clicks, inputs, navigation)
* Server-side and backend logs
* Voice and device audio (when enabled)
* Customer notes
* System metadata (browser, OS, page URL)
Sensitive data can be automatically redacted to keep things secure. See [Sensitive Data Redaction](/recording-links/sensitive-data-redaction) for more details.
## Next steps
* [Set up your workspace](/getting-started/workspace-setup) — invite your teammates and configure settings.
* [Connect your help desk](/getting-started/helpdesk-setup) — request recordings directly from Intercom, Zendesk, or Slack, or install the [Chrome extension](/integrations/chrome-extension) to work alongside any help desk.
* [Customize your recording links](/recording-links/overview) — add your branding and configure what gets captured.
## What gets captured
Every recording includes a video of your customer's screen. Depending on your [domain recording preferences](/recording-links/domain-preferences), you can also capture:
* Browser console logs
* Network request and response data
* Client-side actions (clicks, inputs, navigation)
* Server-side and backend logs
* Voice and device audio (when enabled)
* Customer notes
* System metadata (browser, OS, page URL)
Sensitive data can be automatically redacted to keep things secure. See [Sensitive Data Redaction](/recording-links/sensitive-data-redaction) for more details.
## Next steps
* [Set up your workspace](/getting-started/workspace-setup) — invite your teammates and configure settings.
* [Connect your help desk](/getting-started/helpdesk-setup) — request recordings directly from Intercom, Zendesk, or Slack, or install the [Chrome extension](/integrations/chrome-extension) to work alongside any help desk.
* [Customize your recording links](/recording-links/overview) — add your branding and configure what gets captured.